
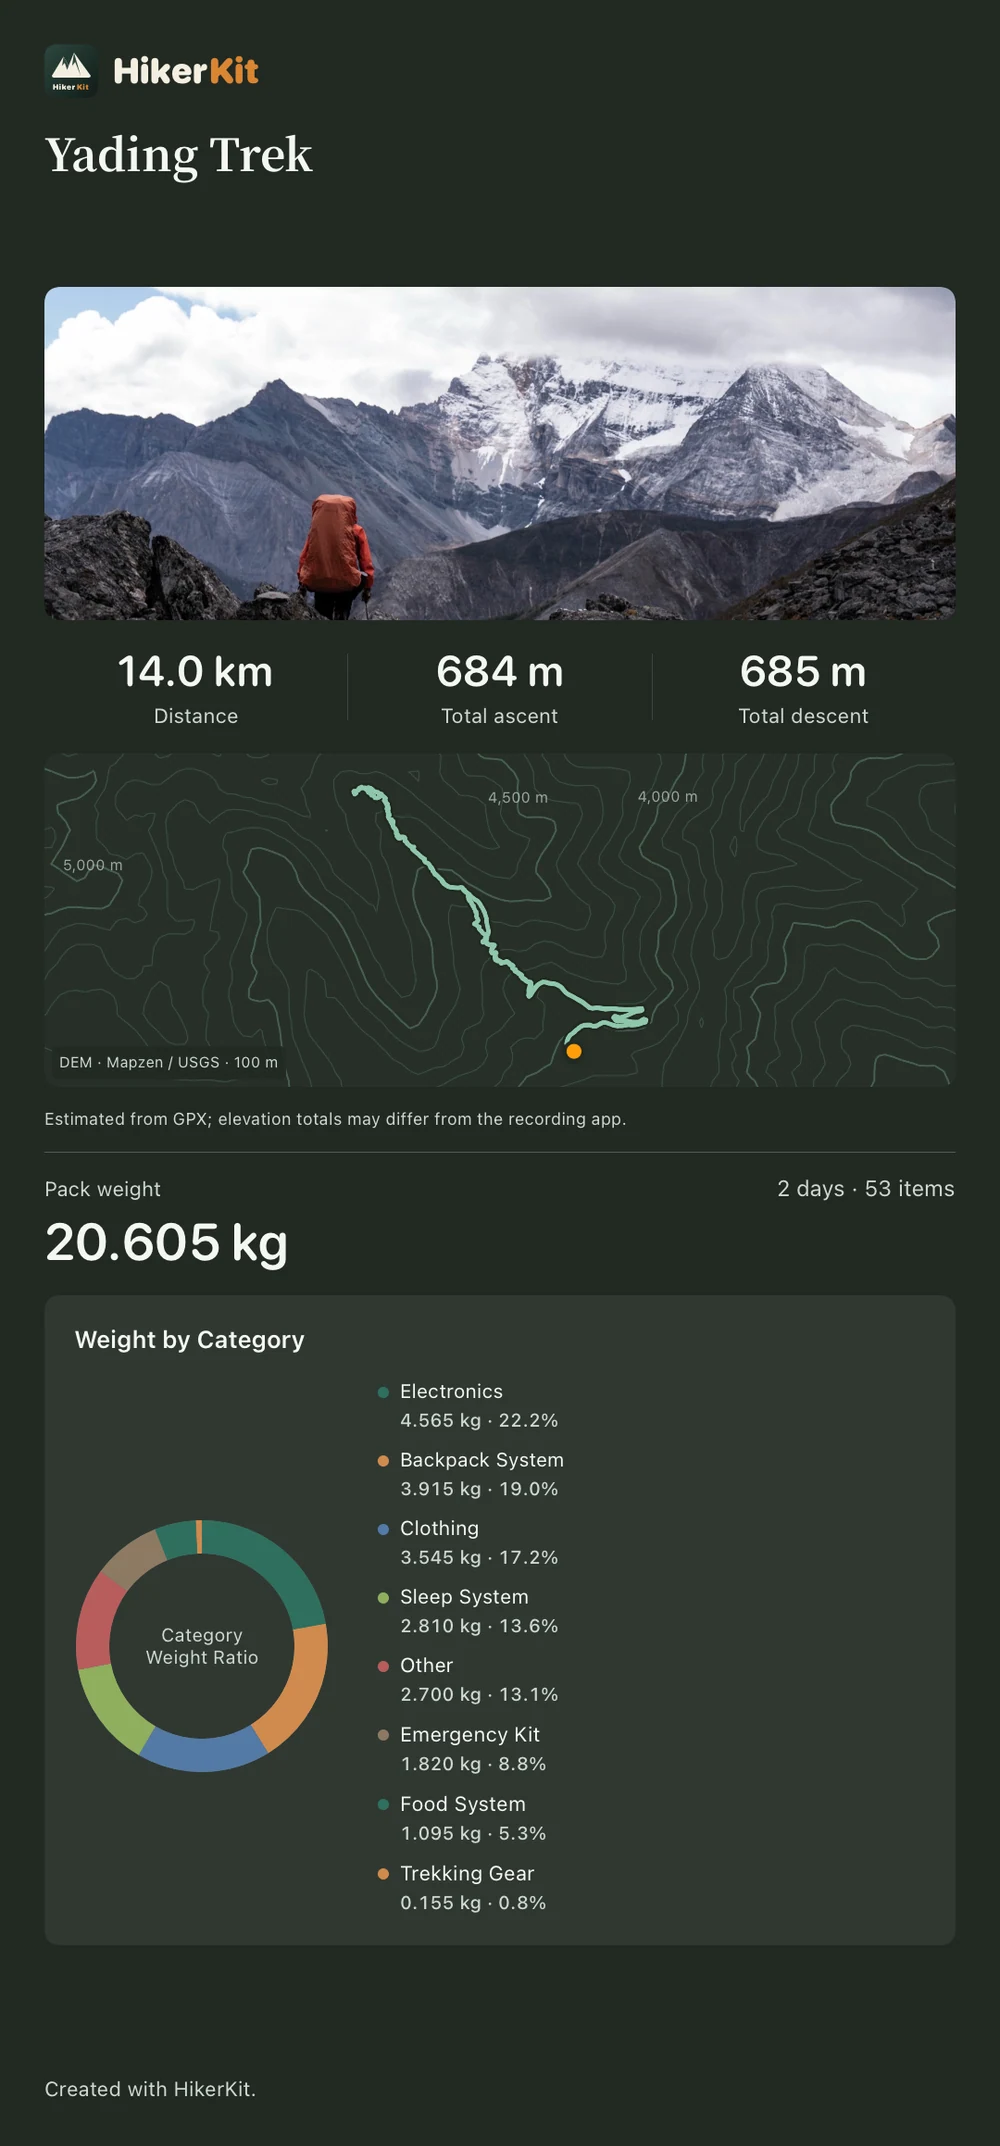
A track, a photo, and a gear checklist can belong to the same trip record. HikerKit 2.0 imports existing GPX tracks, retains the gear configuration when you confirm completion, and brings the photo, route, and equipment together in a memory card. This tutorial begins with an unfinished trip that has no track or photo, then works through importing, reviewing, saving, adding a photo, completing the trip, choosing map backgrounds, and exporting the result.
GPX import organizes tracks you already recorded. It does not provide automatic track recording, live location navigation, or turn-by-turn directions. Keep the original file. Map backgrounds can depend on network access and available caches, so a memory card should not be treated as a complete offline map.
This walkthrough uses the English interface and the Yading Trek demonstration. Counts and weights describe the illustrated configuration.
Prepare the files and trip
Have an accessible GPX file on the device and a trip photo you have permission to use. Check that the track belongs to this outing, then open Trips and create or select its unfinished record. Review the name, planned information, gear, and carried quantities; actual dates will be confirmed in the completion form. If old tracks are already attached, decide whether they belong before adding anything else.
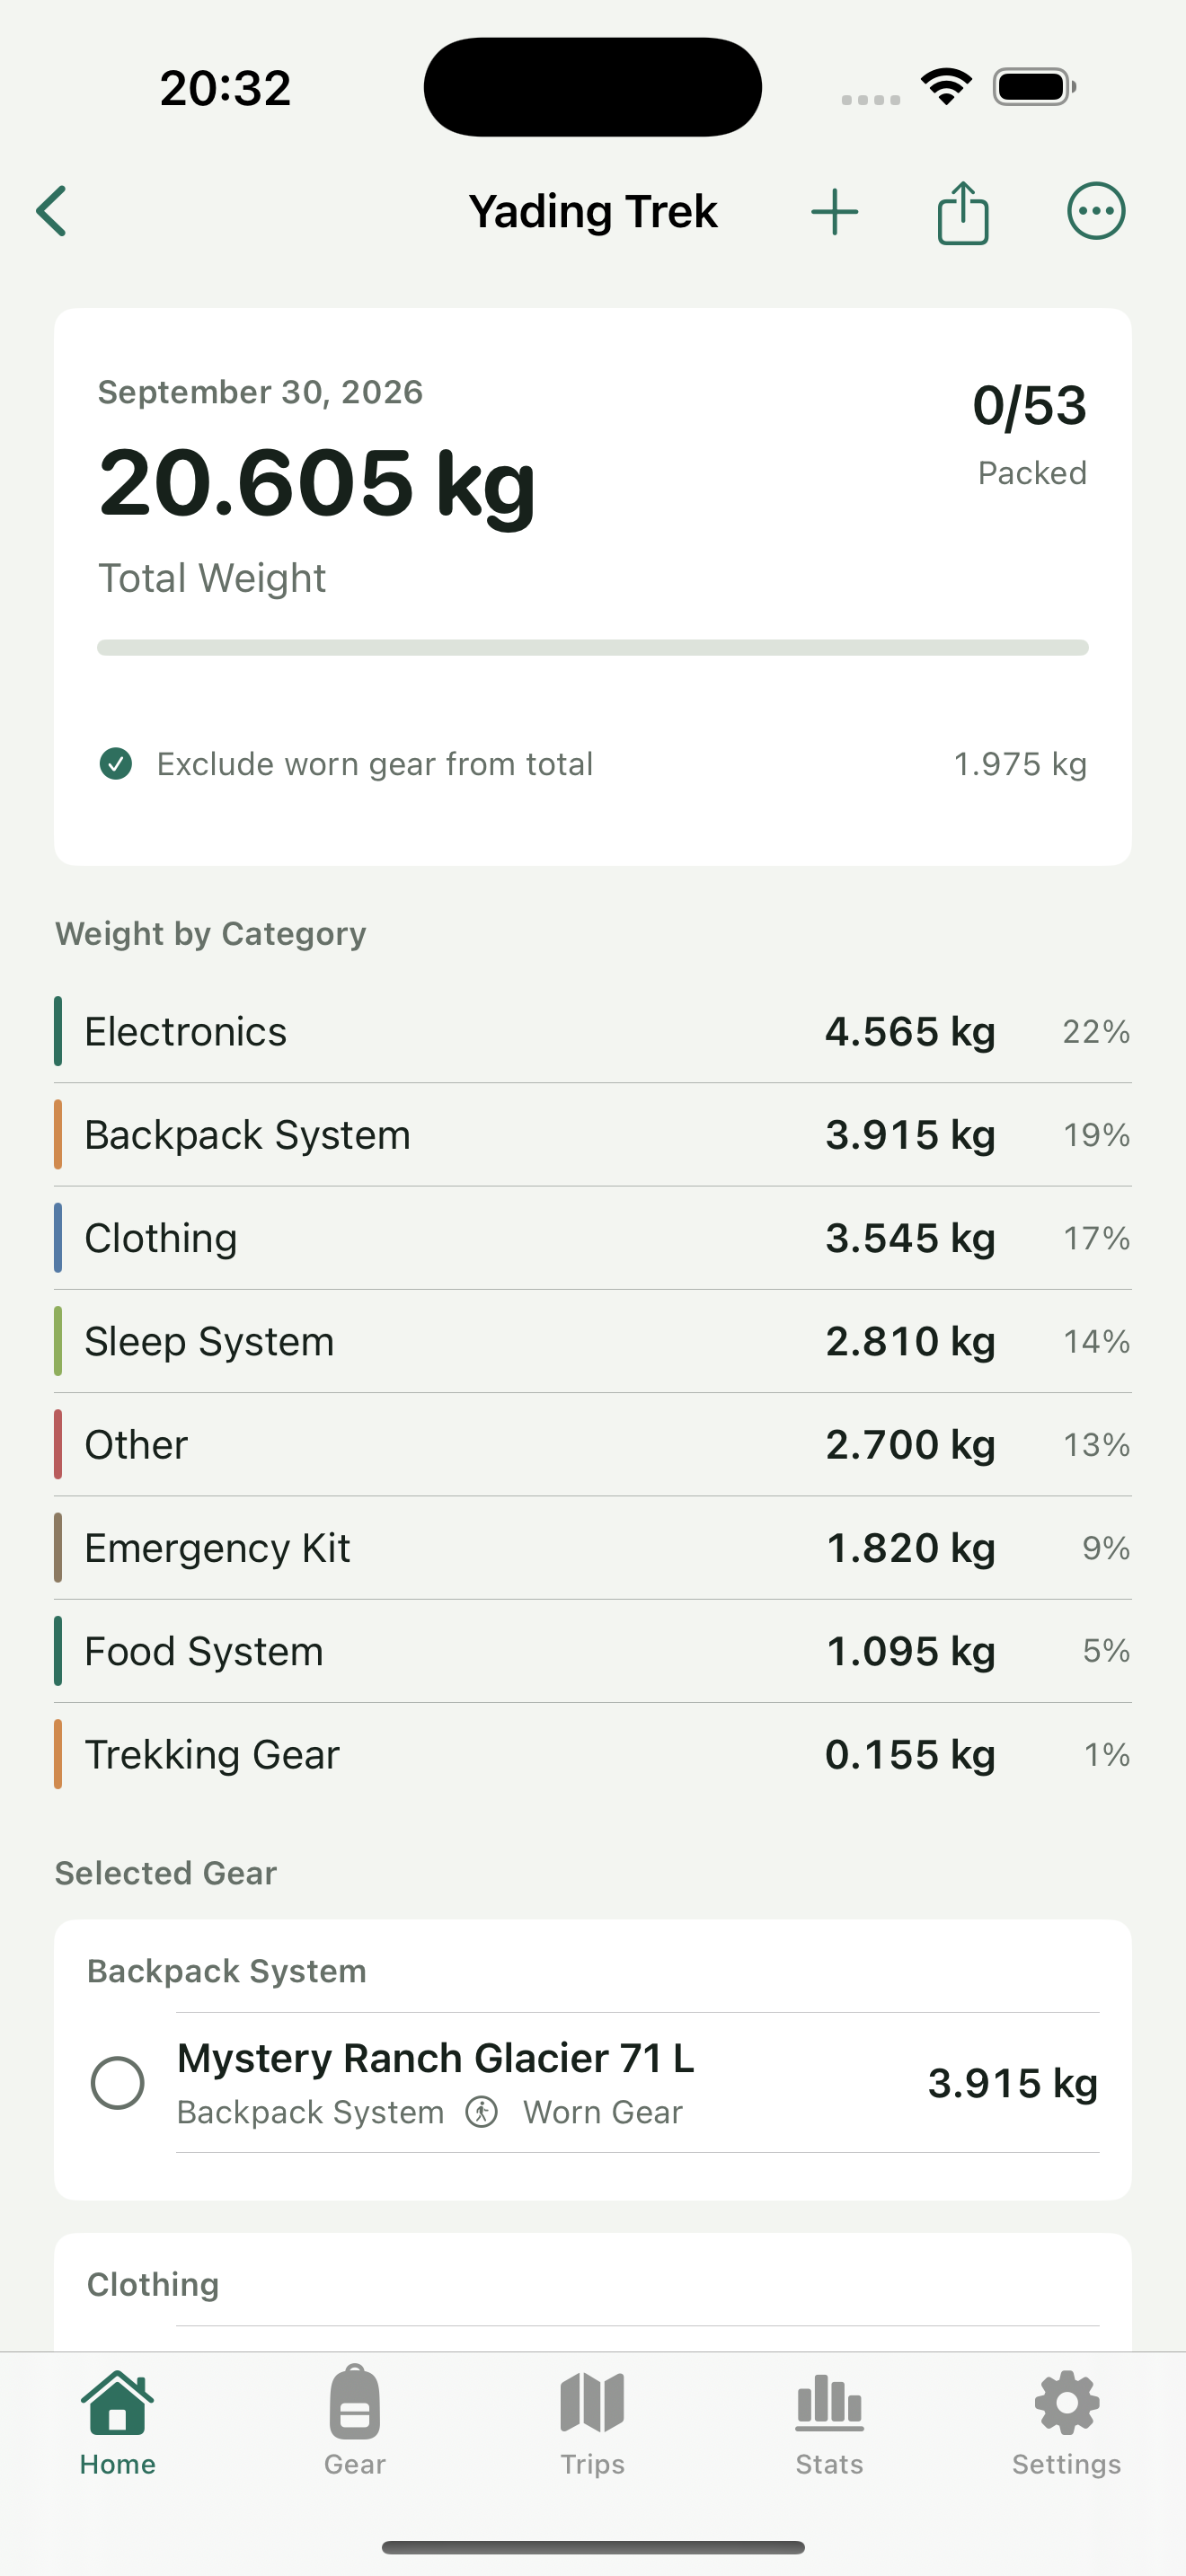
The example uses Yading-October-2026.gpx and a mountain photo. The GPX spans two dates and contains a time gap of about 15 hours 32 minutes. The span between its first and last timestamp is not continuous moving time. A photo’s timestamp also does not replace the trip dates you confirm. A GPX can cover only part of a longer outing, so check the actual trip dates and recording coverage separately.
Step 1 Open the track controls and select the GPX
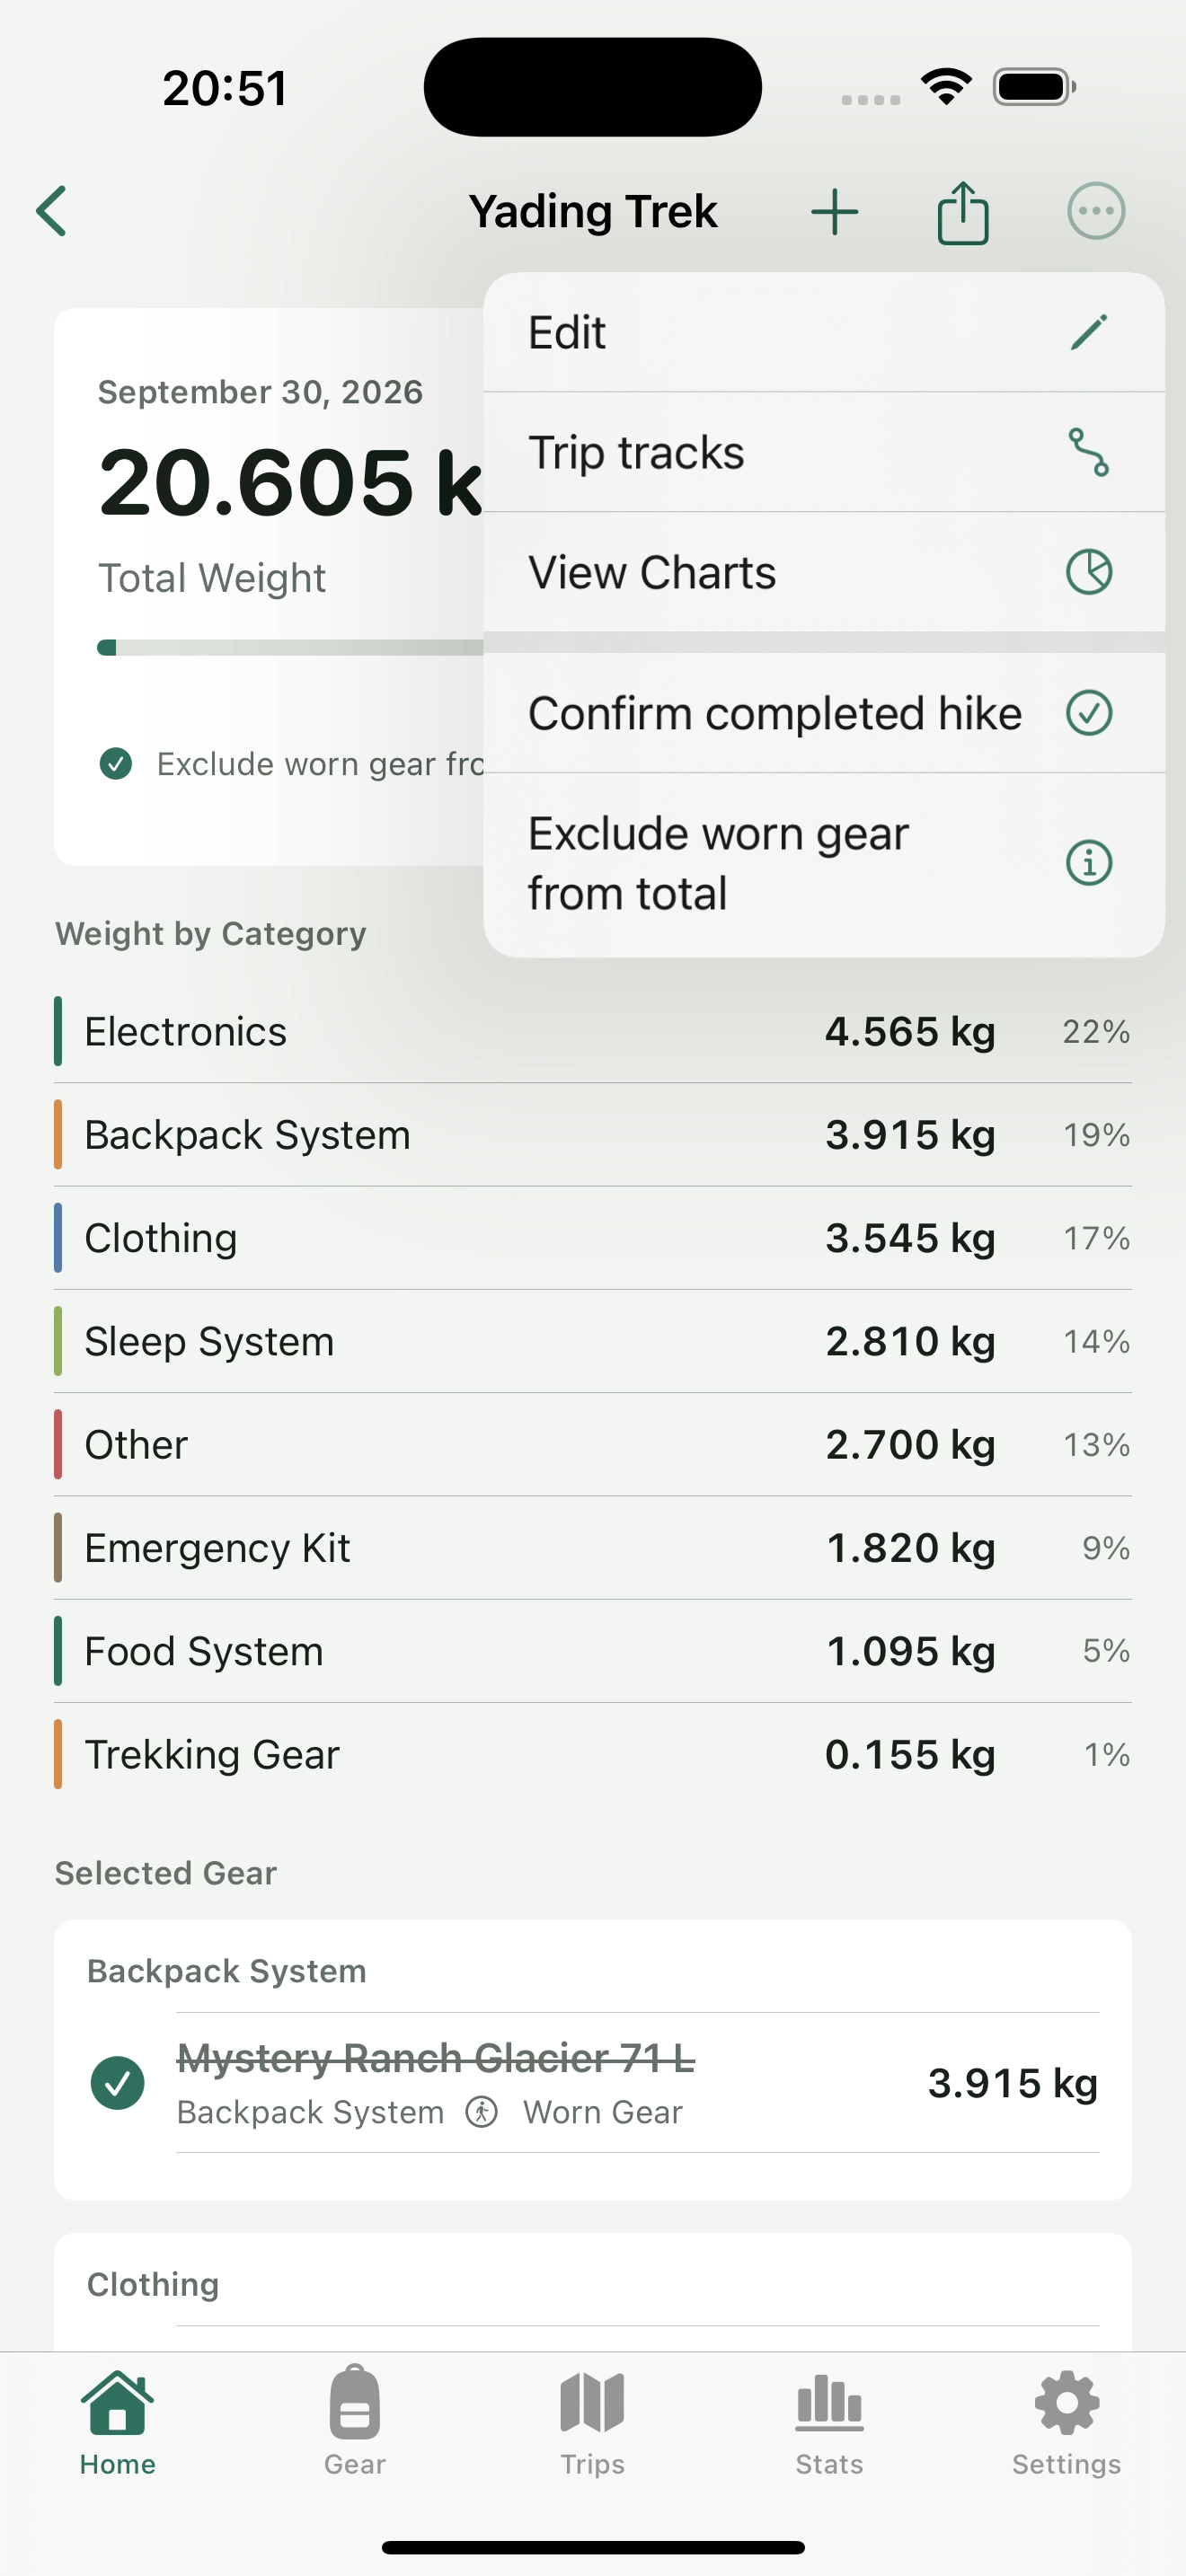
- Open the unfinished trip’s three-dot menu and choose “Trip tracks,” the trip-track action.
- Tap Add GPX files to open the system file picker.
- Find and select the correct file, tap “Open” at the top right of the system picker to open it, then wait for the track preview to finish parsing.
- Add other valid recordings only if they belong to the same outing. Check the filenames each time.
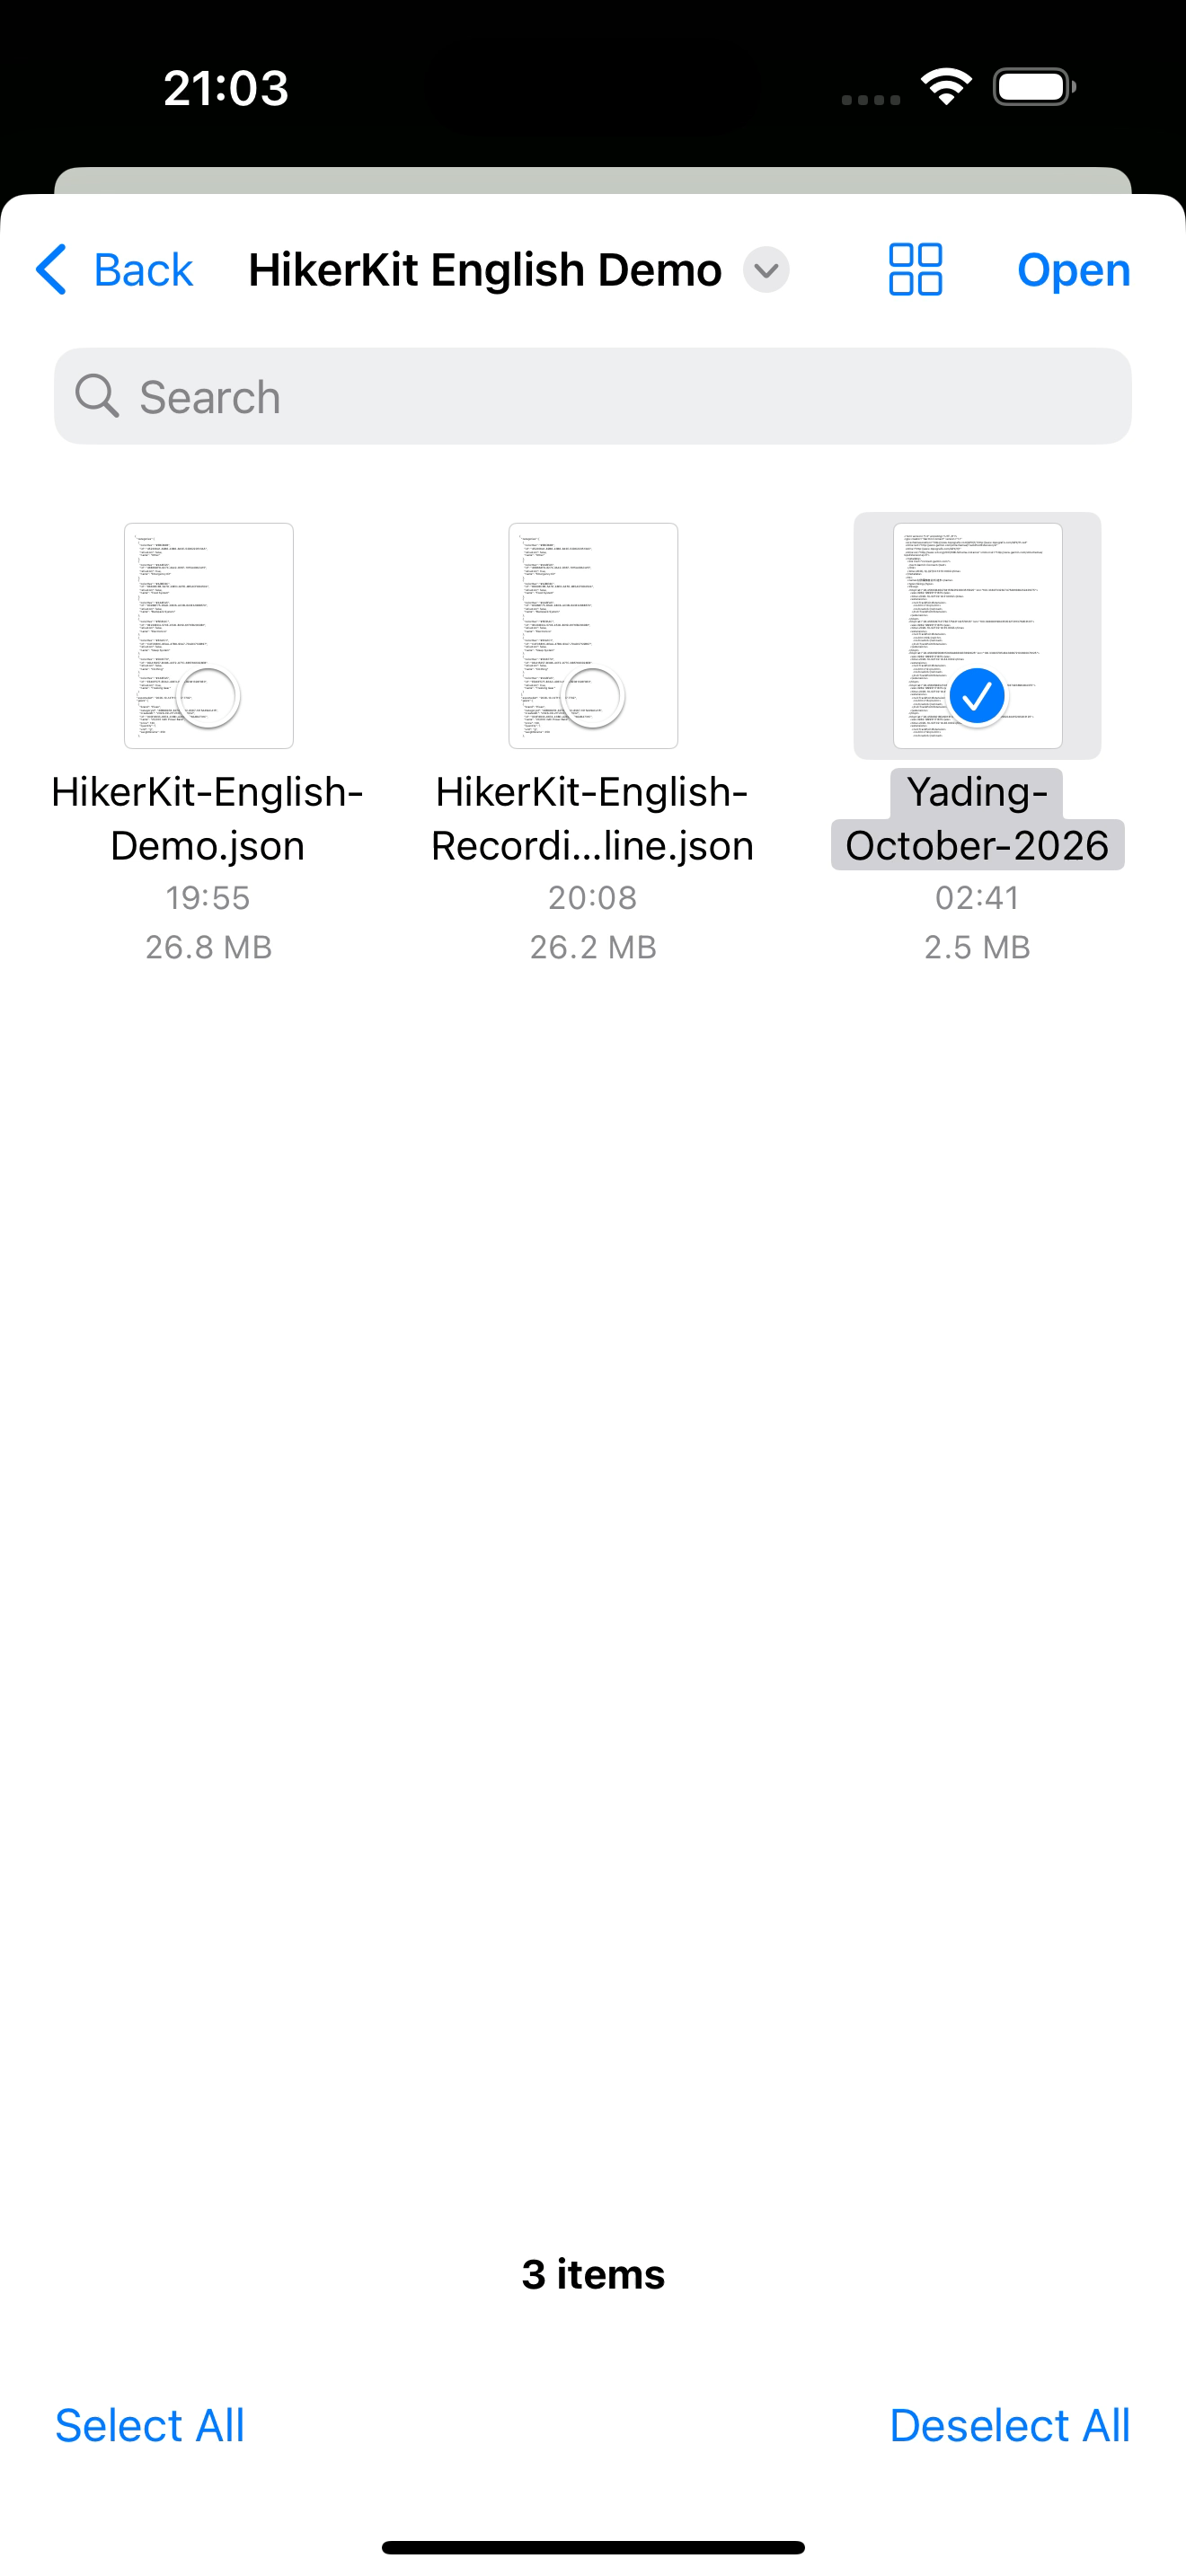
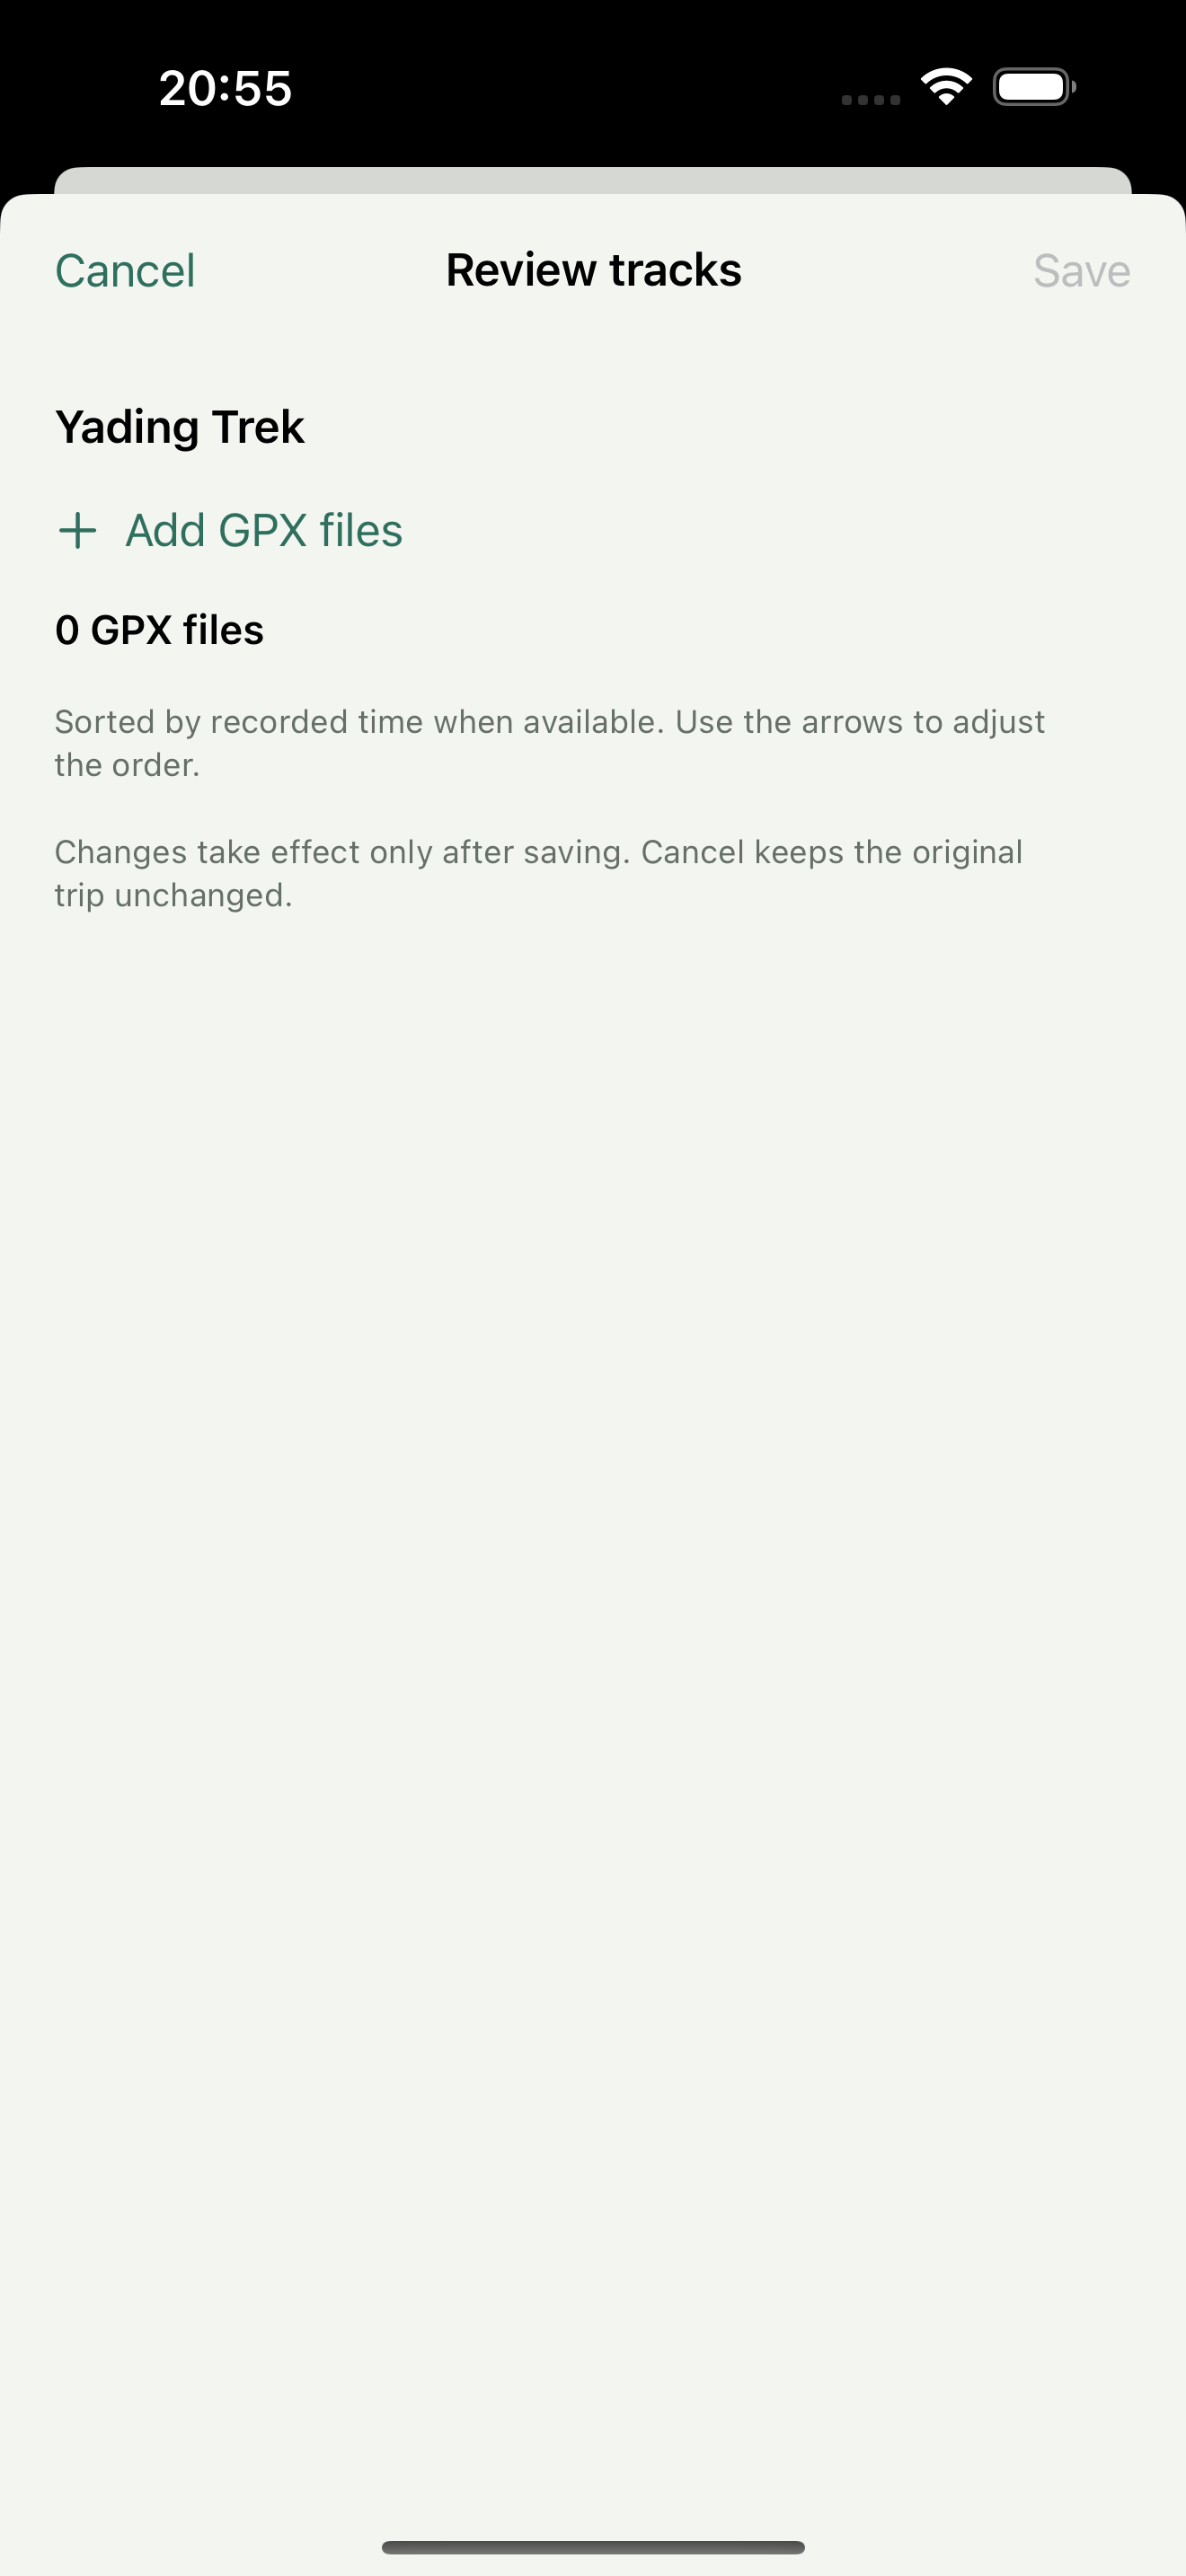
A trip can contain one or multiple GPX files. Separate files and GPX segments retain their boundaries without straight lines added between segments. Segment boundaries and timestamp continuity are different questions. Reimporting the same file produces a prompt. If an individual file fails, check the error and the valid files rather than assuming the failed recording was imported.
Step 2 Check the route and statistics, then save
Review the file list, route shape, distance, total ascent, and total descent. Tracks with recorded times are sorted by their timestamps; the arrows beside the files let you adjust the order when needed. Save the changes, return to the trip, and reopen its tracks to check that the result remains.
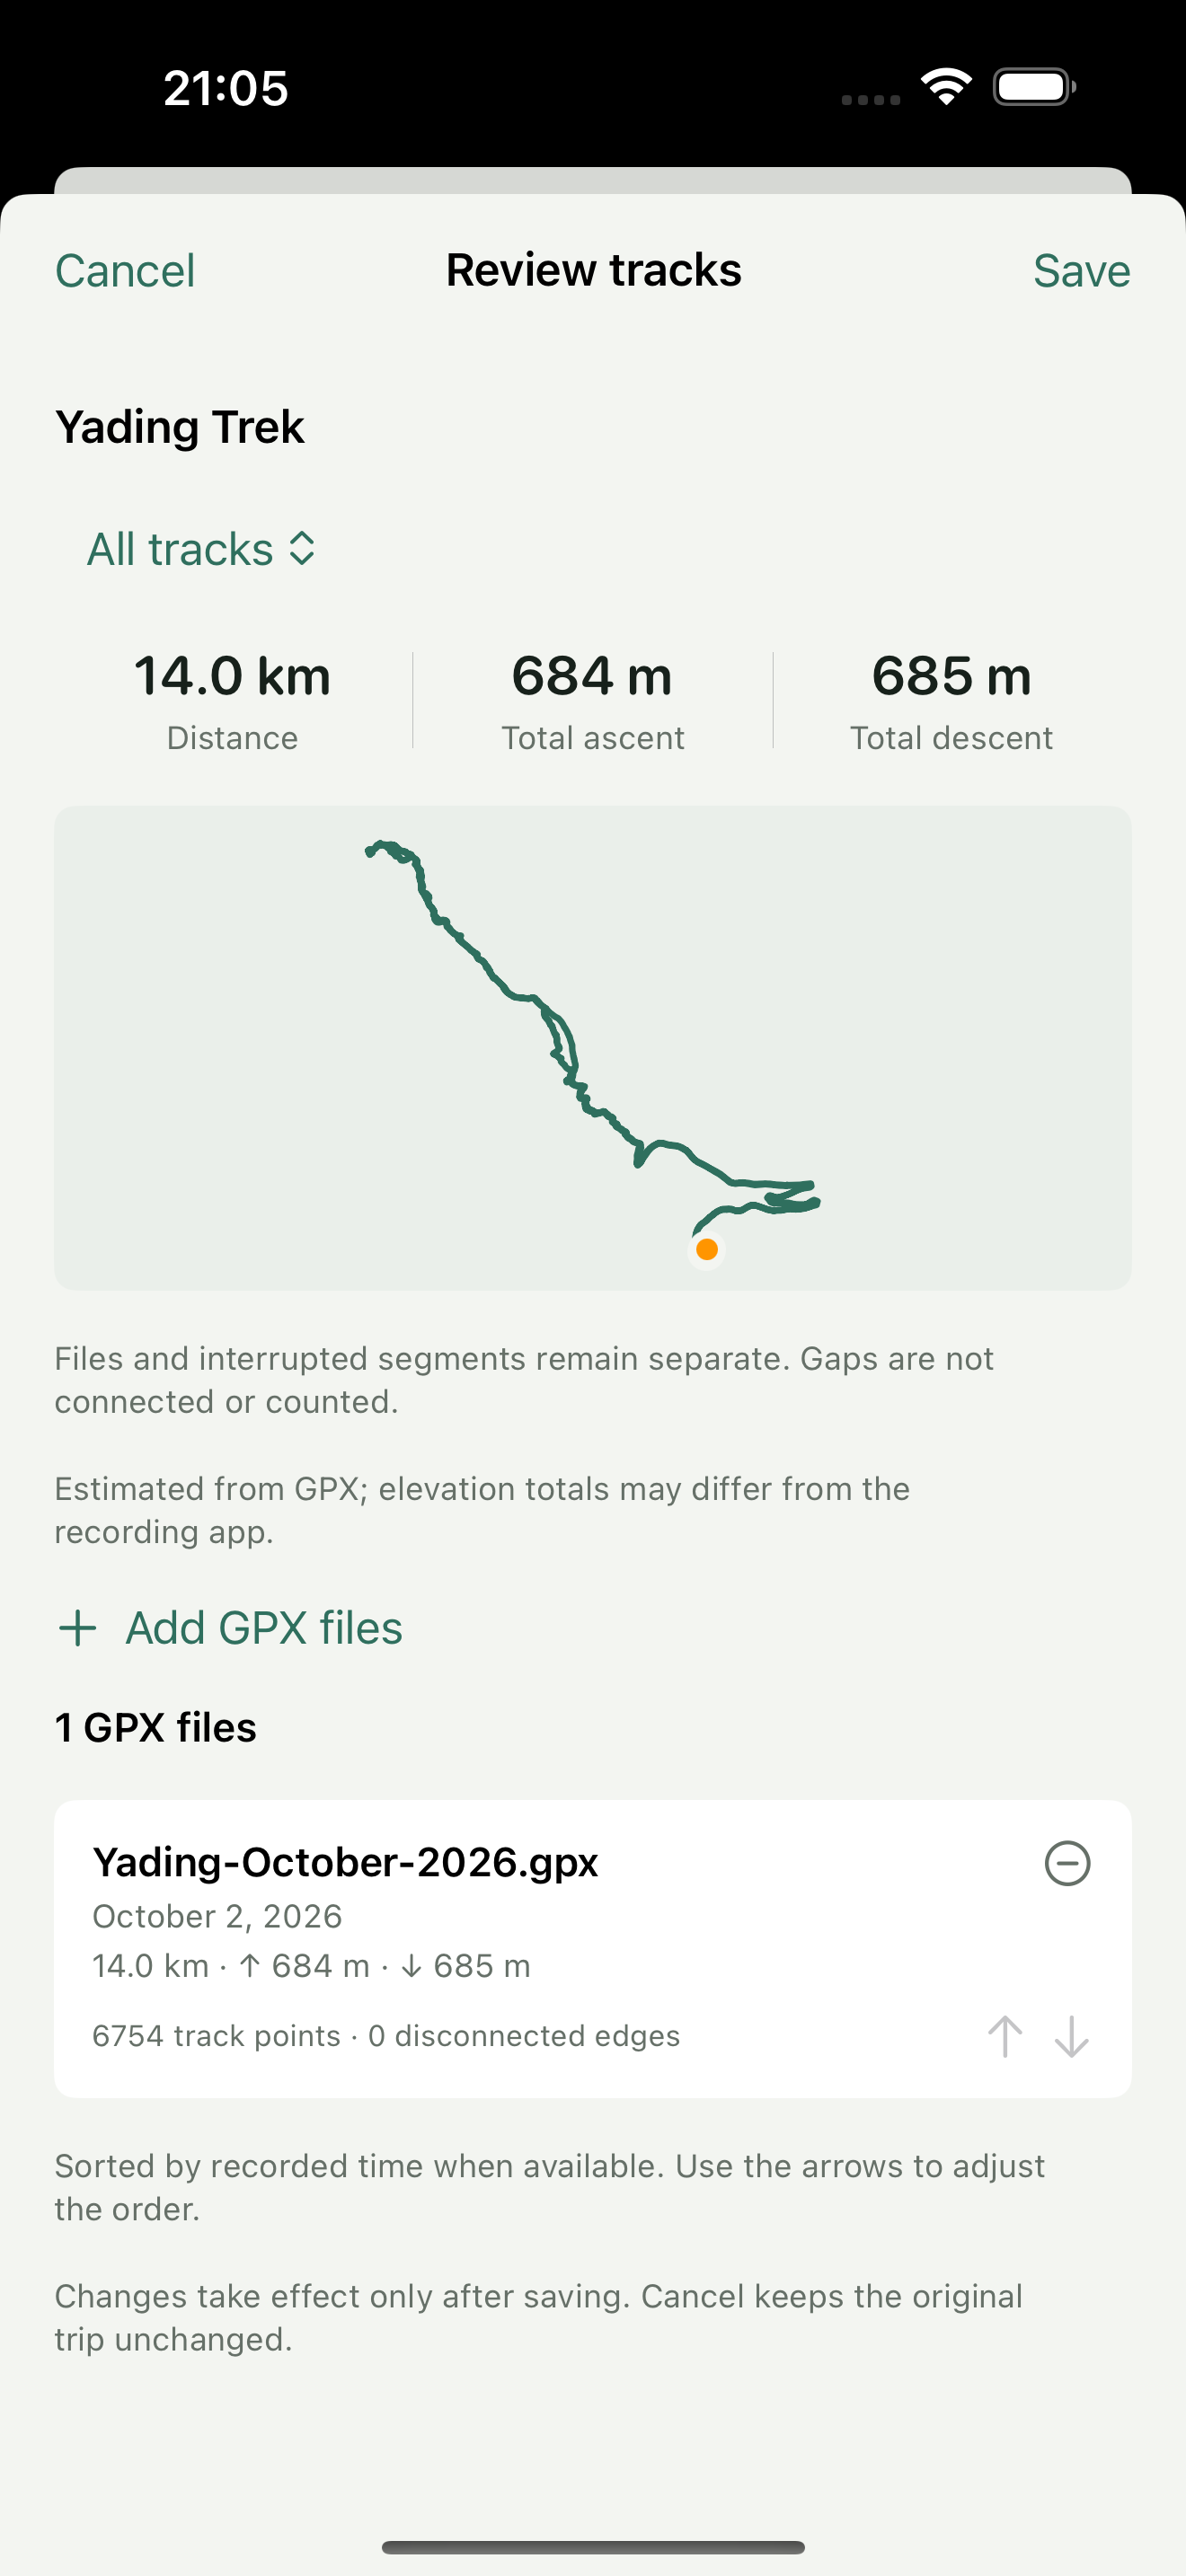
This actual import displays 14.0 km, 684 m of ascent, and 685 m of descent, with 6,754 track points and “0 disconnected edges” in the file details. The figures describe this valid GPX only. The displayed zero break count does not establish continuous movement between the first and last timestamp; check the recording coverage and its overnight time gap as well.
The statistics come from the imported GPX and may differ from the recording app because of calculation methods or the valid-data scope. Missing recordings cannot be reconstructed automatically. Missing elevation does not mean there was no ascent. A time gap alone cannot establish whether you were moving or stopped throughout that interval.
Changes take effect only after saving. Canceling leaves the original trip tracks unchanged; seeing a route in the preview does not prove it has been saved.
Step 3 Add a photo in the completion form
- After saving the track, return to the unfinished trip, open its three-dot menu, and choose “Confirm completed hike” to open the completion form.
- Check the actual hiking dates in “Start” and “End.” This demonstration confirms October 2–3, 2026; do not simply reuse the earlier planned date.
- Add optional memory text under “A FEW WORDS (OPTIONAL)” if needed. Tap “Choose from Library” under the optional trip-photo section and choose this outing’s photo in the system picker.
- Back in the completion form, check that the chosen photo appears and review the dates and text. Save the completion details at the top in the next step.
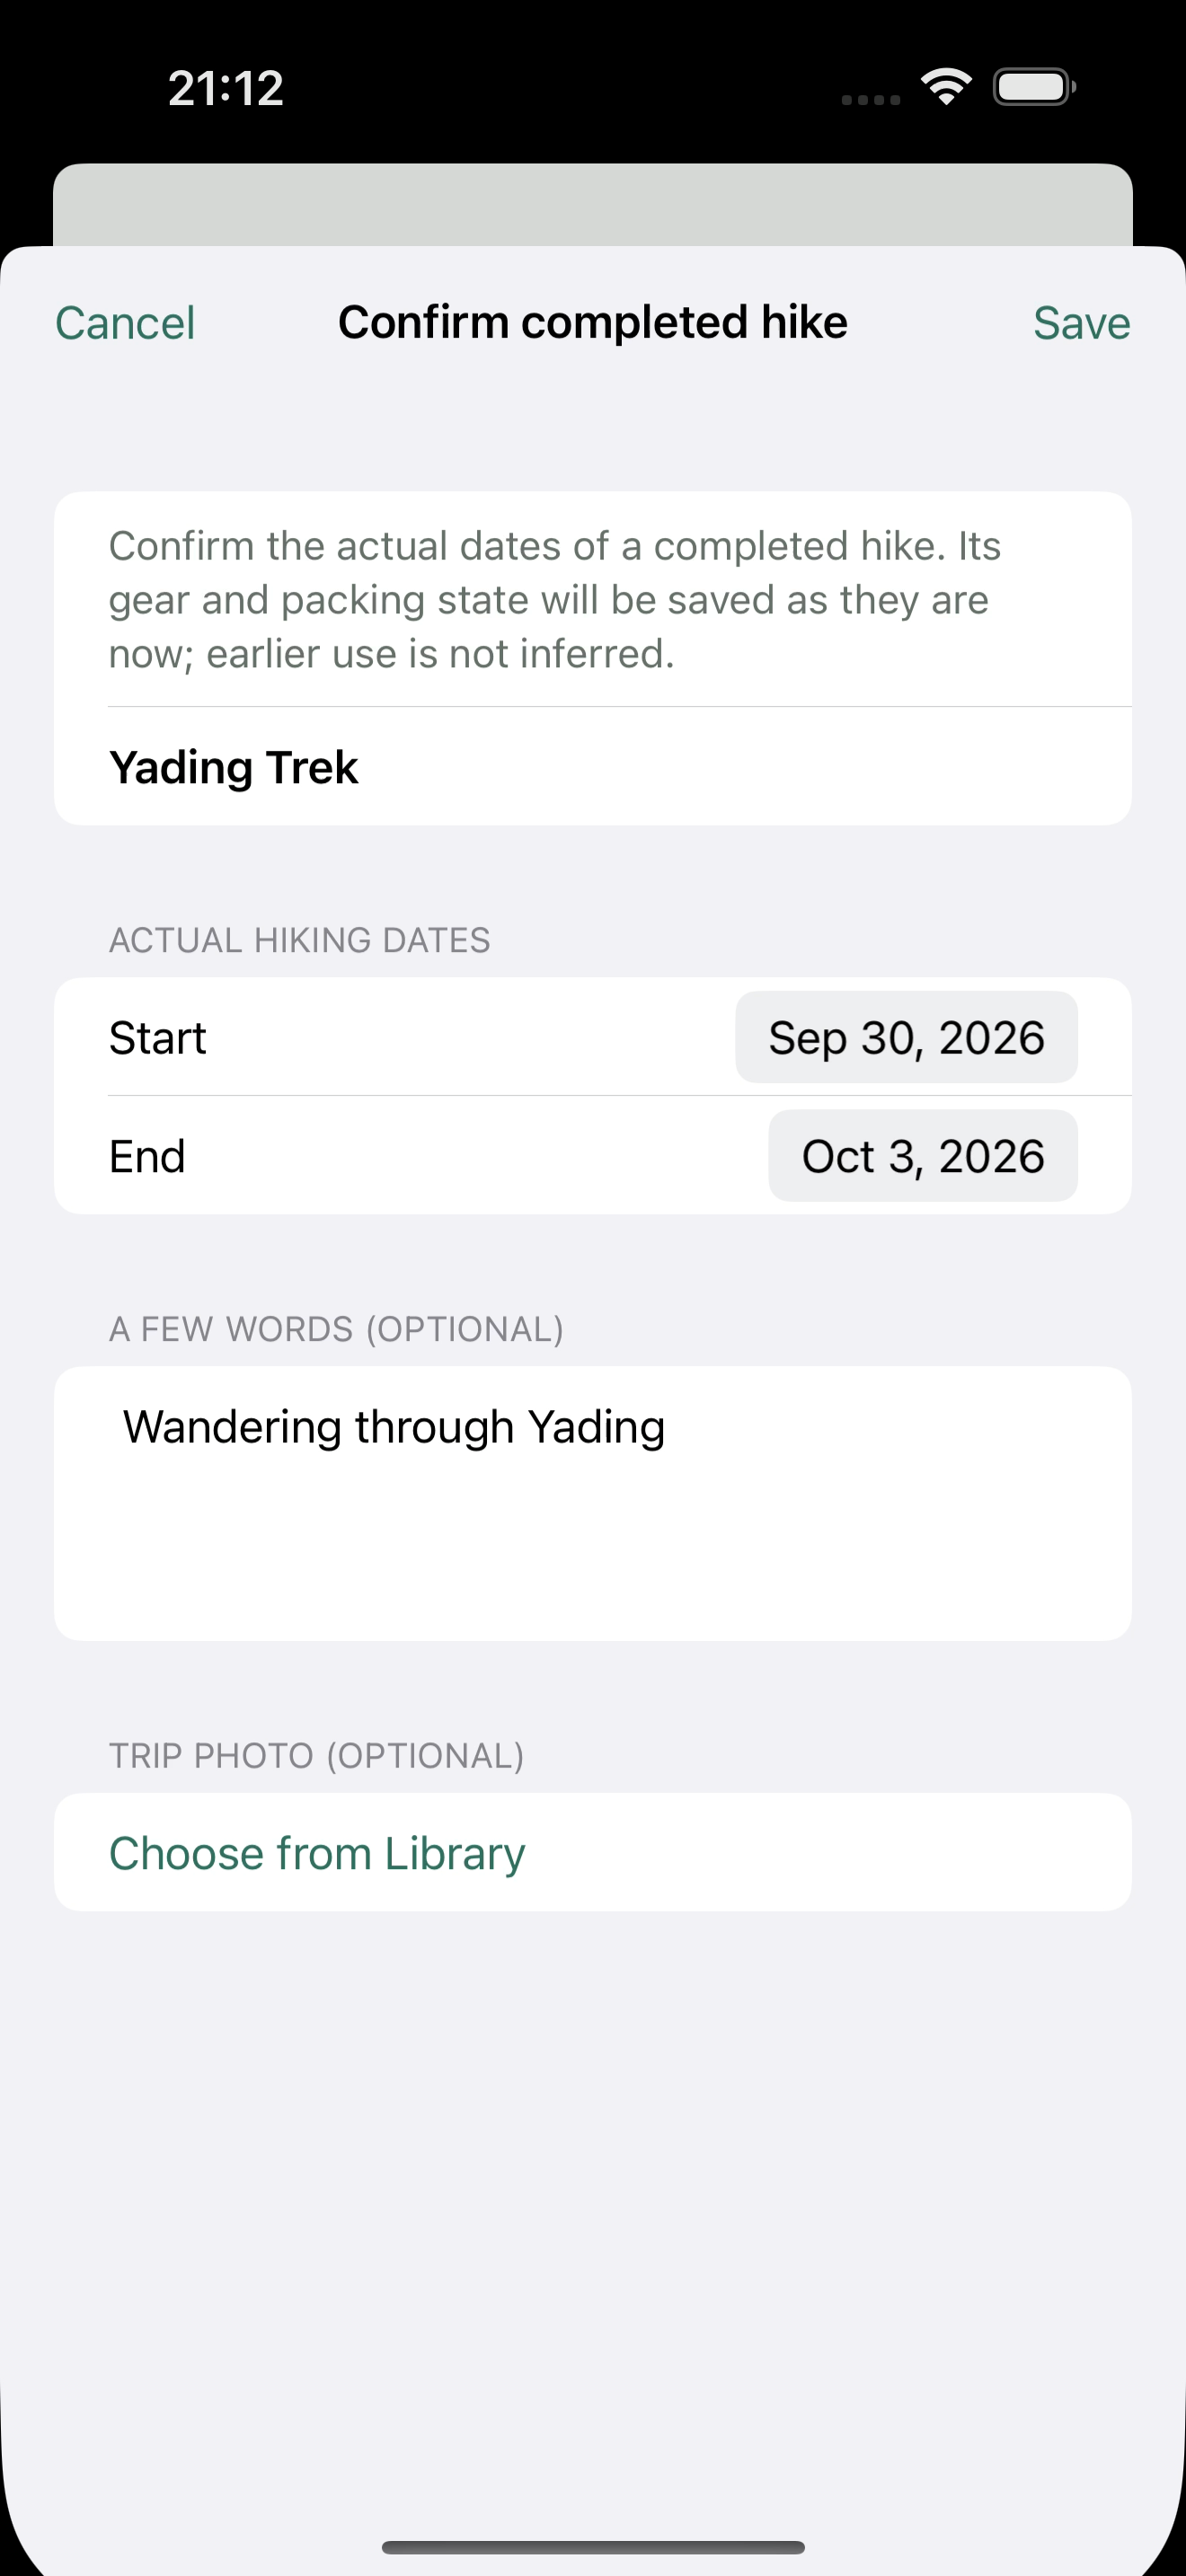
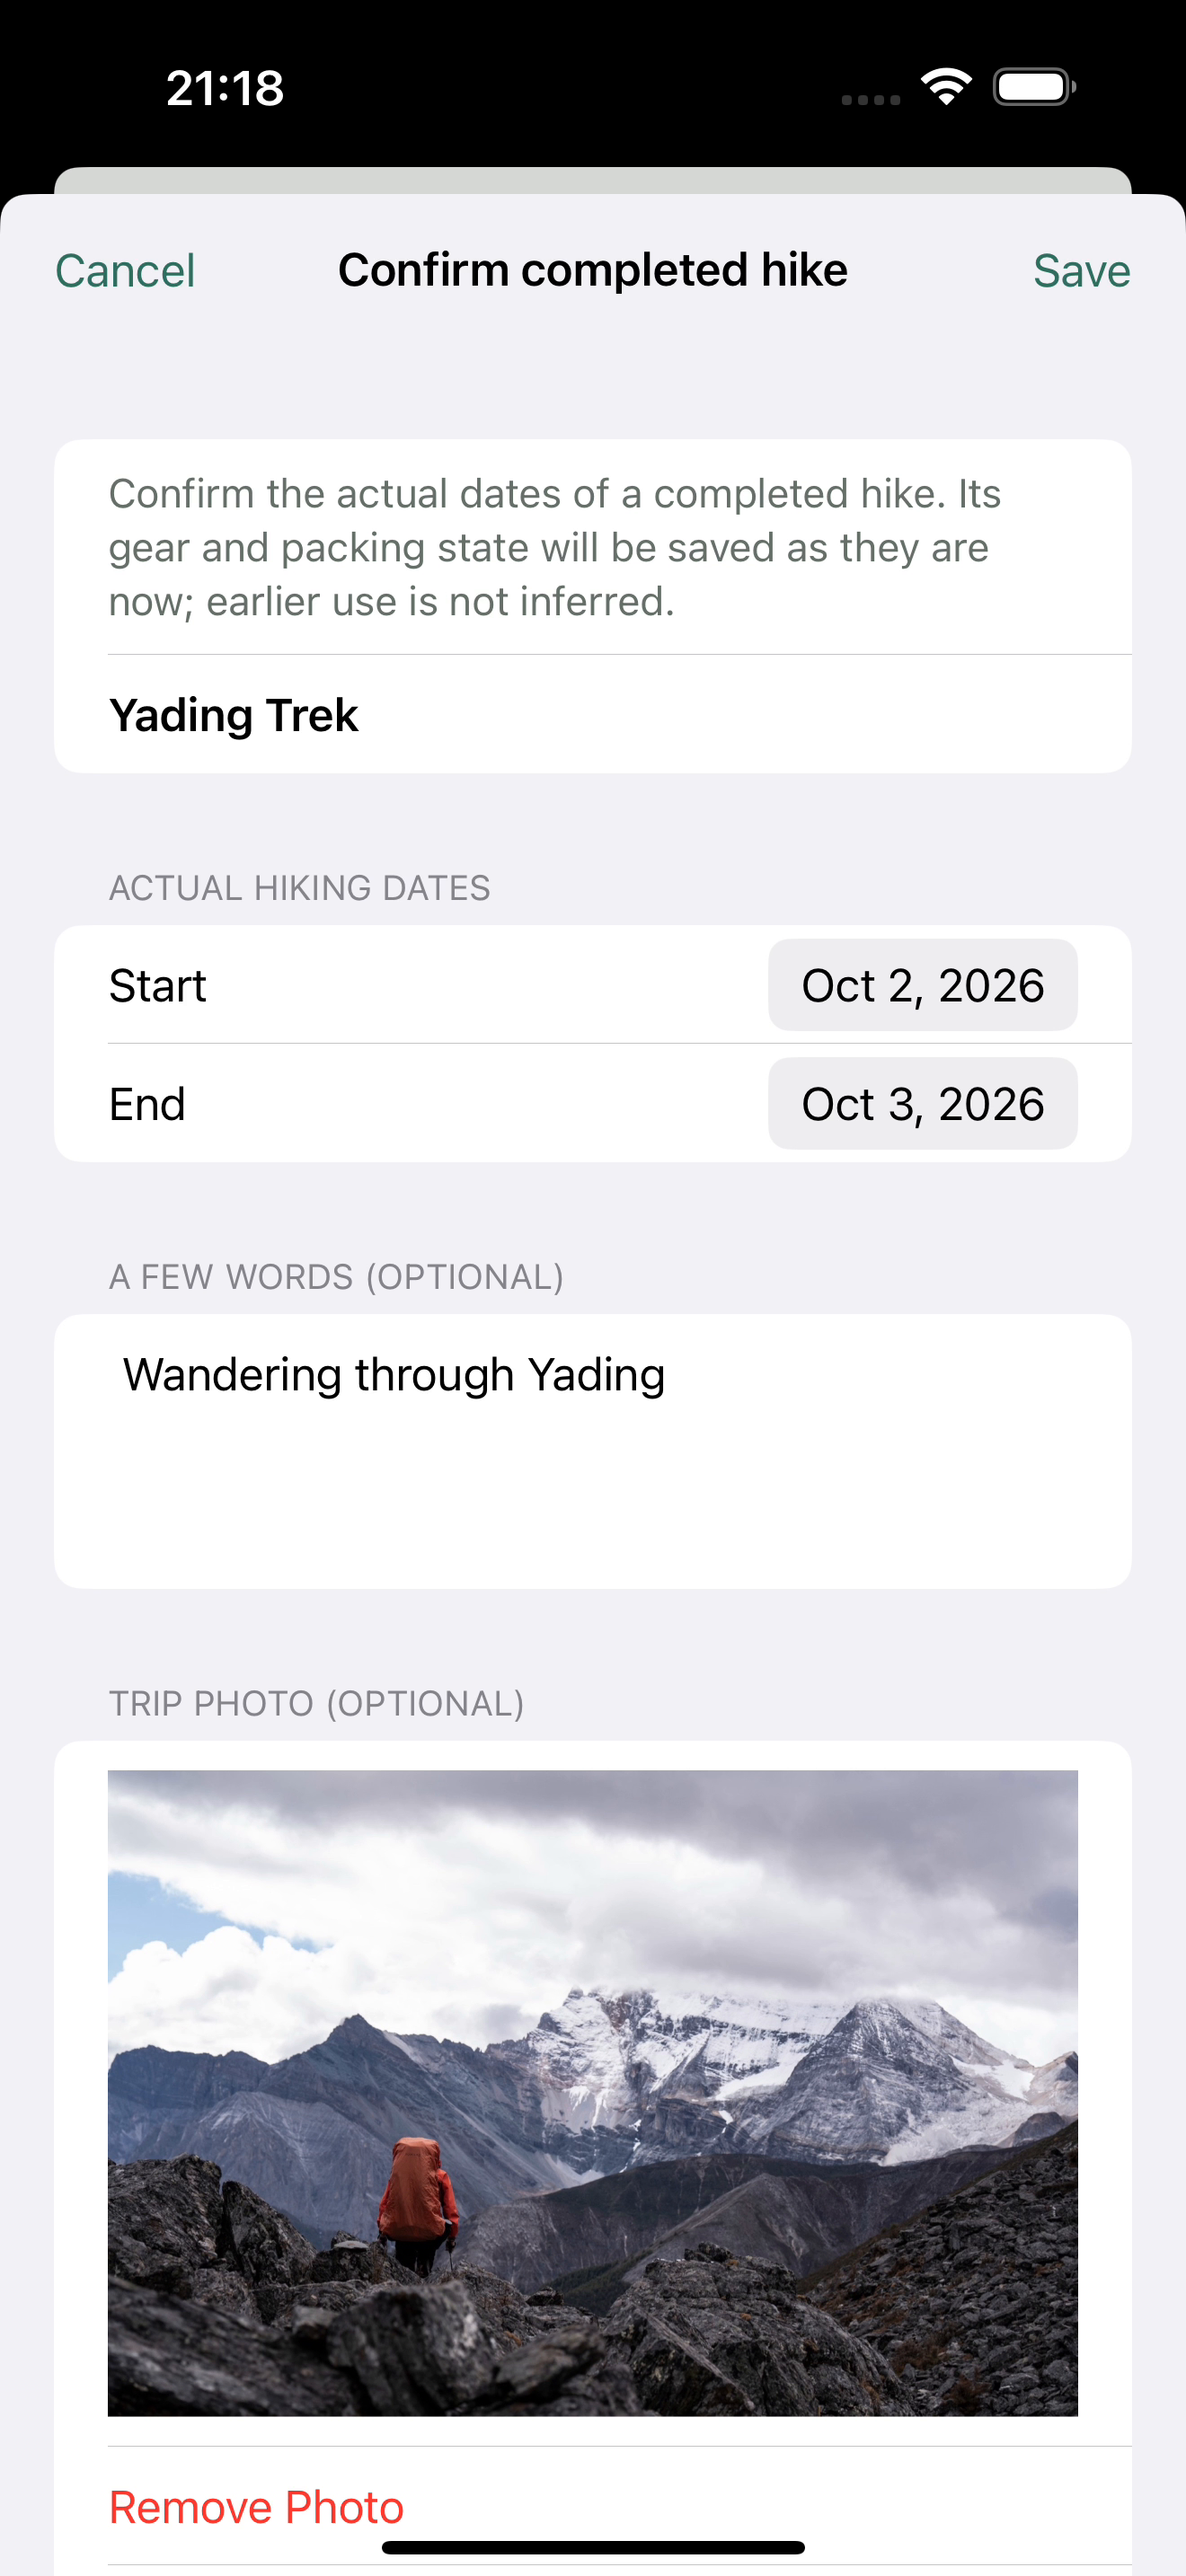
Choose a cover image that represents the outing. Before adding it, check whether people, registration plates, or private locations are appropriate to show. Keep the memory text to what you want recorded. The photo and text are optional; you do not need a full trip report to retain the outing.
Step 4 Complete the trip and check the gear snapshot
After checking the completion form’s actual dates, photo, and text, tap “Save” at the top right. In Trip memory, check the same photo, October 2–3, 2026 dates, this GPX’s statistics, and the historical gear. This result shows a pack weight of 20.605 kg from the 53-entry configuration captured at completion.
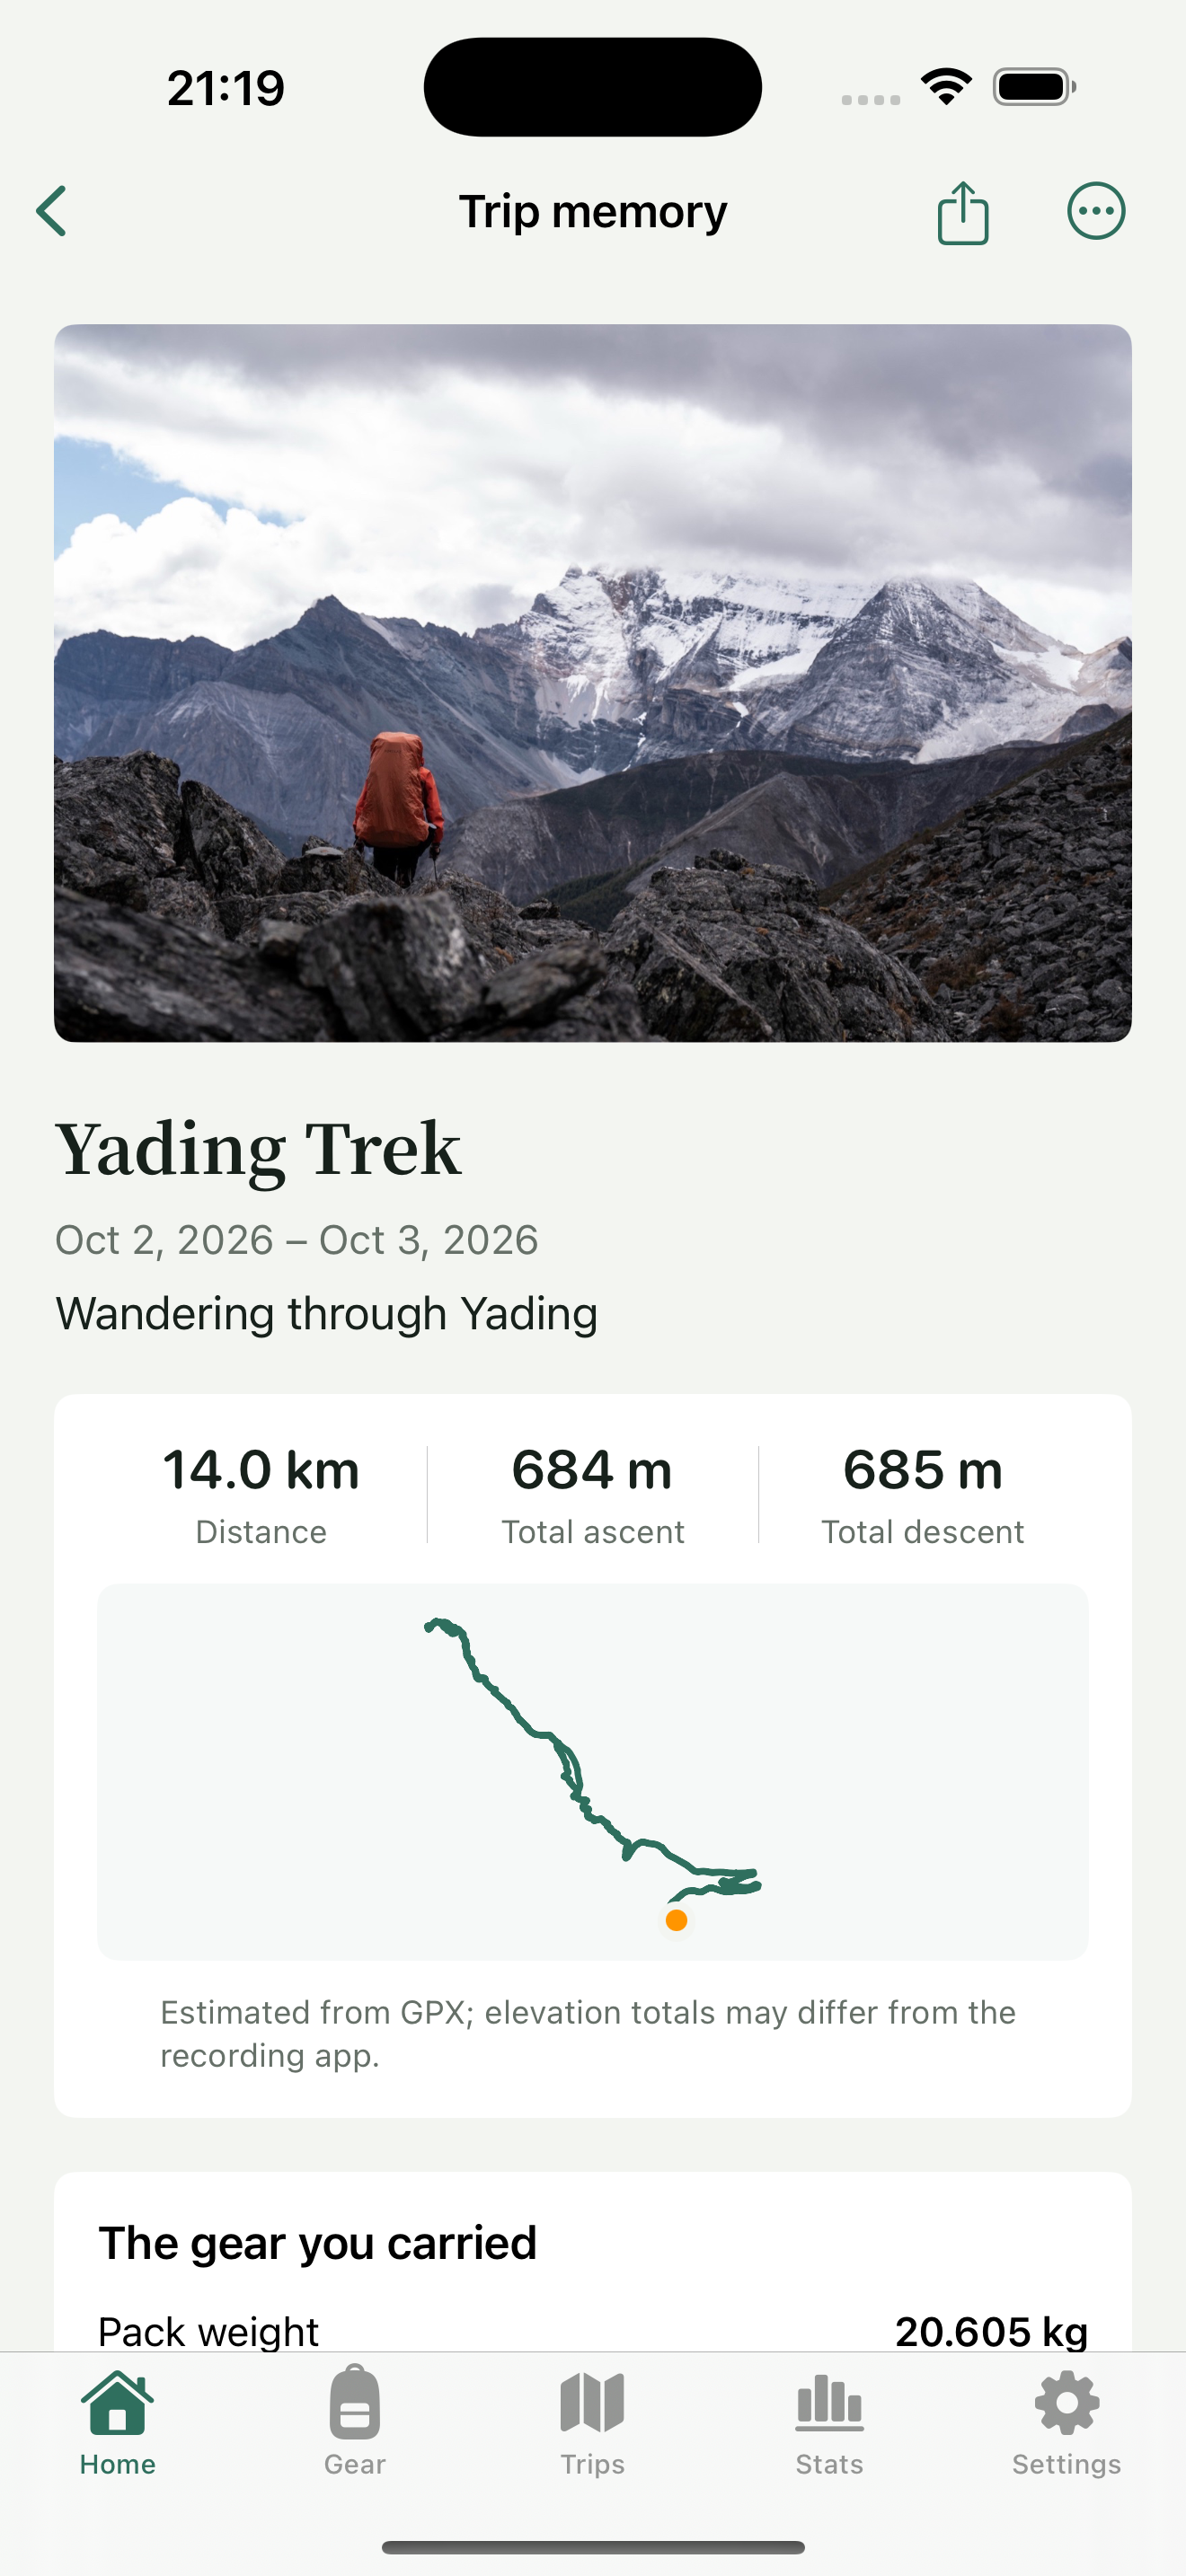
Completion freezes a gear snapshot. Later changes or deletions in the library do not rewrite that configuration. If the historical record needs correction, undo completion from the three-dot menu, make the changes, then confirm again. The existing photo, memory text, tracks, and previous snapshot are retained; reconfirming completion captures the current configuration.
Step 5 Make a memory card and choose its map background
Open the completed trip’s Trip memory screen and choose “Share a memory card” from its three-dot menu. Decide whether to display precise dates, memory text, and the route before choosing the map background. Precise dates and memory text are hidden by default. Enable the corresponding controls when you want to show them.
- Scroll down to the memory-card settings, enable “Show route” to show the route, and tap the current background name to open its menu.
- Choose Route only, Contour map, Terrain map, or Satellite. Route only omits a map background; the three actual exported cards below compare the other choices.
- Choose a map, wait for it to load, and check the route, endpoints, and attribution. Save at the top retains the settings; Save to Photos generates the image. The examples below are actual exported cards for the same GPX, rather than a sequence of in-editor terrain and satellite previews. Each service fits the GPX extent automatically.
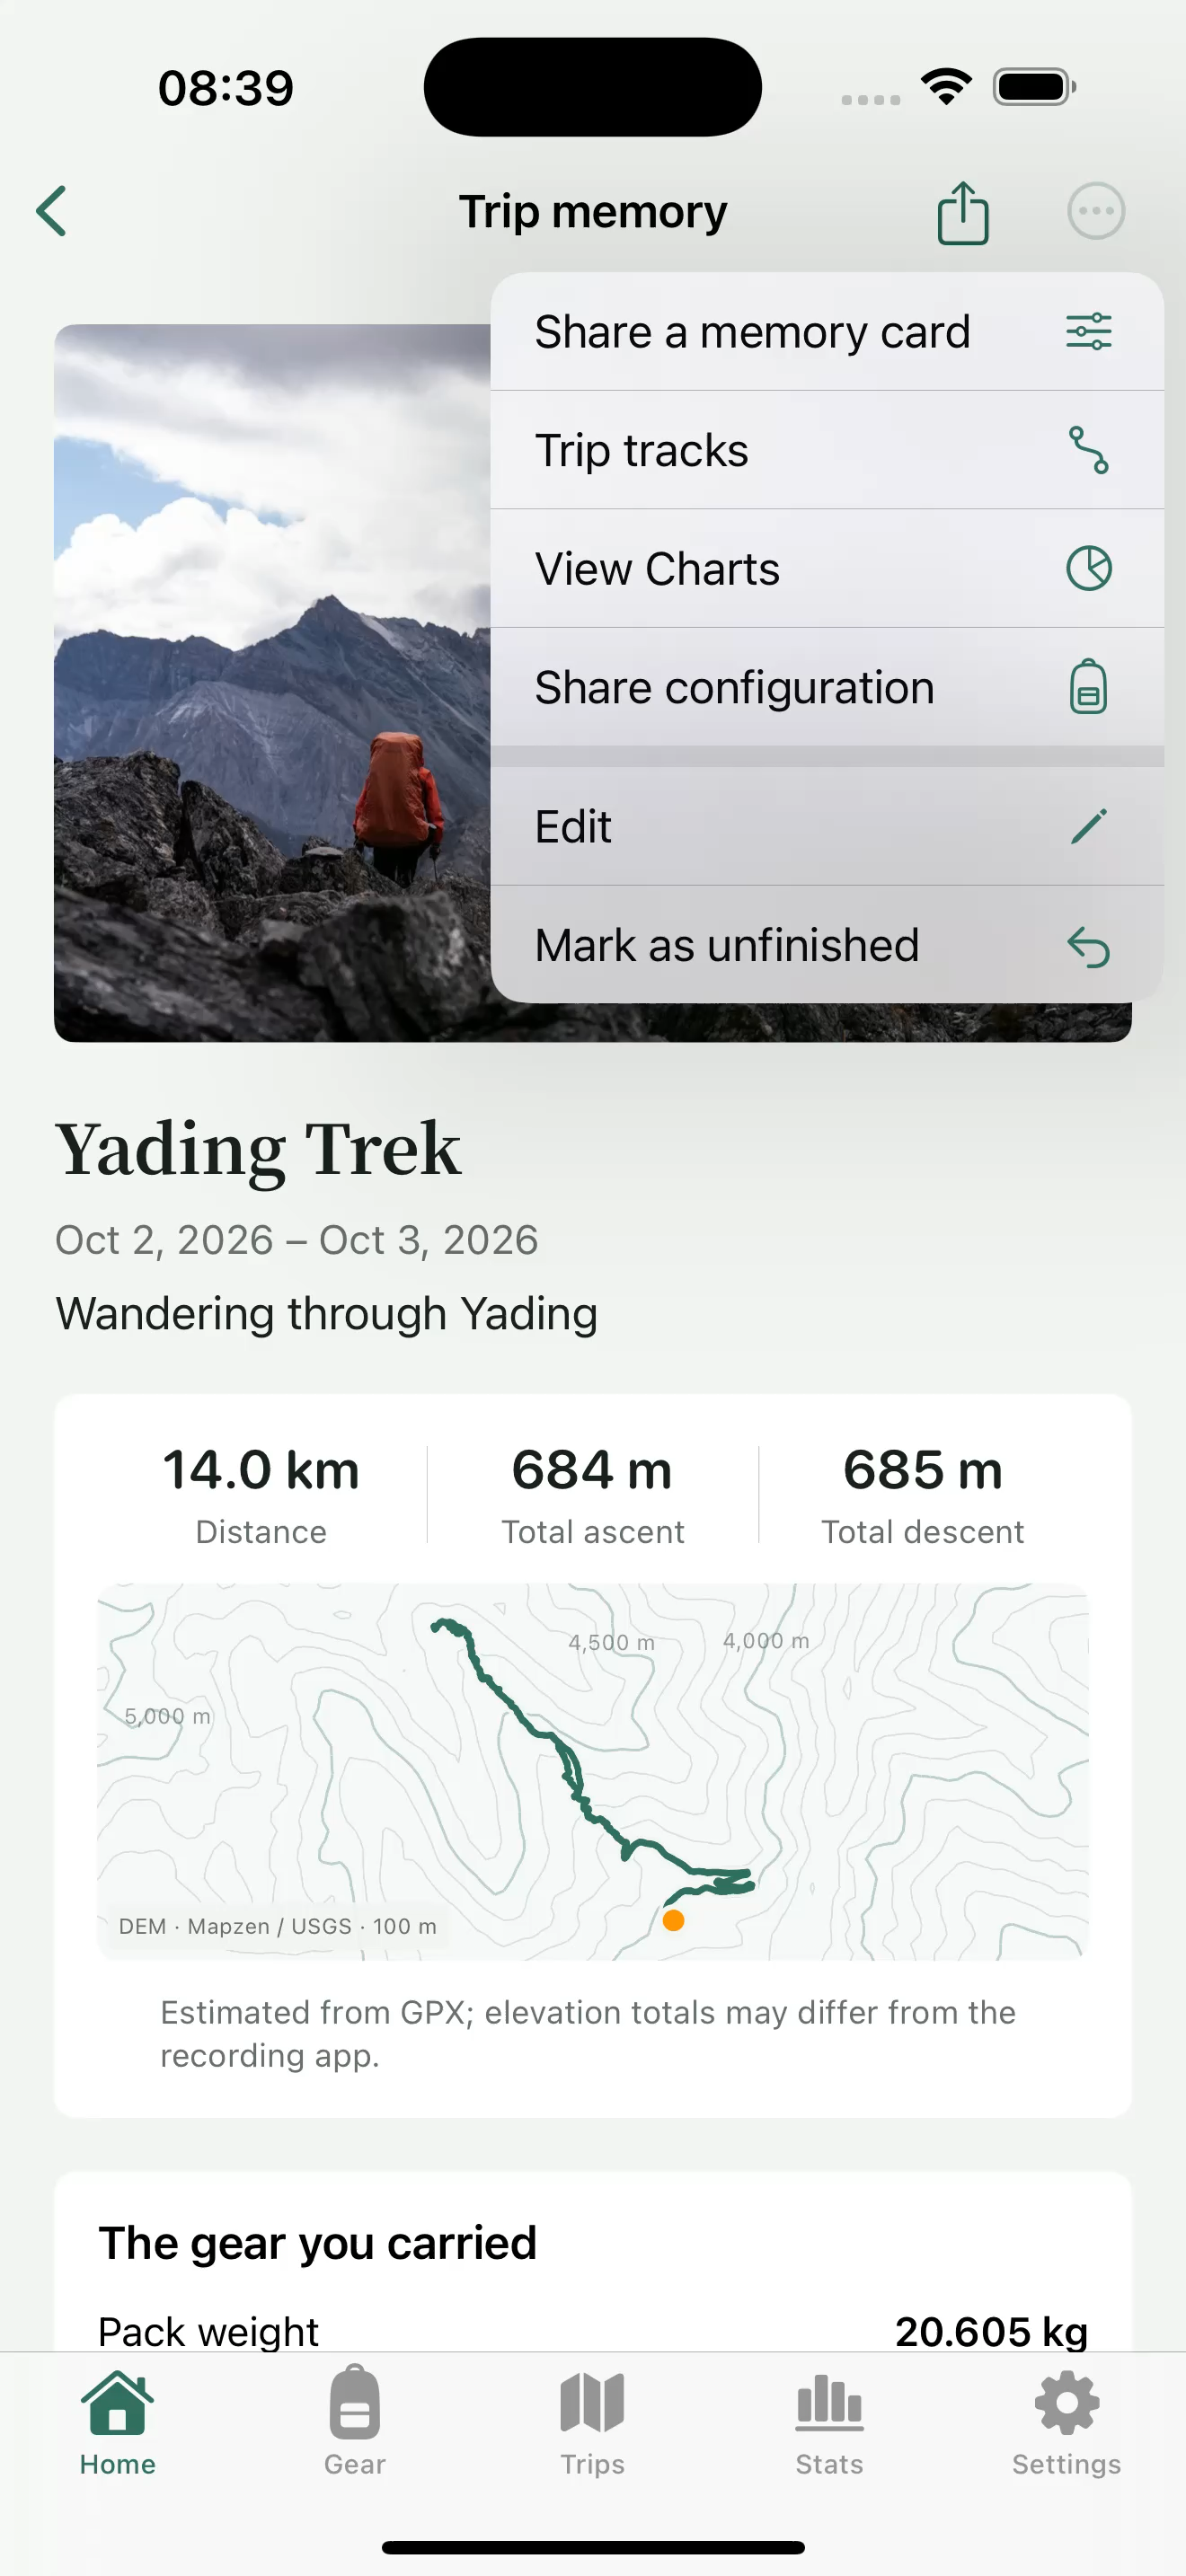 Trip memory: Share a memory card / Share configuration
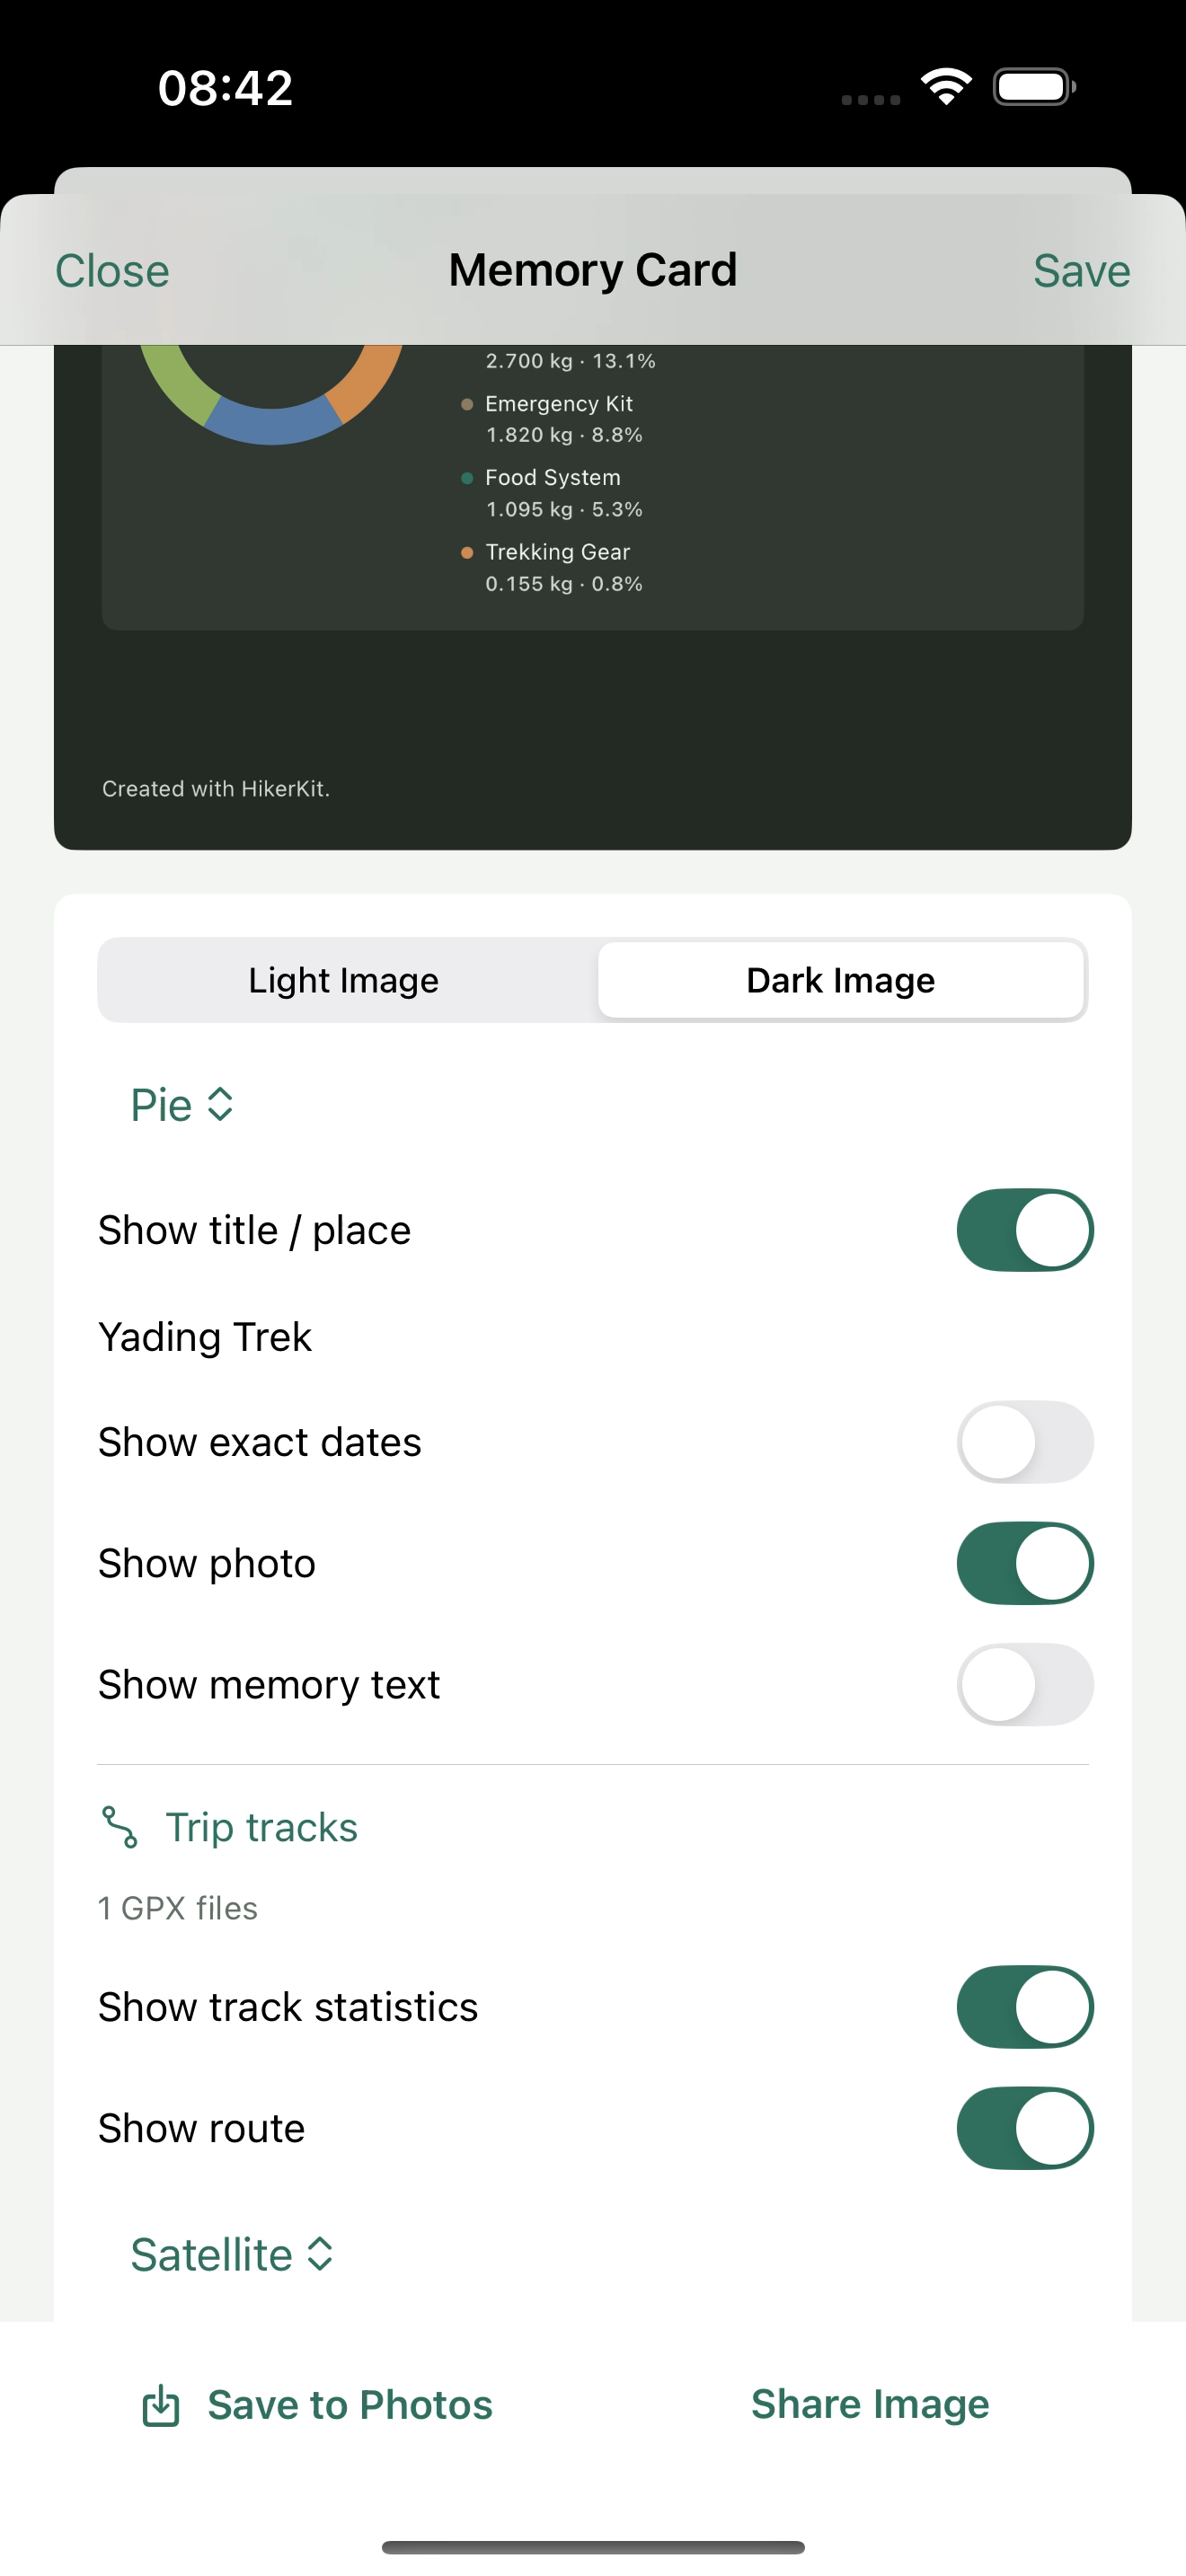 Memory Card: Show route enabled
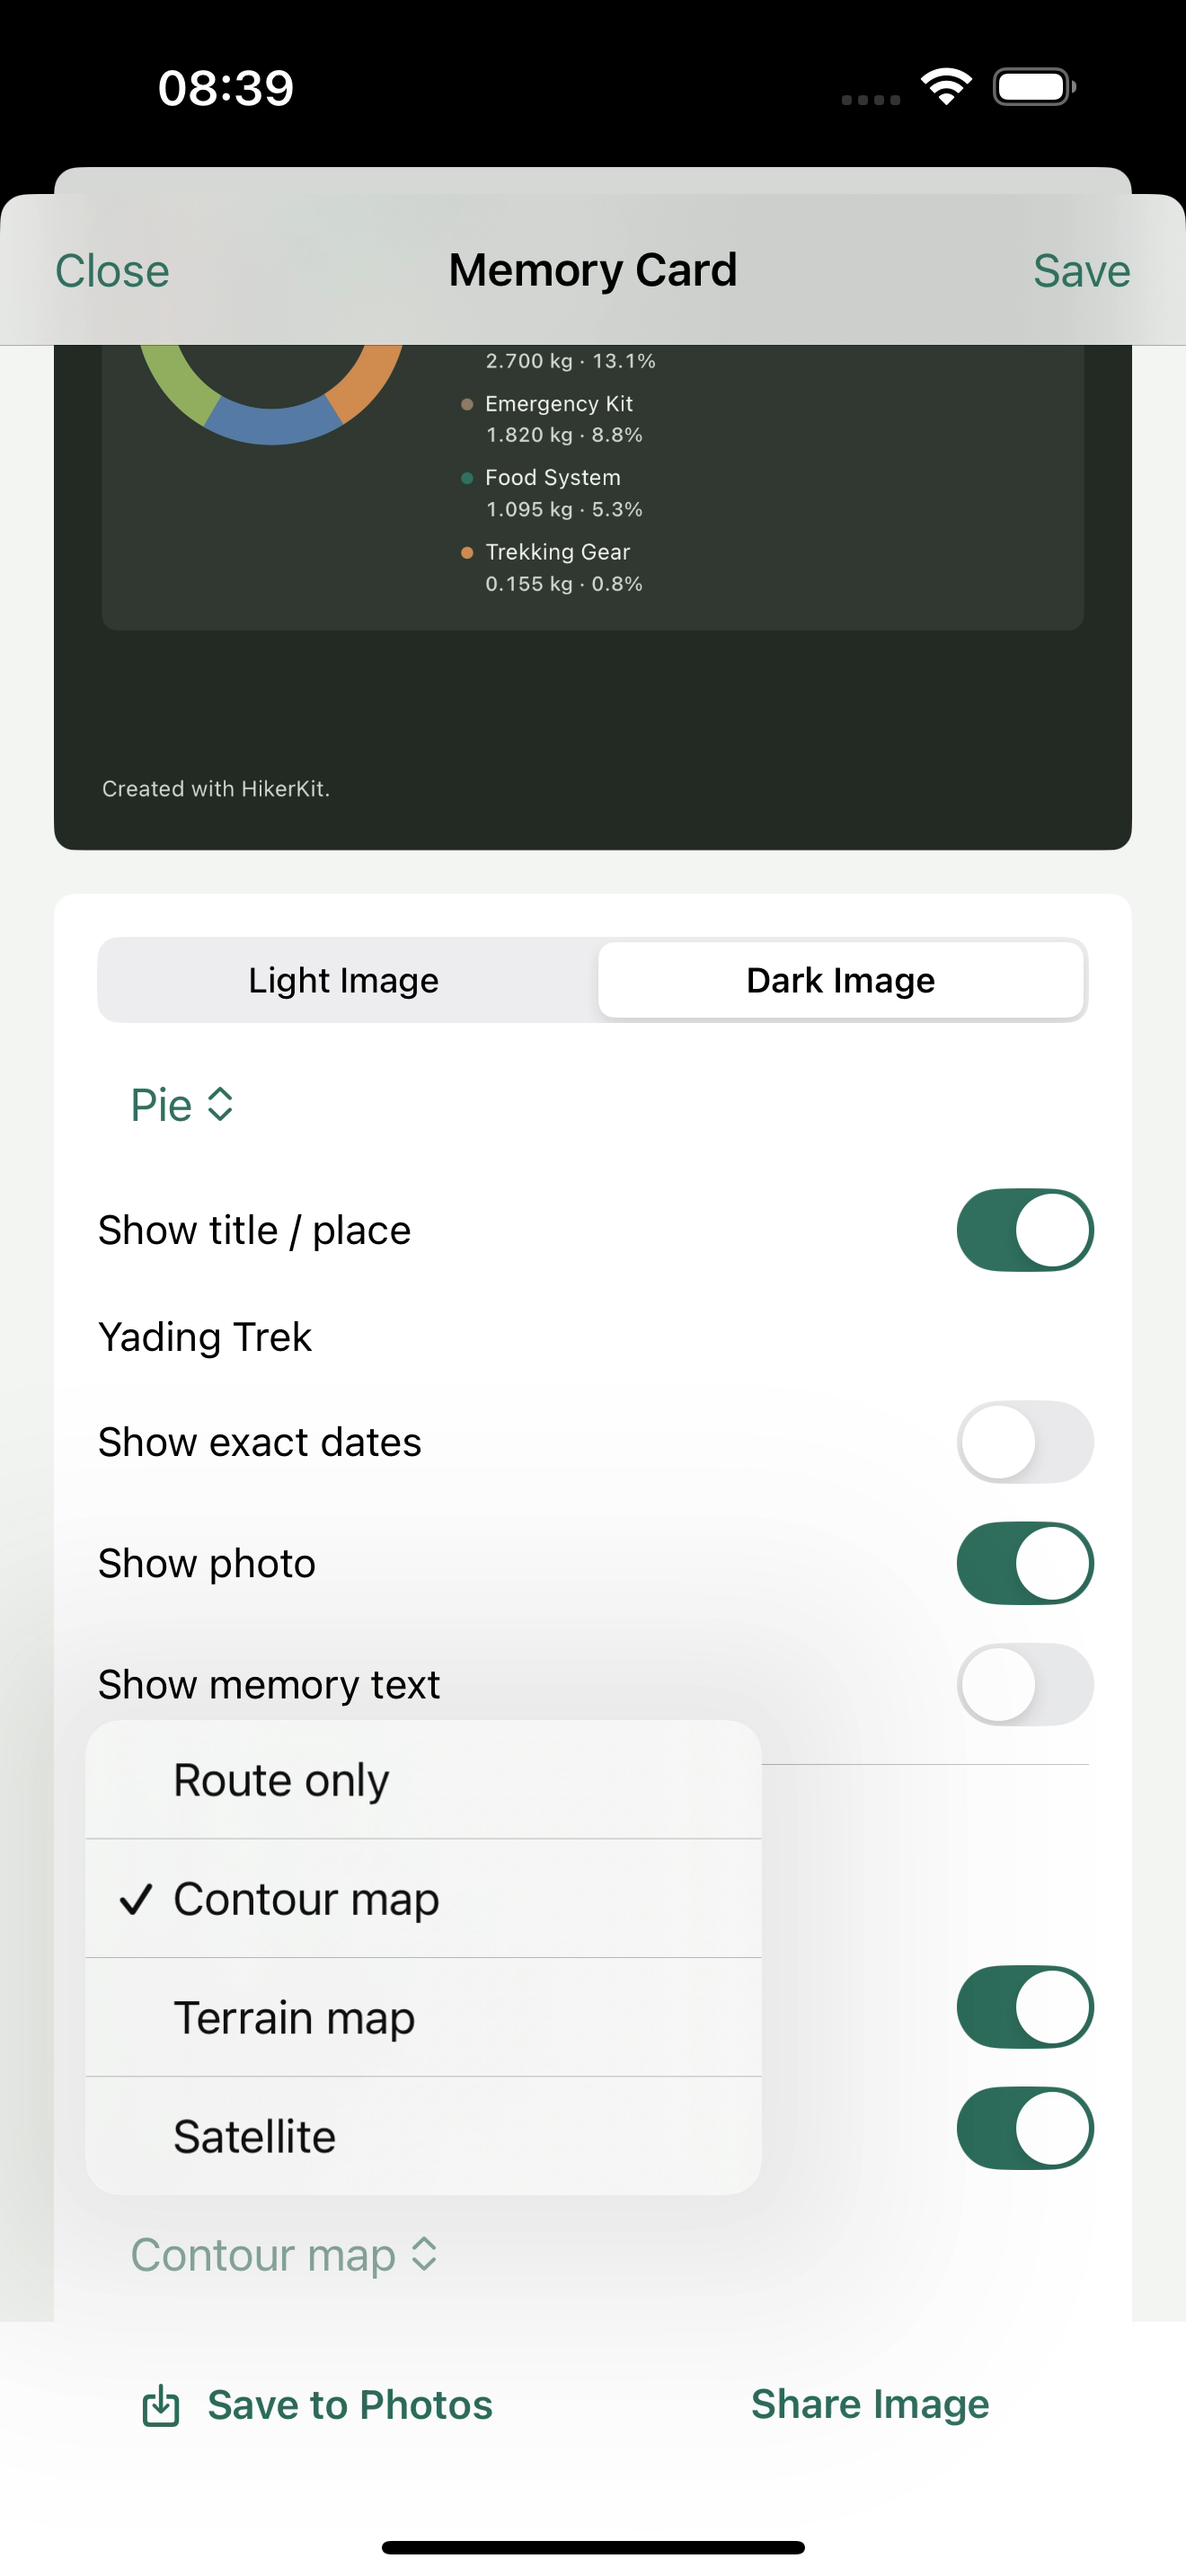 Route only, Contour map, Terrain map, Satellite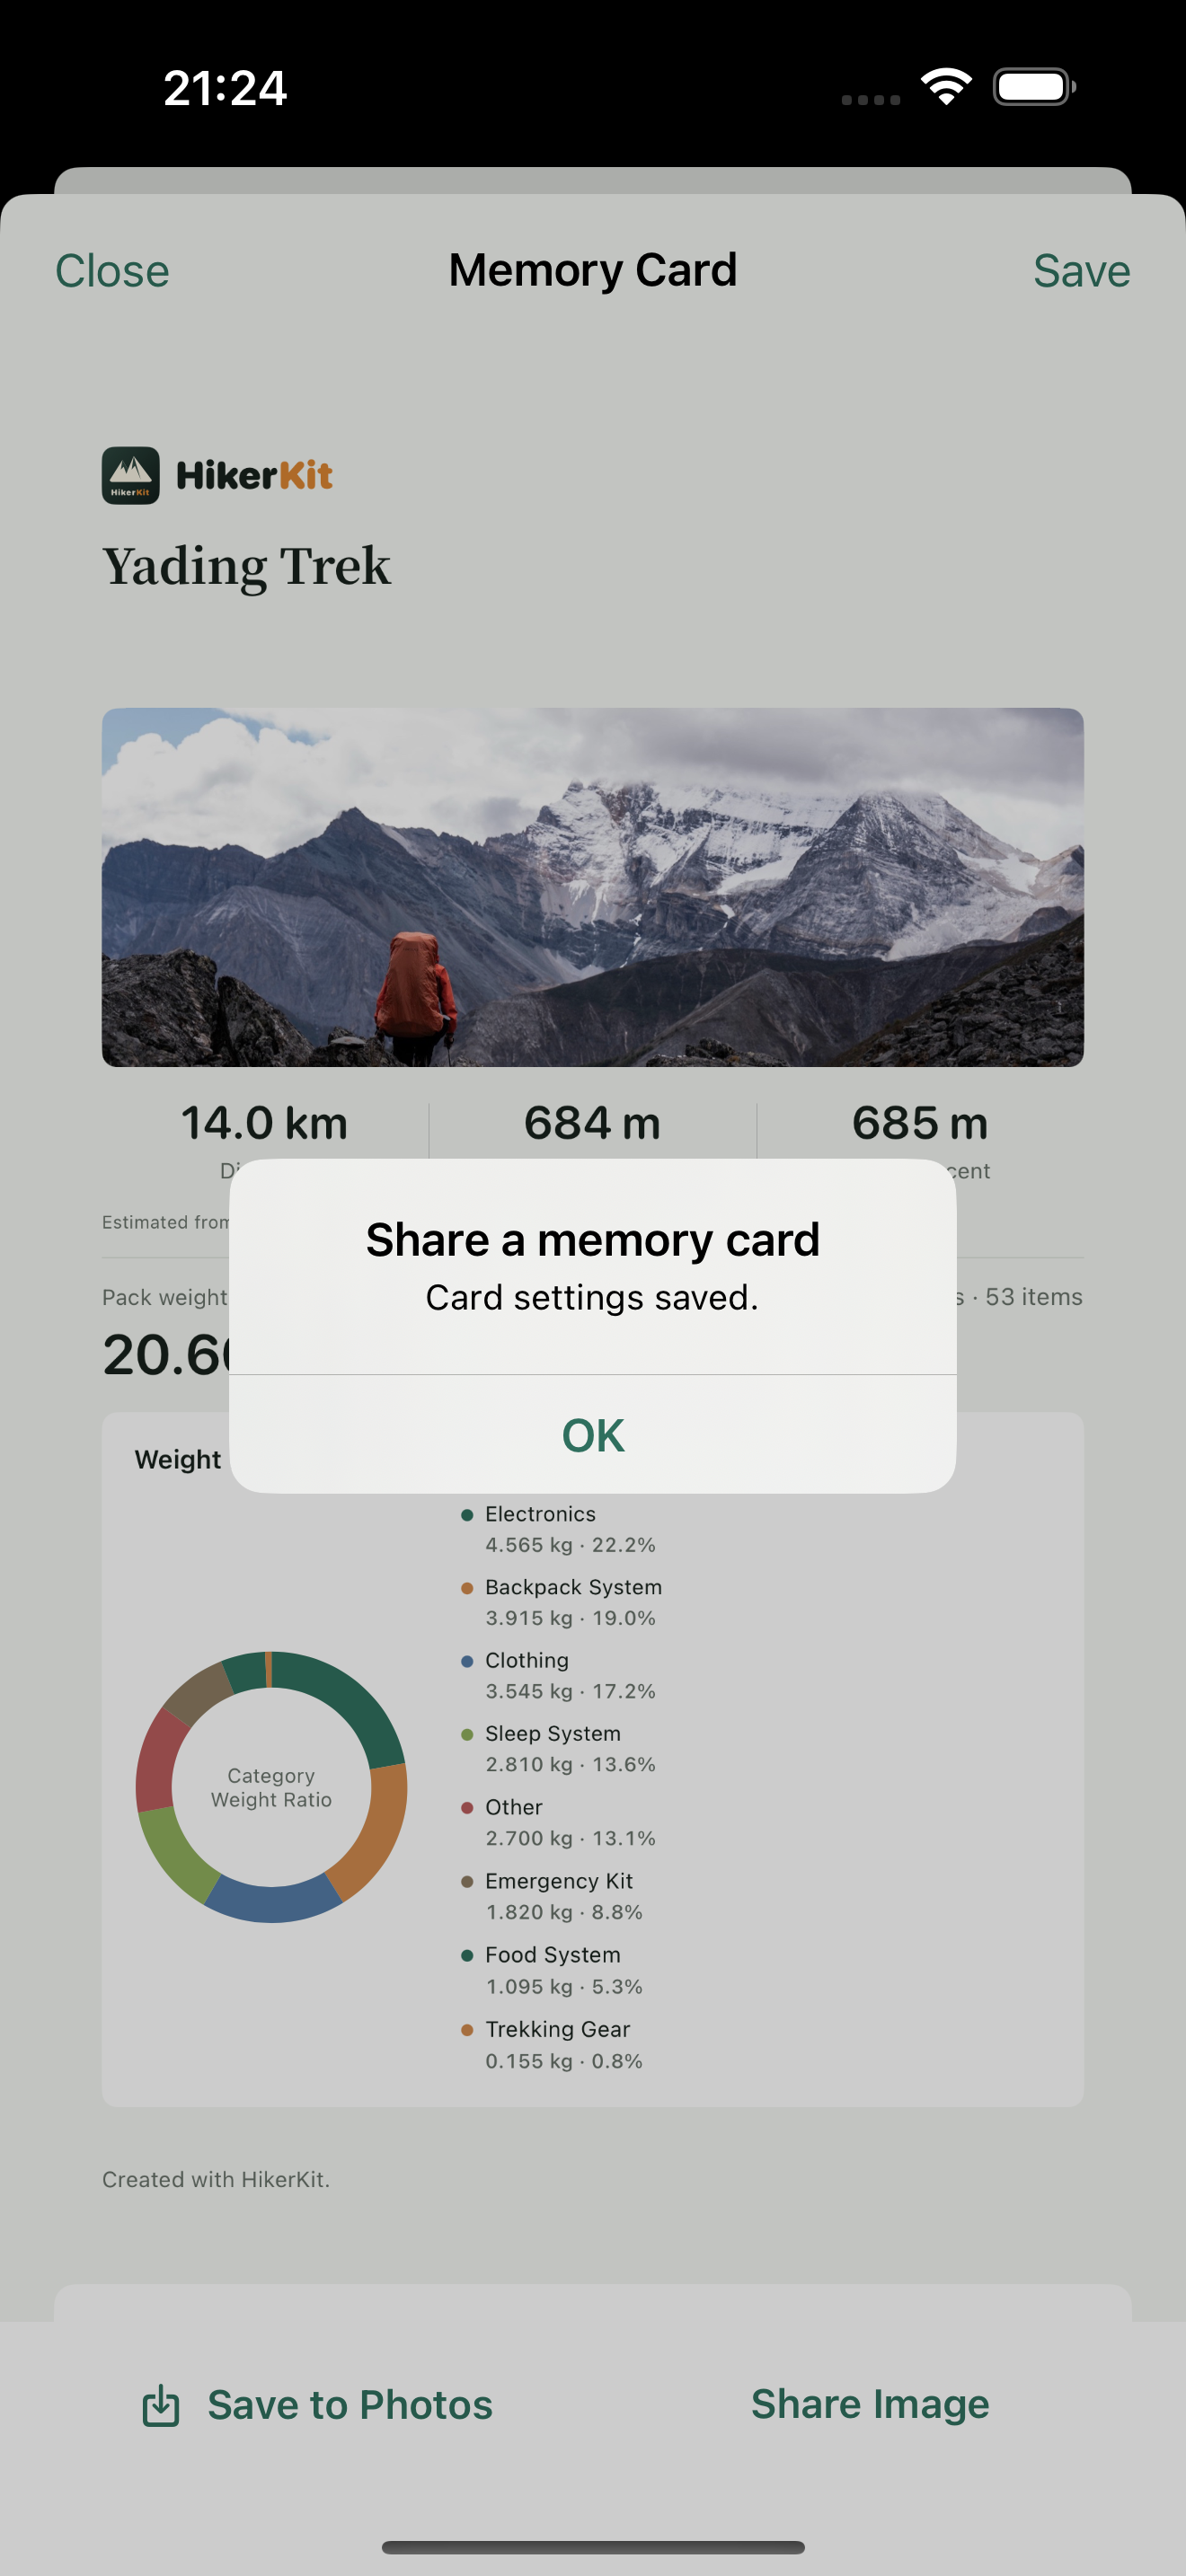
Contour background
Contours help show the shape and elevations of the terrain around the route. Keep the DEM and data-source attribution visible. This background comes from elevation data; it does not modify the imported track or independently verify the GPX ascent figure.
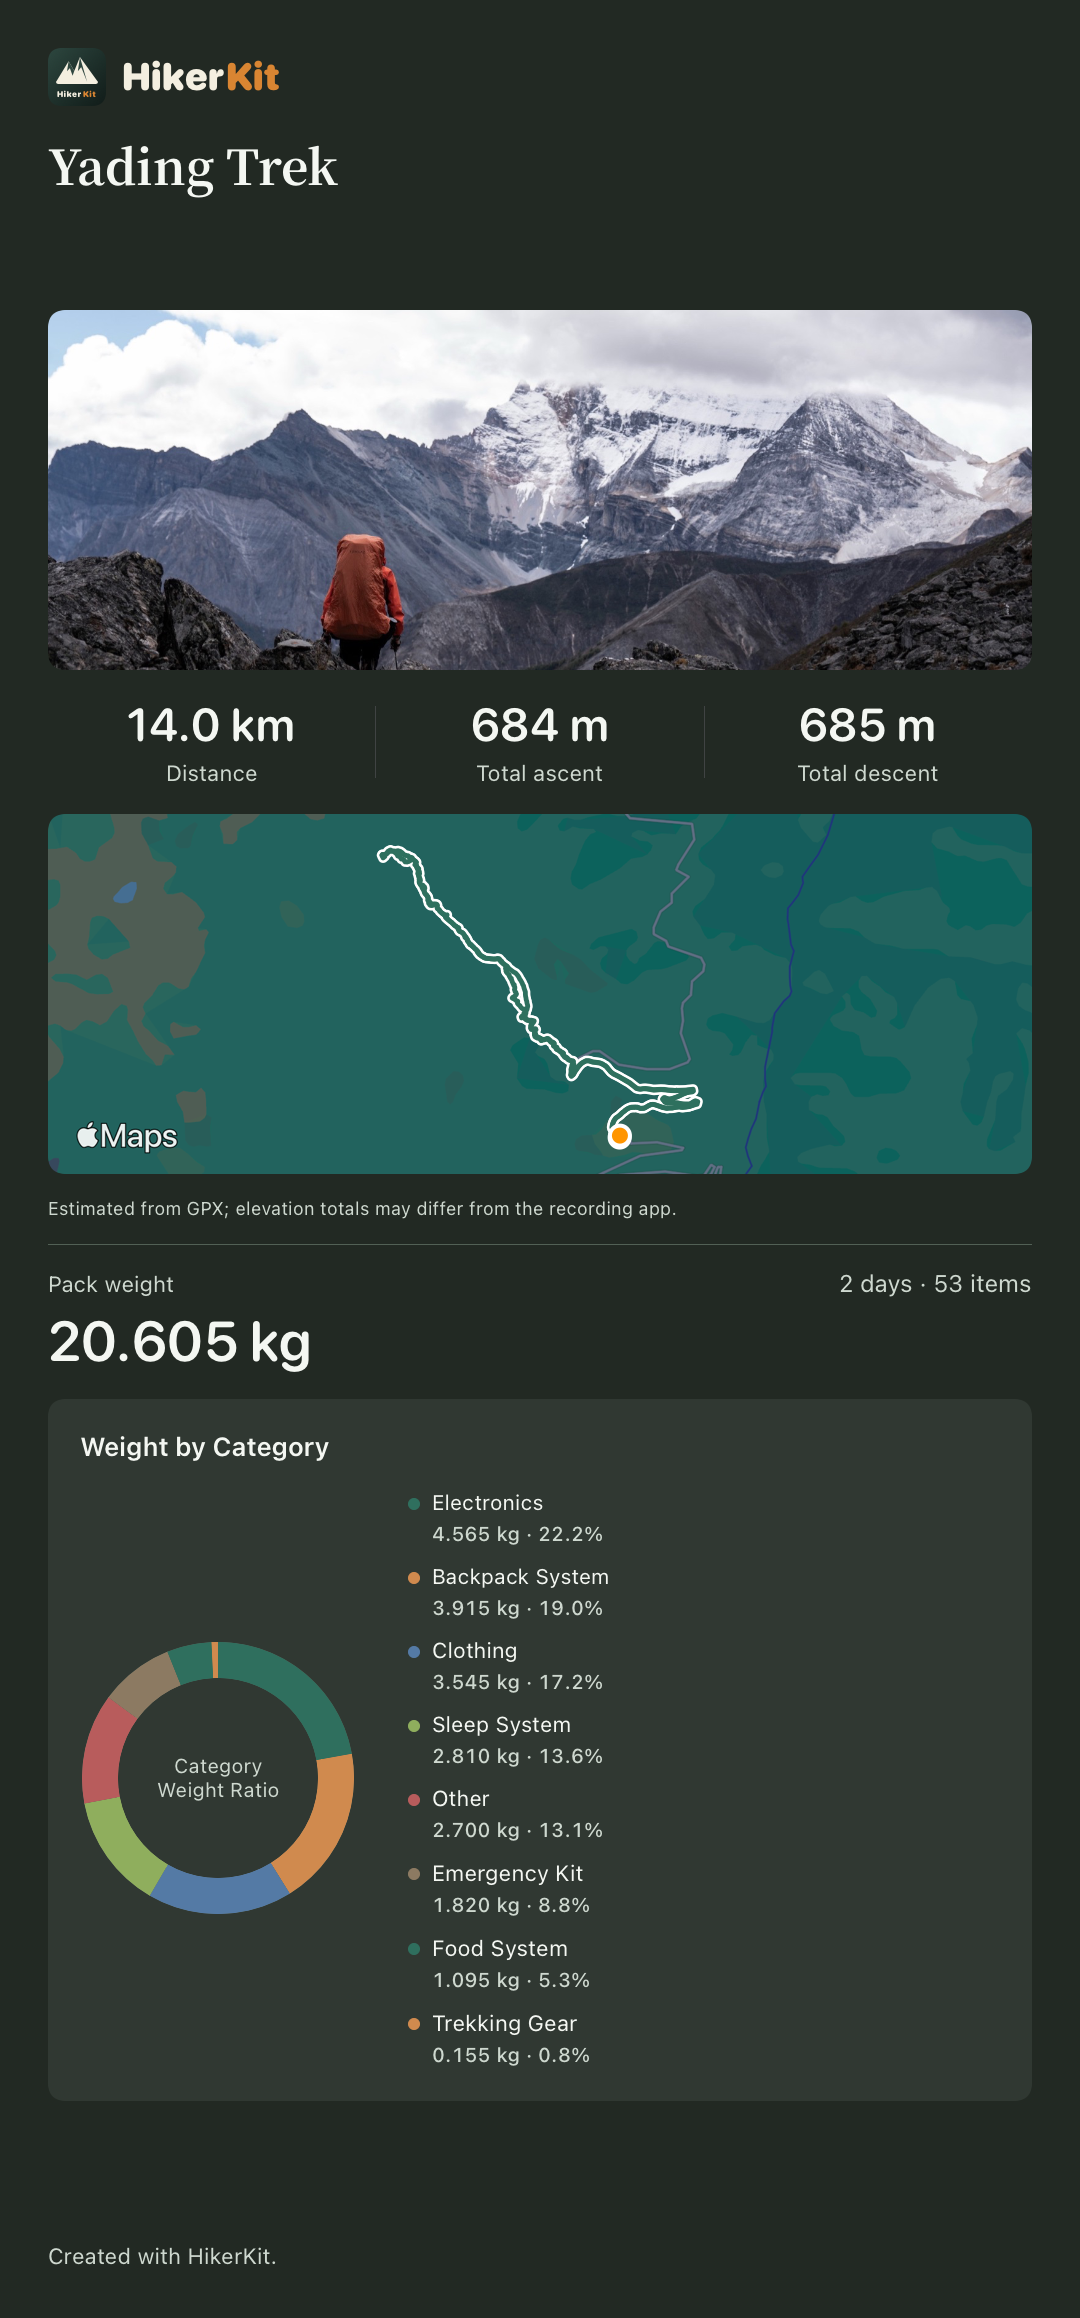
Standard terrain background
The standard background helps show the route in relation to the surrounding terrain. Wait for the map to load and check the line, endpoints, and readability. This is another background for the same GPX rather than a different route.
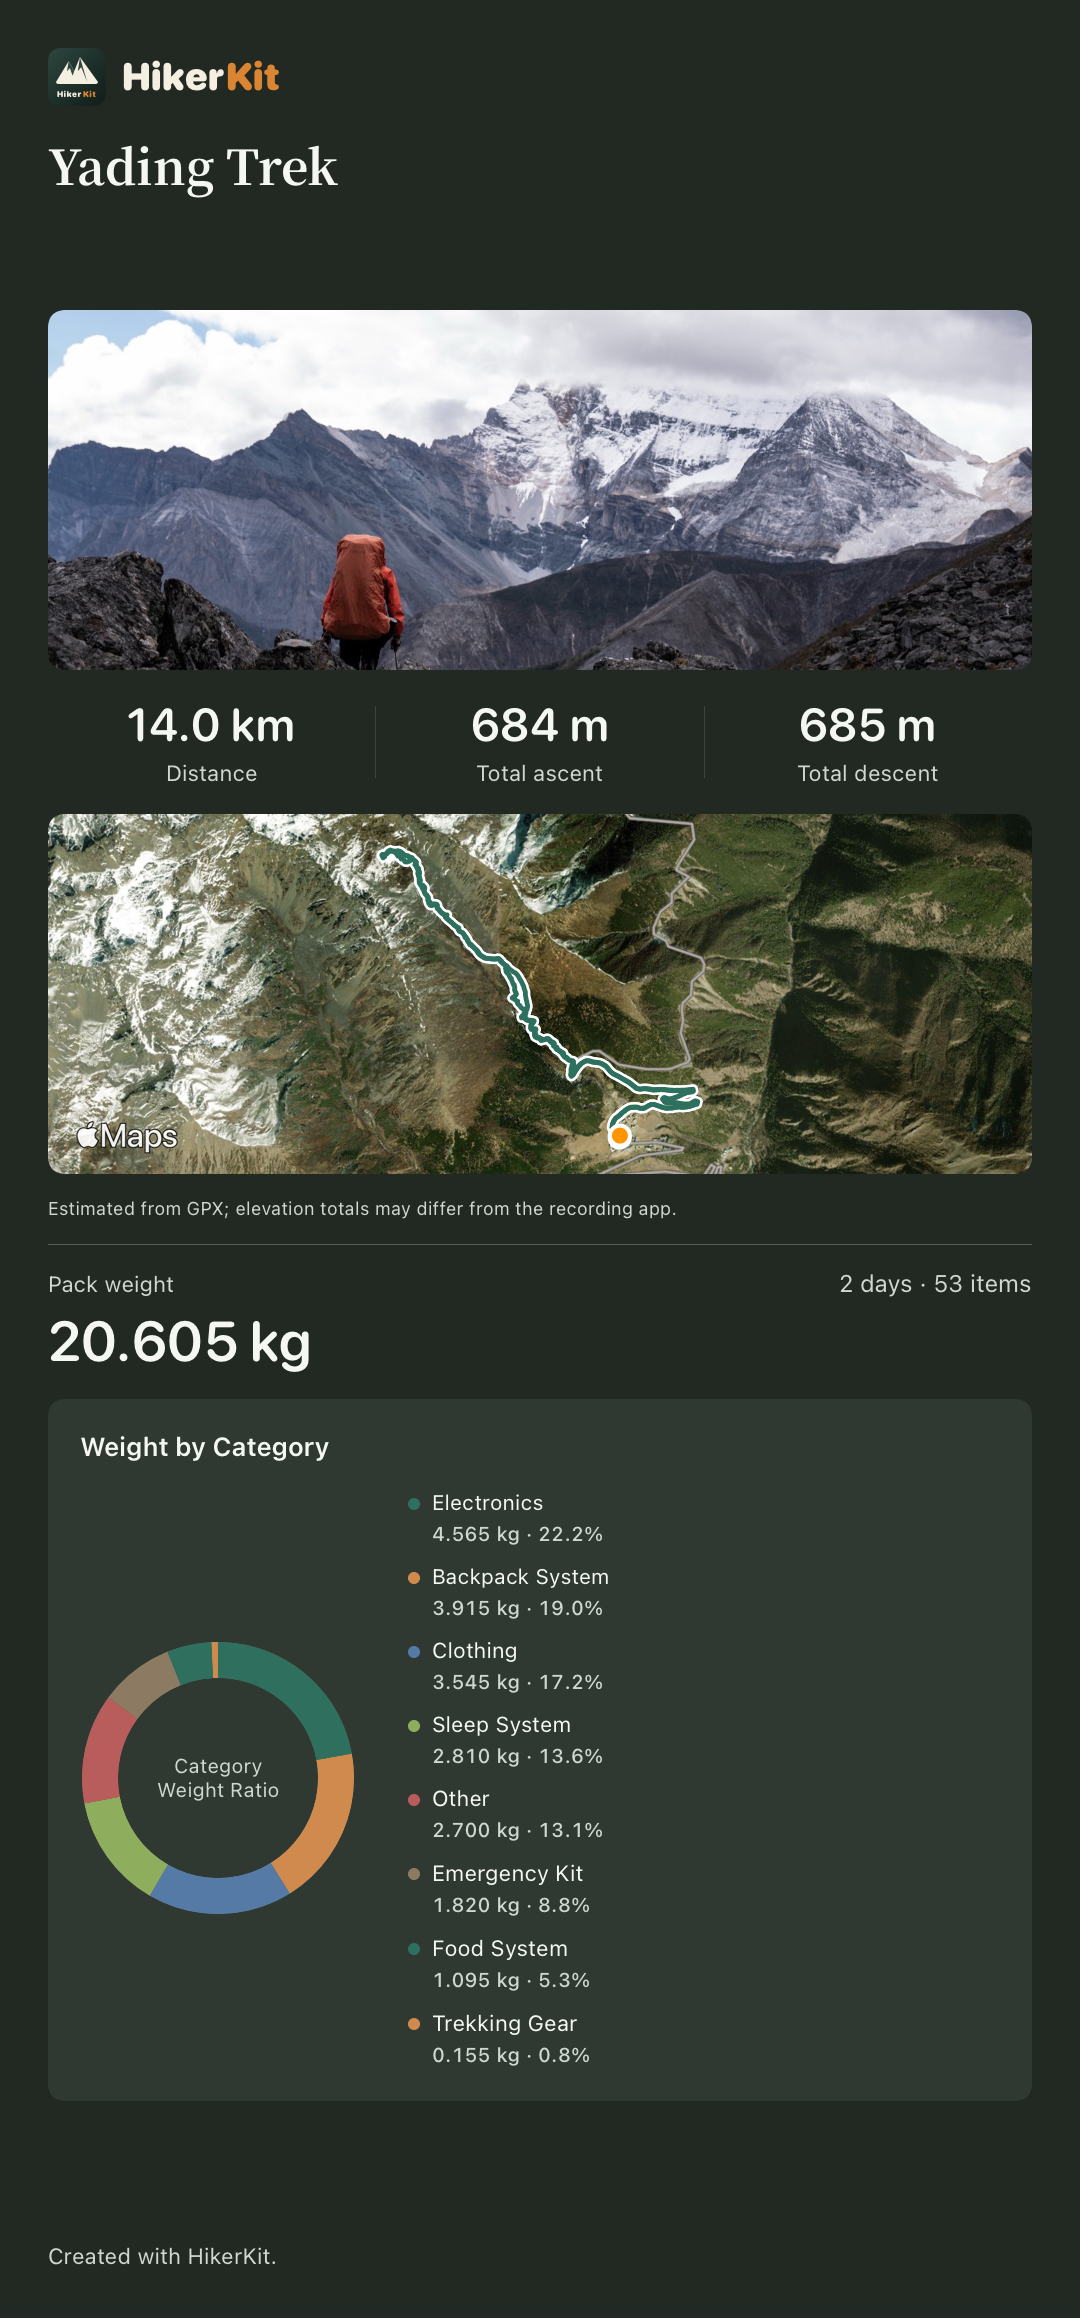
Satellite background
Satellite imagery shows surface texture. Dark terrain or shadows can reduce contrast with the track, so inspect the preview before saving. Standard and satellite backgrounds use the system map service; contours use elevation data. Network, service availability, and system caches affect loading, and offline coverage is not guaranteed.
Step 6 Save the settings and actual image
Choose “Light Image” or “Dark Image” for a light or dark exported image. Review the photo, dates, text, route, equipment, and weight basis. Save at the top retains the card settings; Save to Photos at the bottom generates an image. This demonstration reports one image saved to Photos. Its actual 1080×2318 PNG summarizes the 53-entry configuration and shows a pack weight of 20.605 kg. The dark contour card uses an independent export color choice within the light app interface.
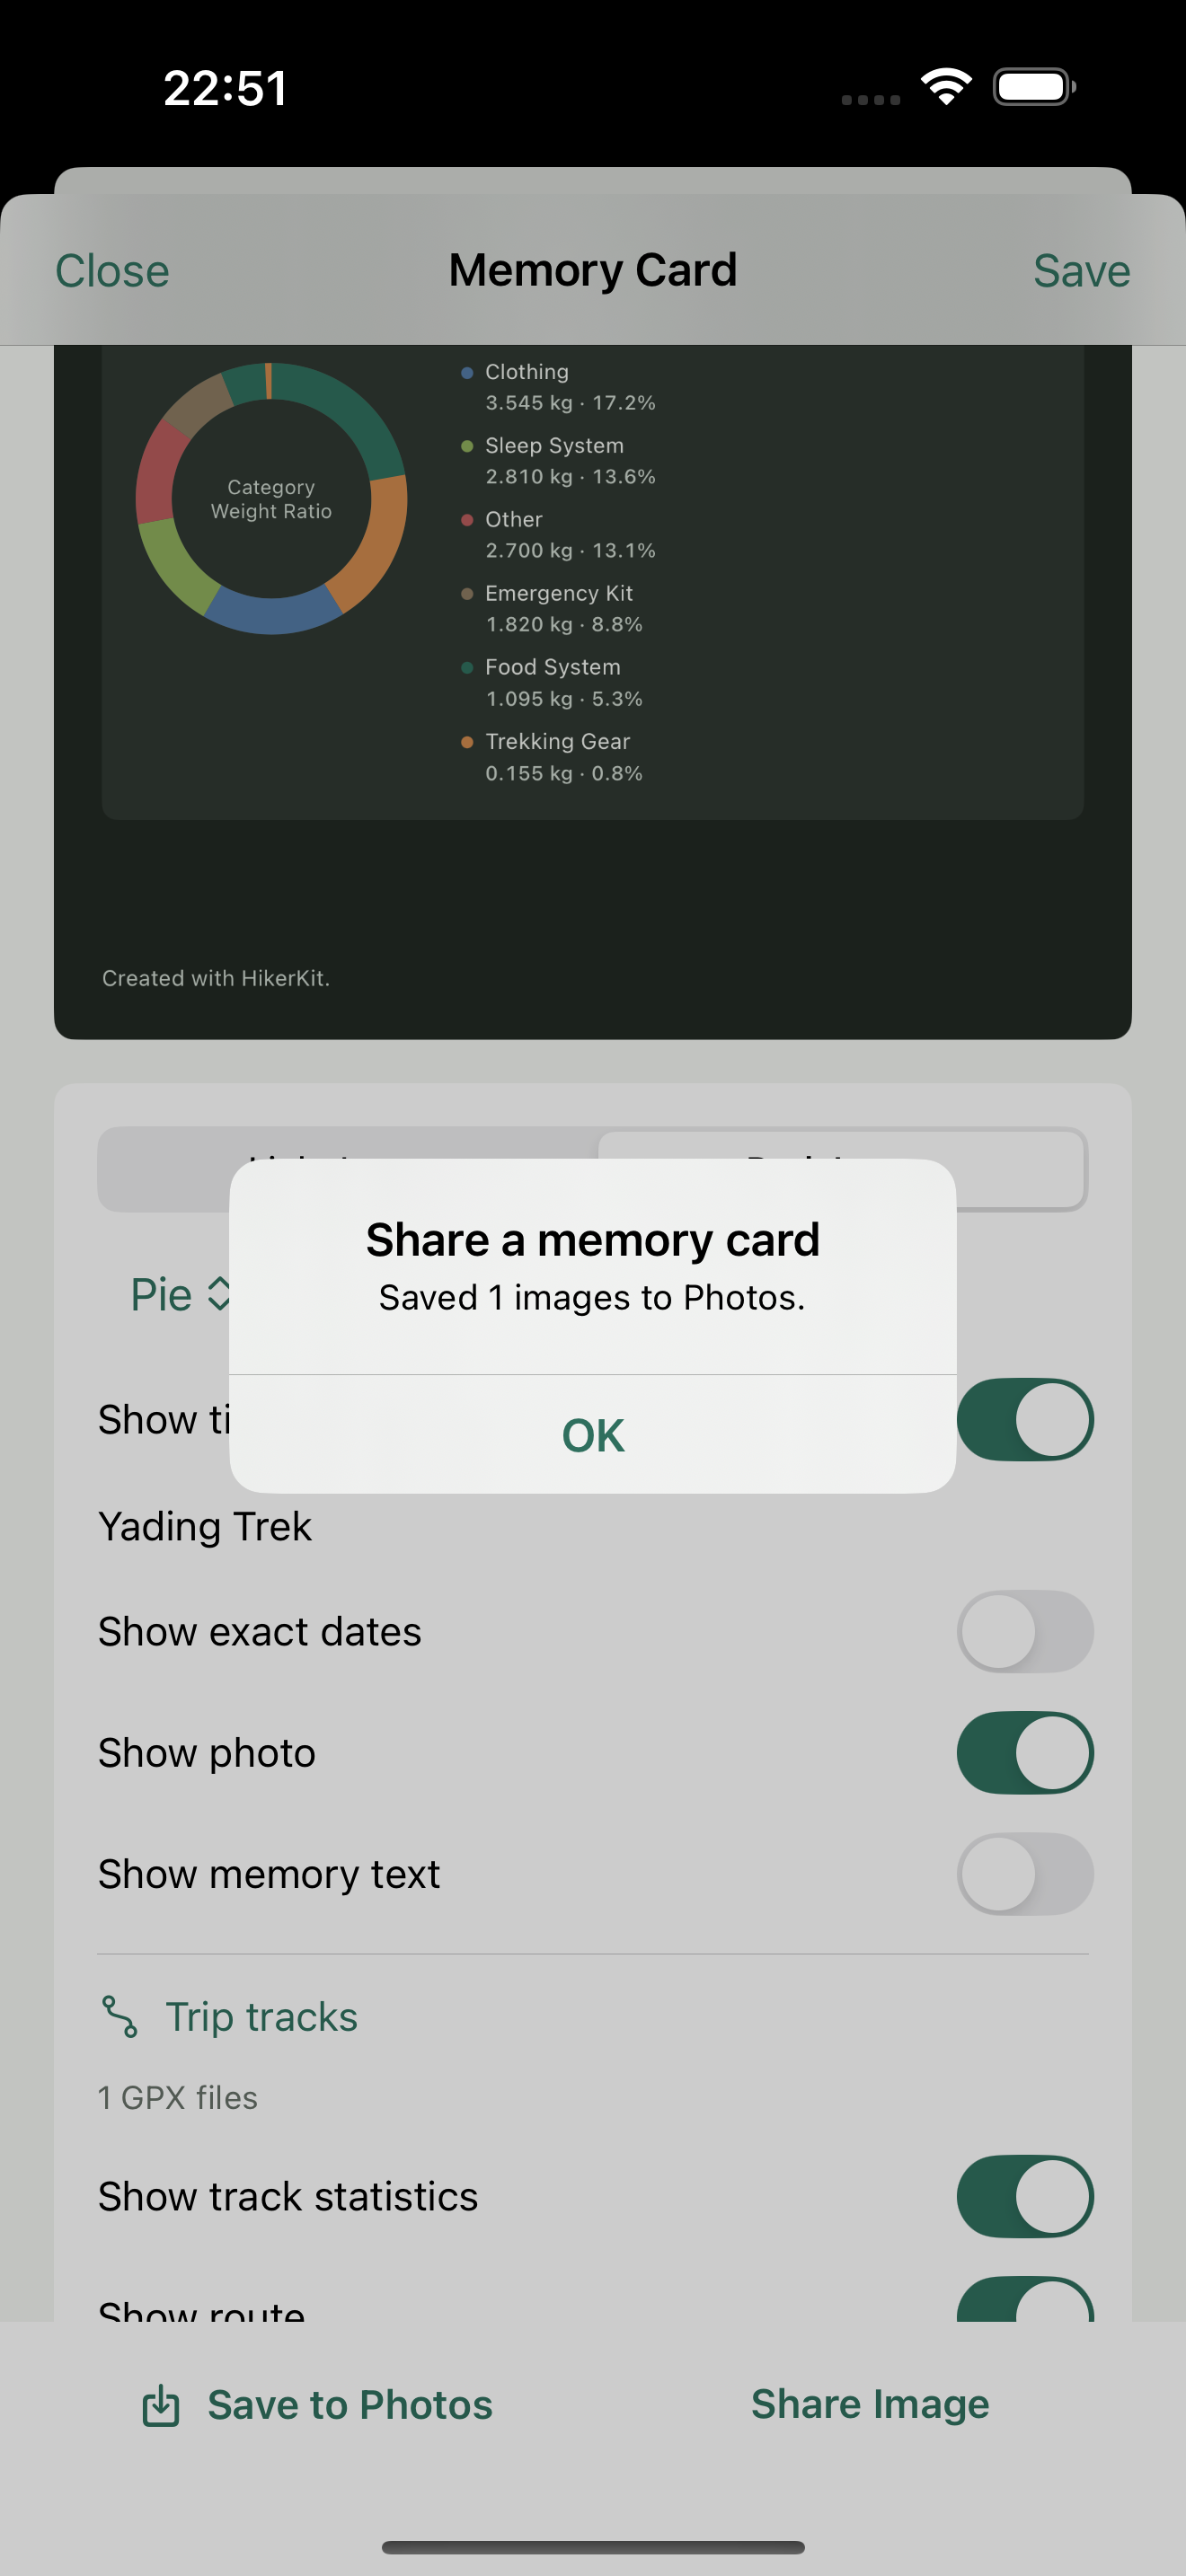 Dark contour memory card: saved to Photos
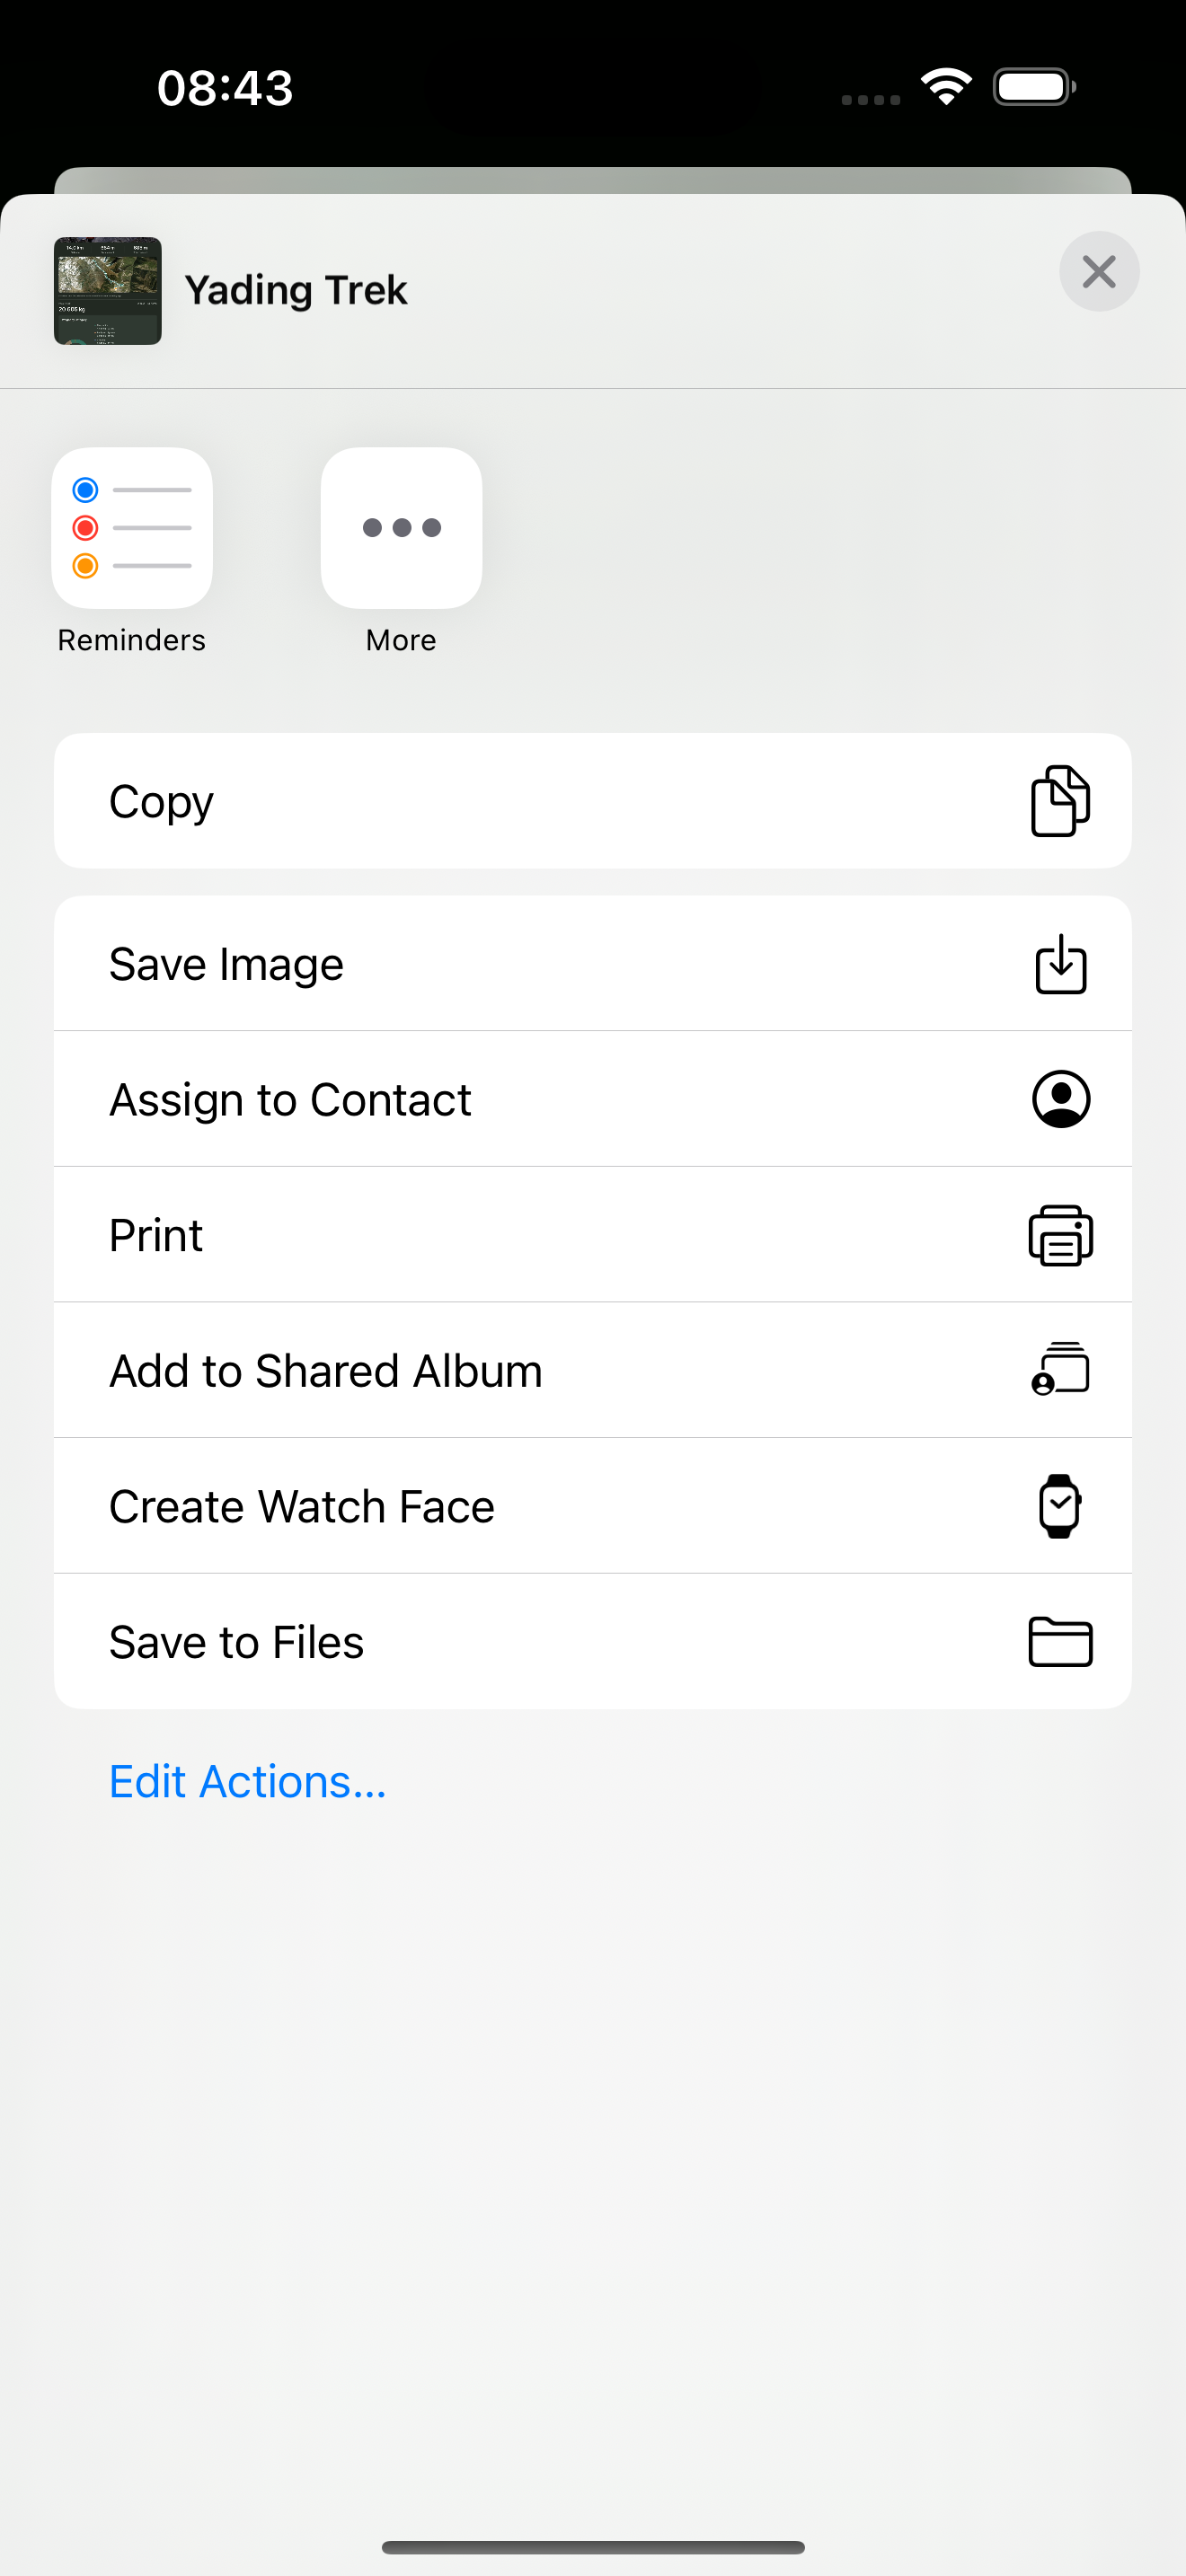 Satellite memory card: system share sheet
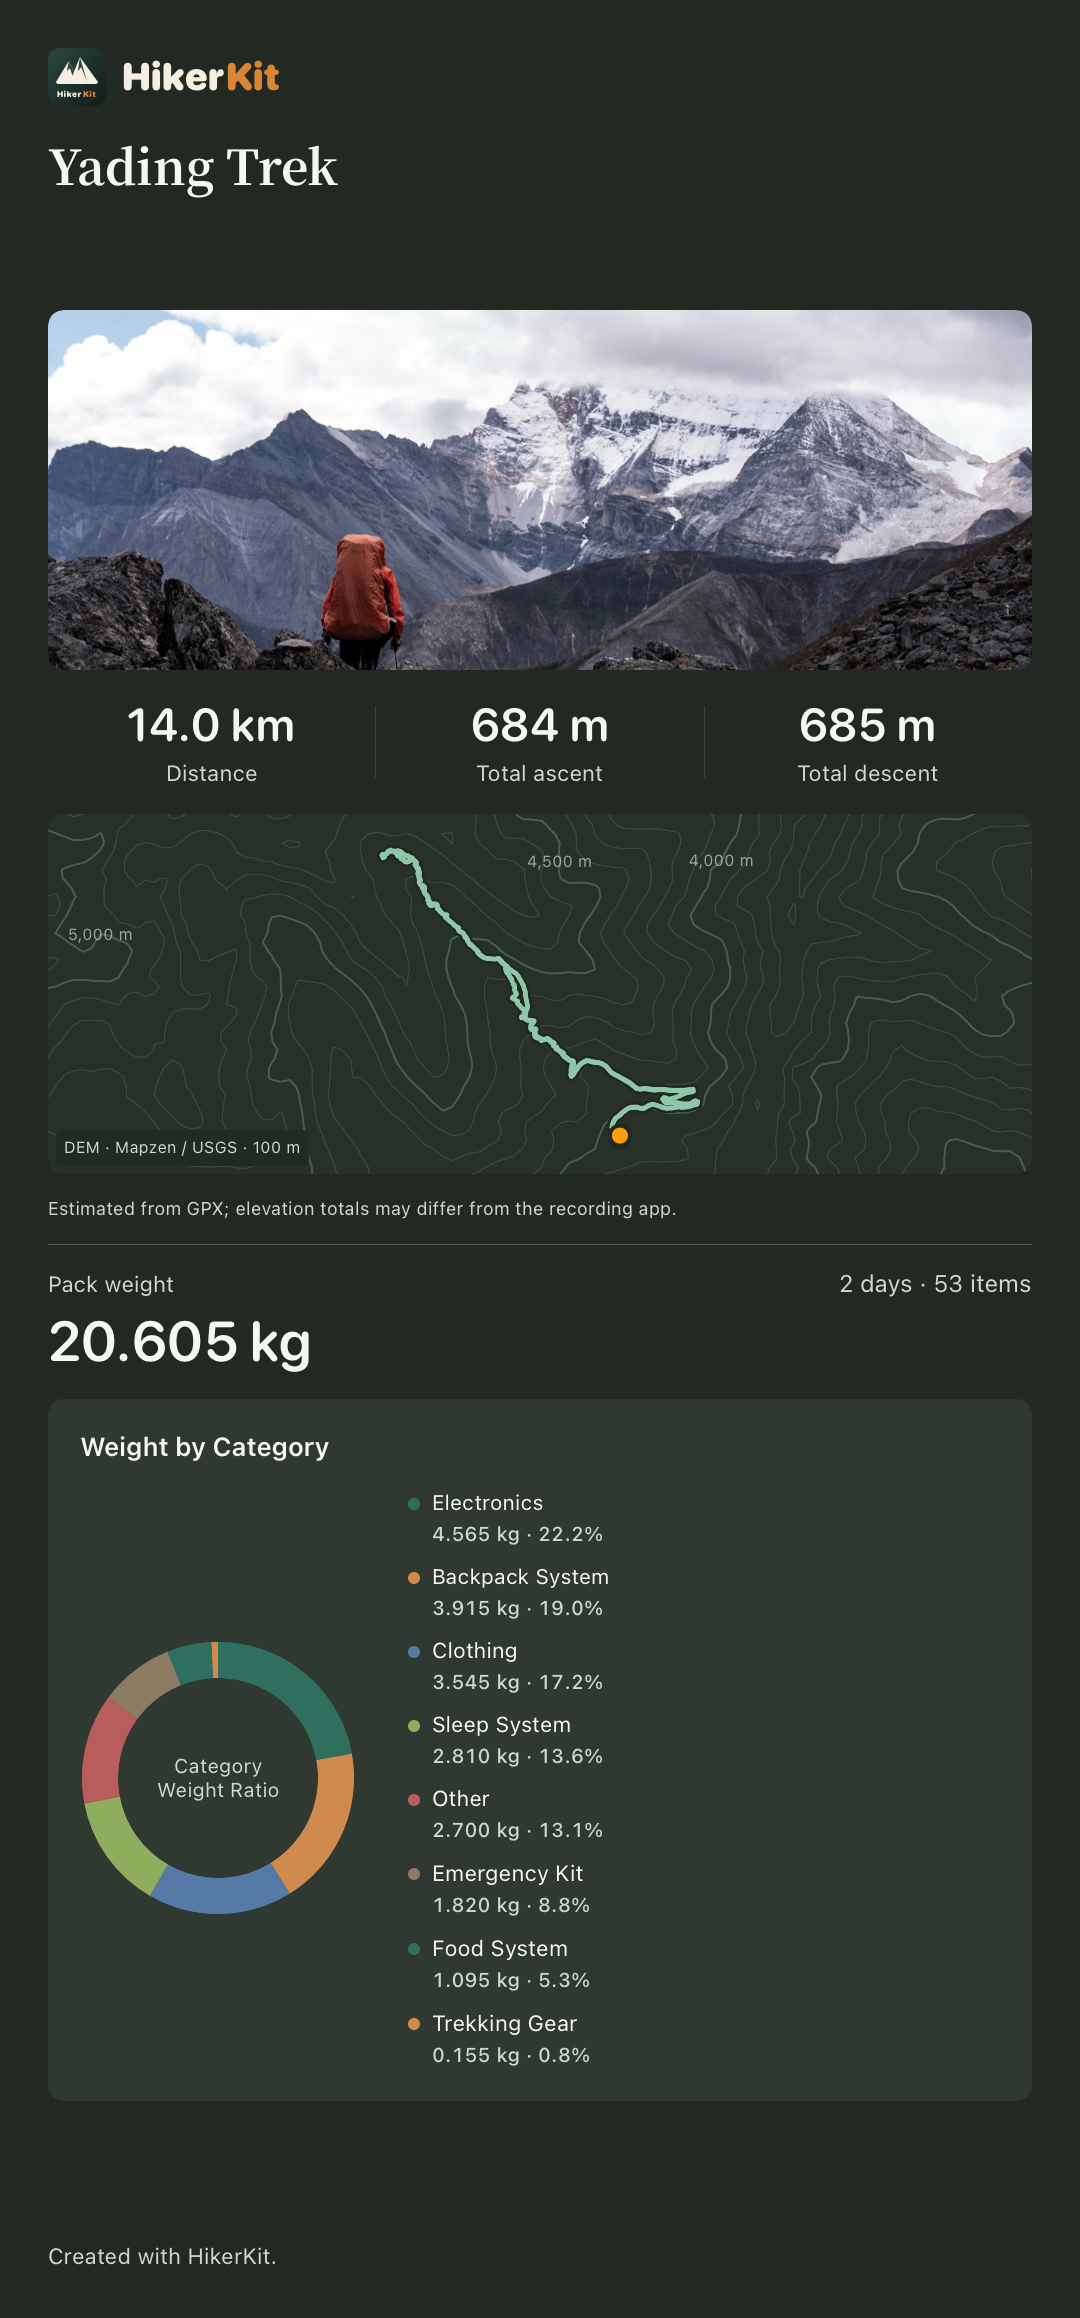 Actual dark contour memory-card PNG
Share Image opens the system share sheet, where you can choose a destination or recipient. The demonstration opens the sheet without sending. Trip memory’s shortcut uses the saved card settings. Check the final image before publishing; hiding its date does not prevent a photo or route from revealing a location.
Frequently asked questions
Can I complete a trip without GPX or a photo
Yes. Those details are optional; you confirm the dates and completion. A photo cannot supply valid track distance for a trip without GPX.
Does changing the map alter distance or ascent
The map is a background for the same imported track. Read statistics from the actual GPX preview and valid-data coverage rather than treating a background change as a route change.
Why did a route disappear after I saw it in the preview
Check whether you saved on the track screen. Previewing, saving tracks, retaining card settings, and saving an image are separate steps.
What should I check when an import fails or statistics are missing
Check that the selected file is a valid GPX for this outing, then read the preview’s error and file list. A recording that did not parse successfully cannot be treated as saved. Ascent comes from valid segments with elevation data; a missing value is not evidence of zero climbing.
Is hiding the date enough before publishing
Review the photo, memory text, and route too. Terrain, buildings, or endpoints can still reveal a location. Keeping card settings does not automatically anonymize that information.