
A useful packing list starts with information you can reuse. The weight of a rain jacket, the number of spare batteries, and clothes worn on your body can live in the gear library, while each trip holds the choices for that outing. This tutorial starts by checking existing gear, then takes you through opening an unfinished trip, selecting items and quantities, checking the worn-weight setting, marking packing progress, and saving a readable checklist image.
The gear library and trip checklists are established HikerKit features. Version 2.0 adds flexible carried quantities, pounds (lb), and historical gear snapshots when a trip is completed. The real demonstration uses an existing Yading trip. The library’s 72 records and the trip’s 53 checklist entries describe different scopes.
This walkthrough uses the English interface and the Yading Trek demonstration. Counts and weights describe the illustrated configuration.
What to prepare
Have an existing gear library and one unfinished trip. If you are starting from an empty library, use the plus button in Gear to enter the items you need, including a name, category, weight, and unit, then save. Use the plus button in Trips to create a trip. The tutorial below starts with existing records, checking them before selecting them for this trip.
Weigh each item in the state you will pack it. Check whether the camera includes its battery, the tent includes its stakes, or the storage bag is part of the measured weight. Record accessory details in the notes. A model or color can distinguish two rain jackets, and complete kits should not overlap with separately listed components.
HikerKit supports g, kg, oz, and lb. A value of 250 g represents the same weight as 0.25 kg. Changing units does not reduce the physical load. Check units and quantities before correcting a surprising number.
Step 1 Find existing gear and check its details
- Open Gear to reach Gear Library and browse the existing items.
- Narrow the list with the category filter at the top left, or enter part of an item’s name in search.
- Open its details and check the name, category, single-item weight, and library quantity. Use Edit if the reusable information needs correcting.
- Return to the list and make sure you can find the item before choosing gear for the trip.
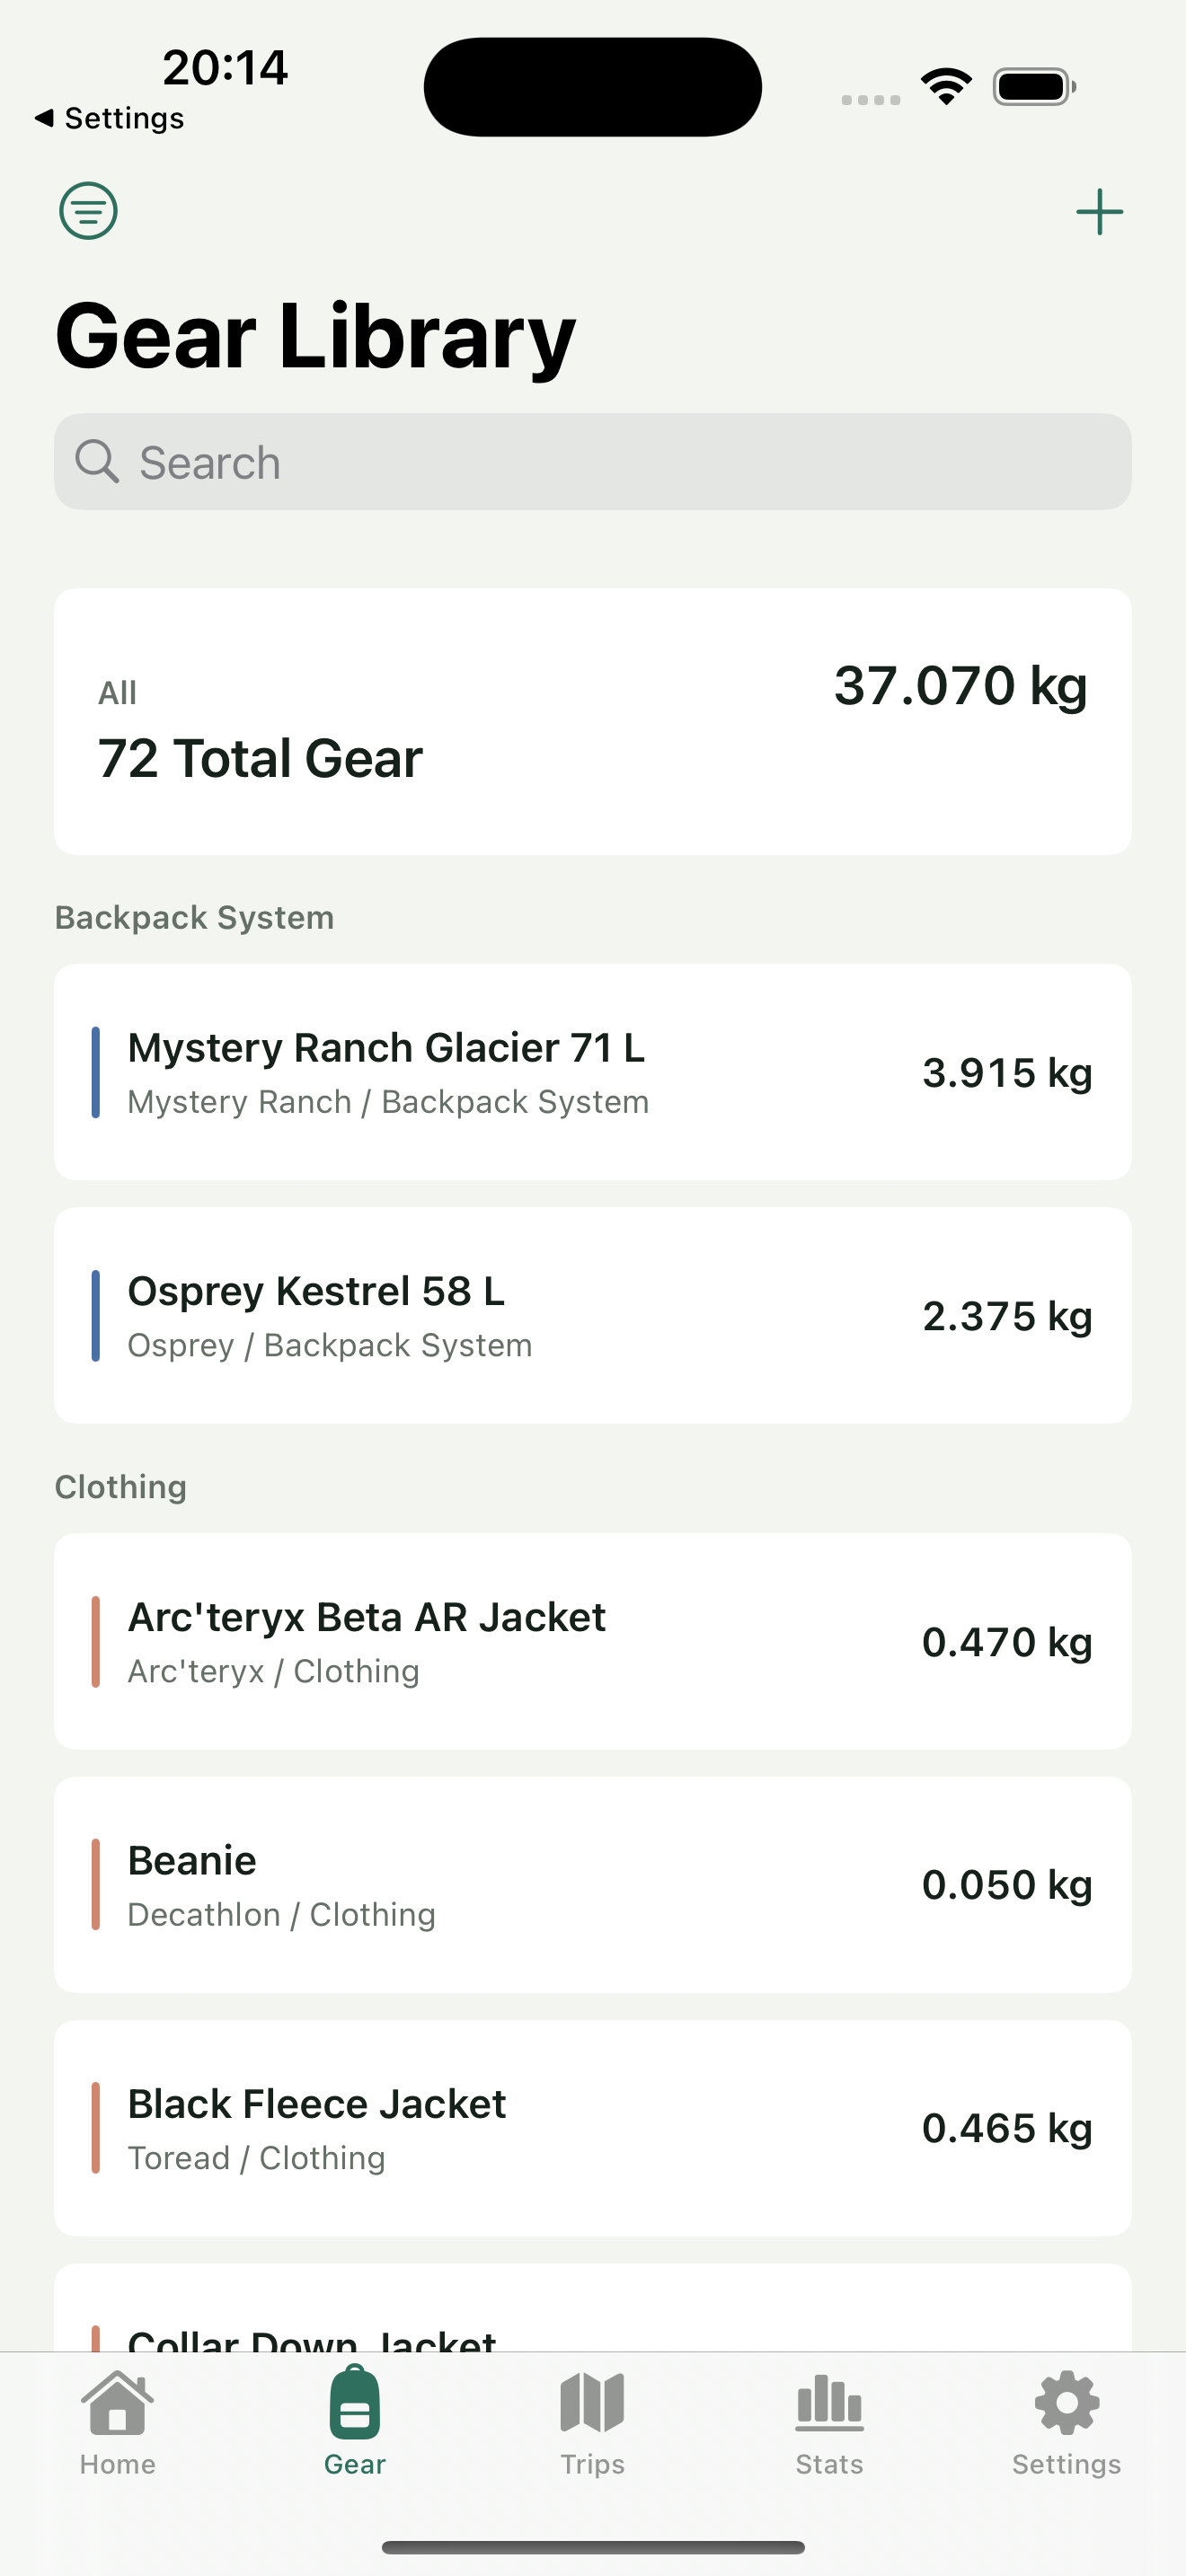
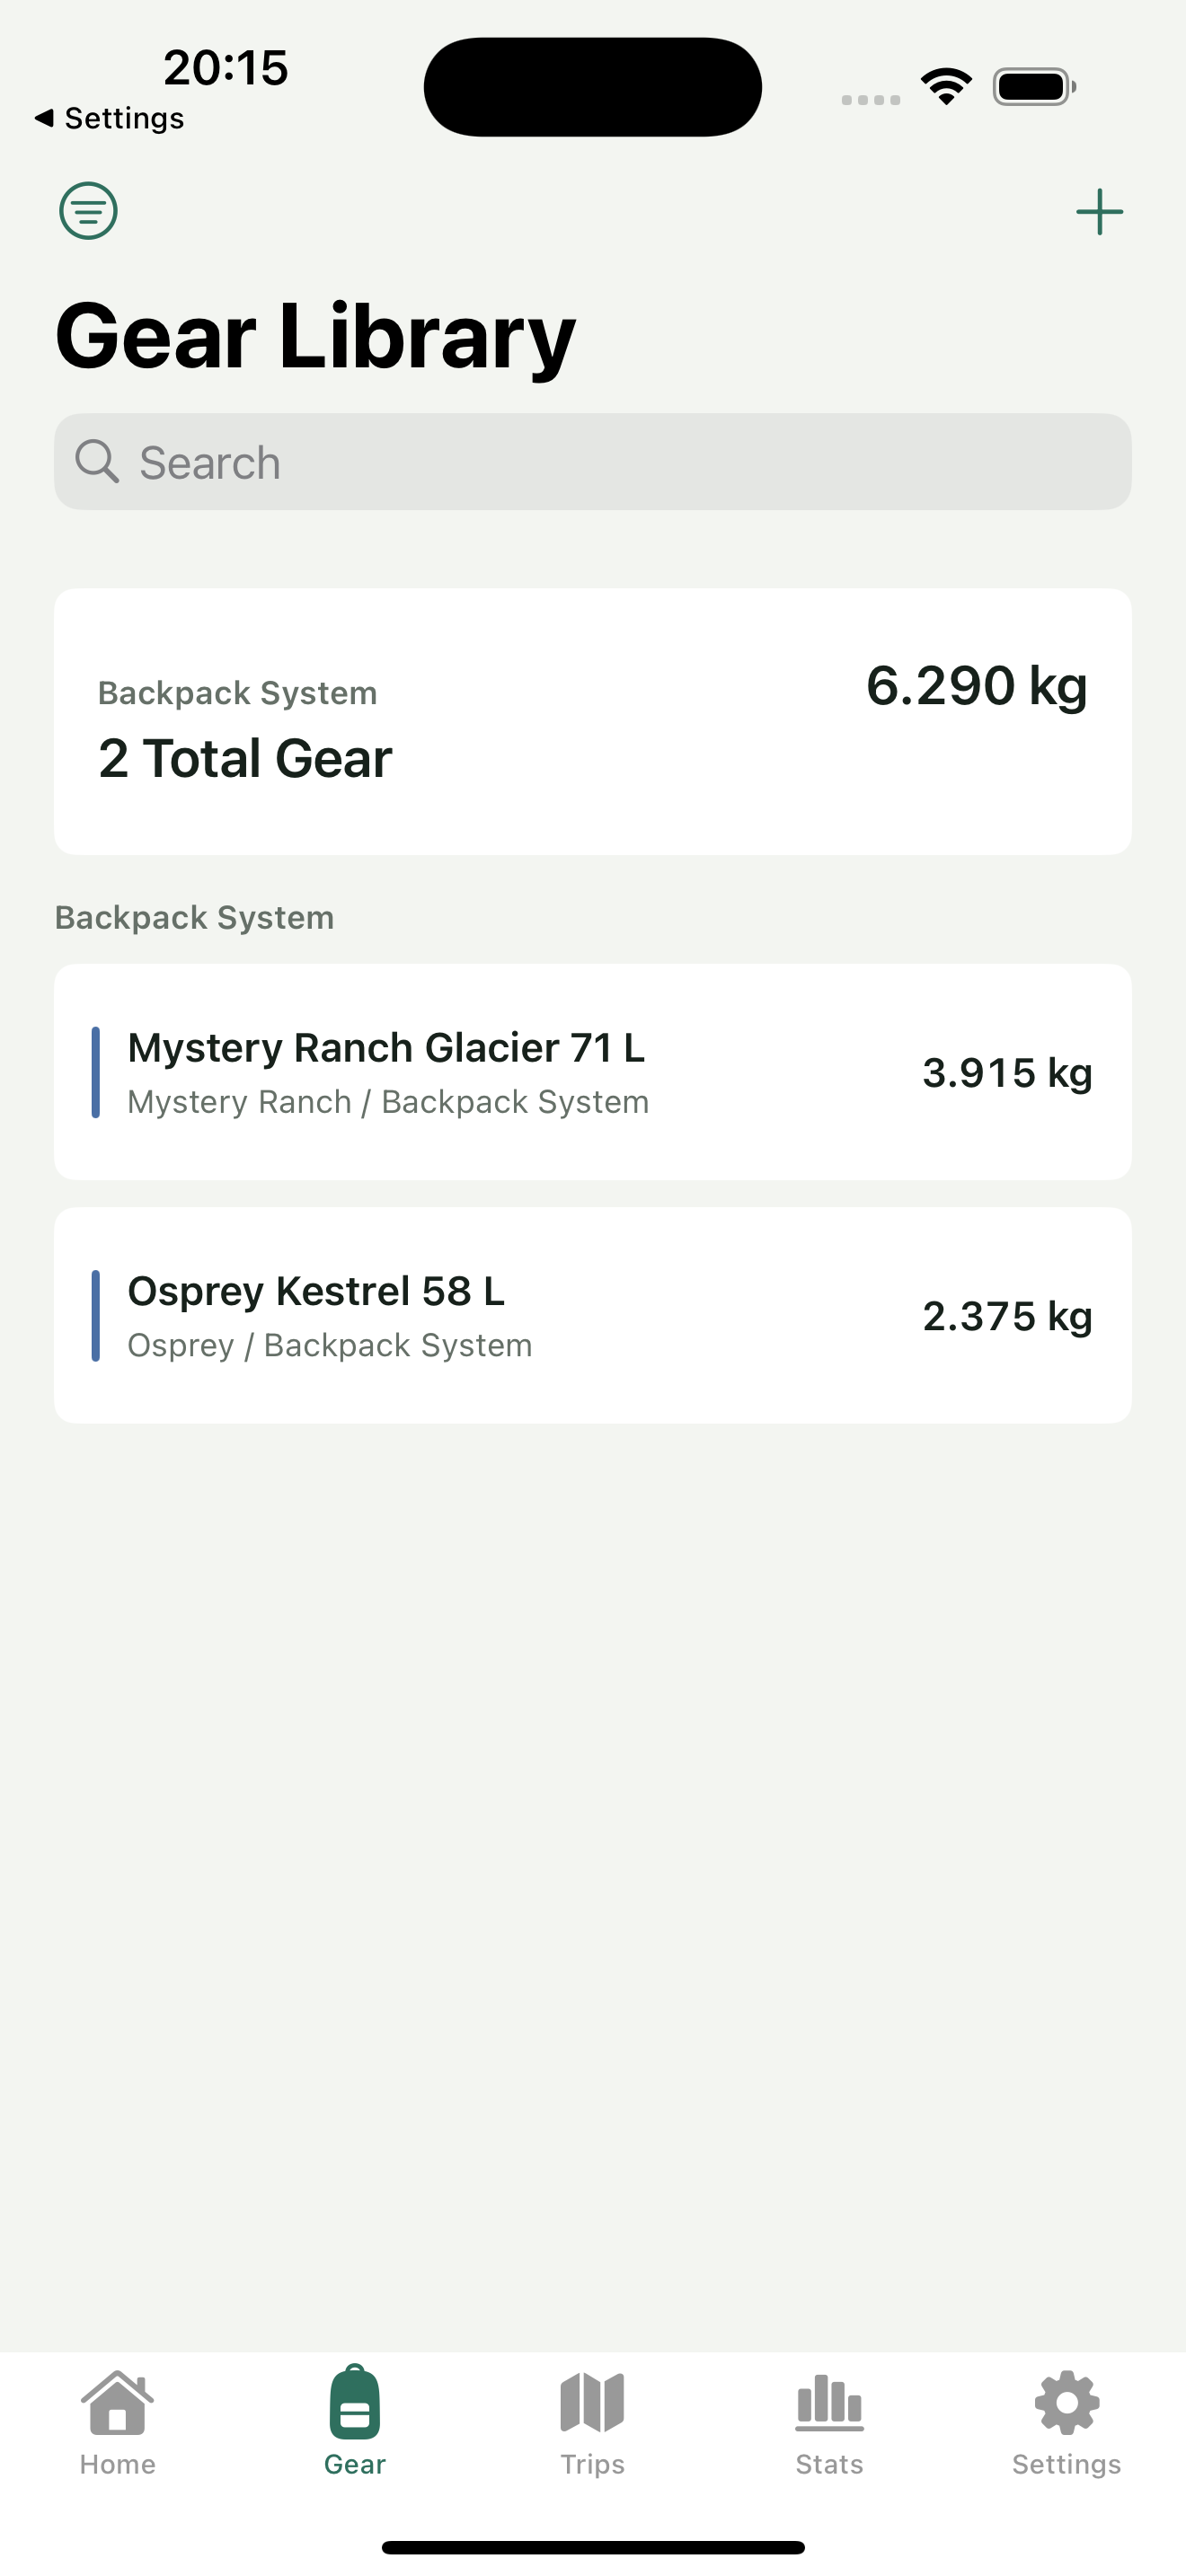
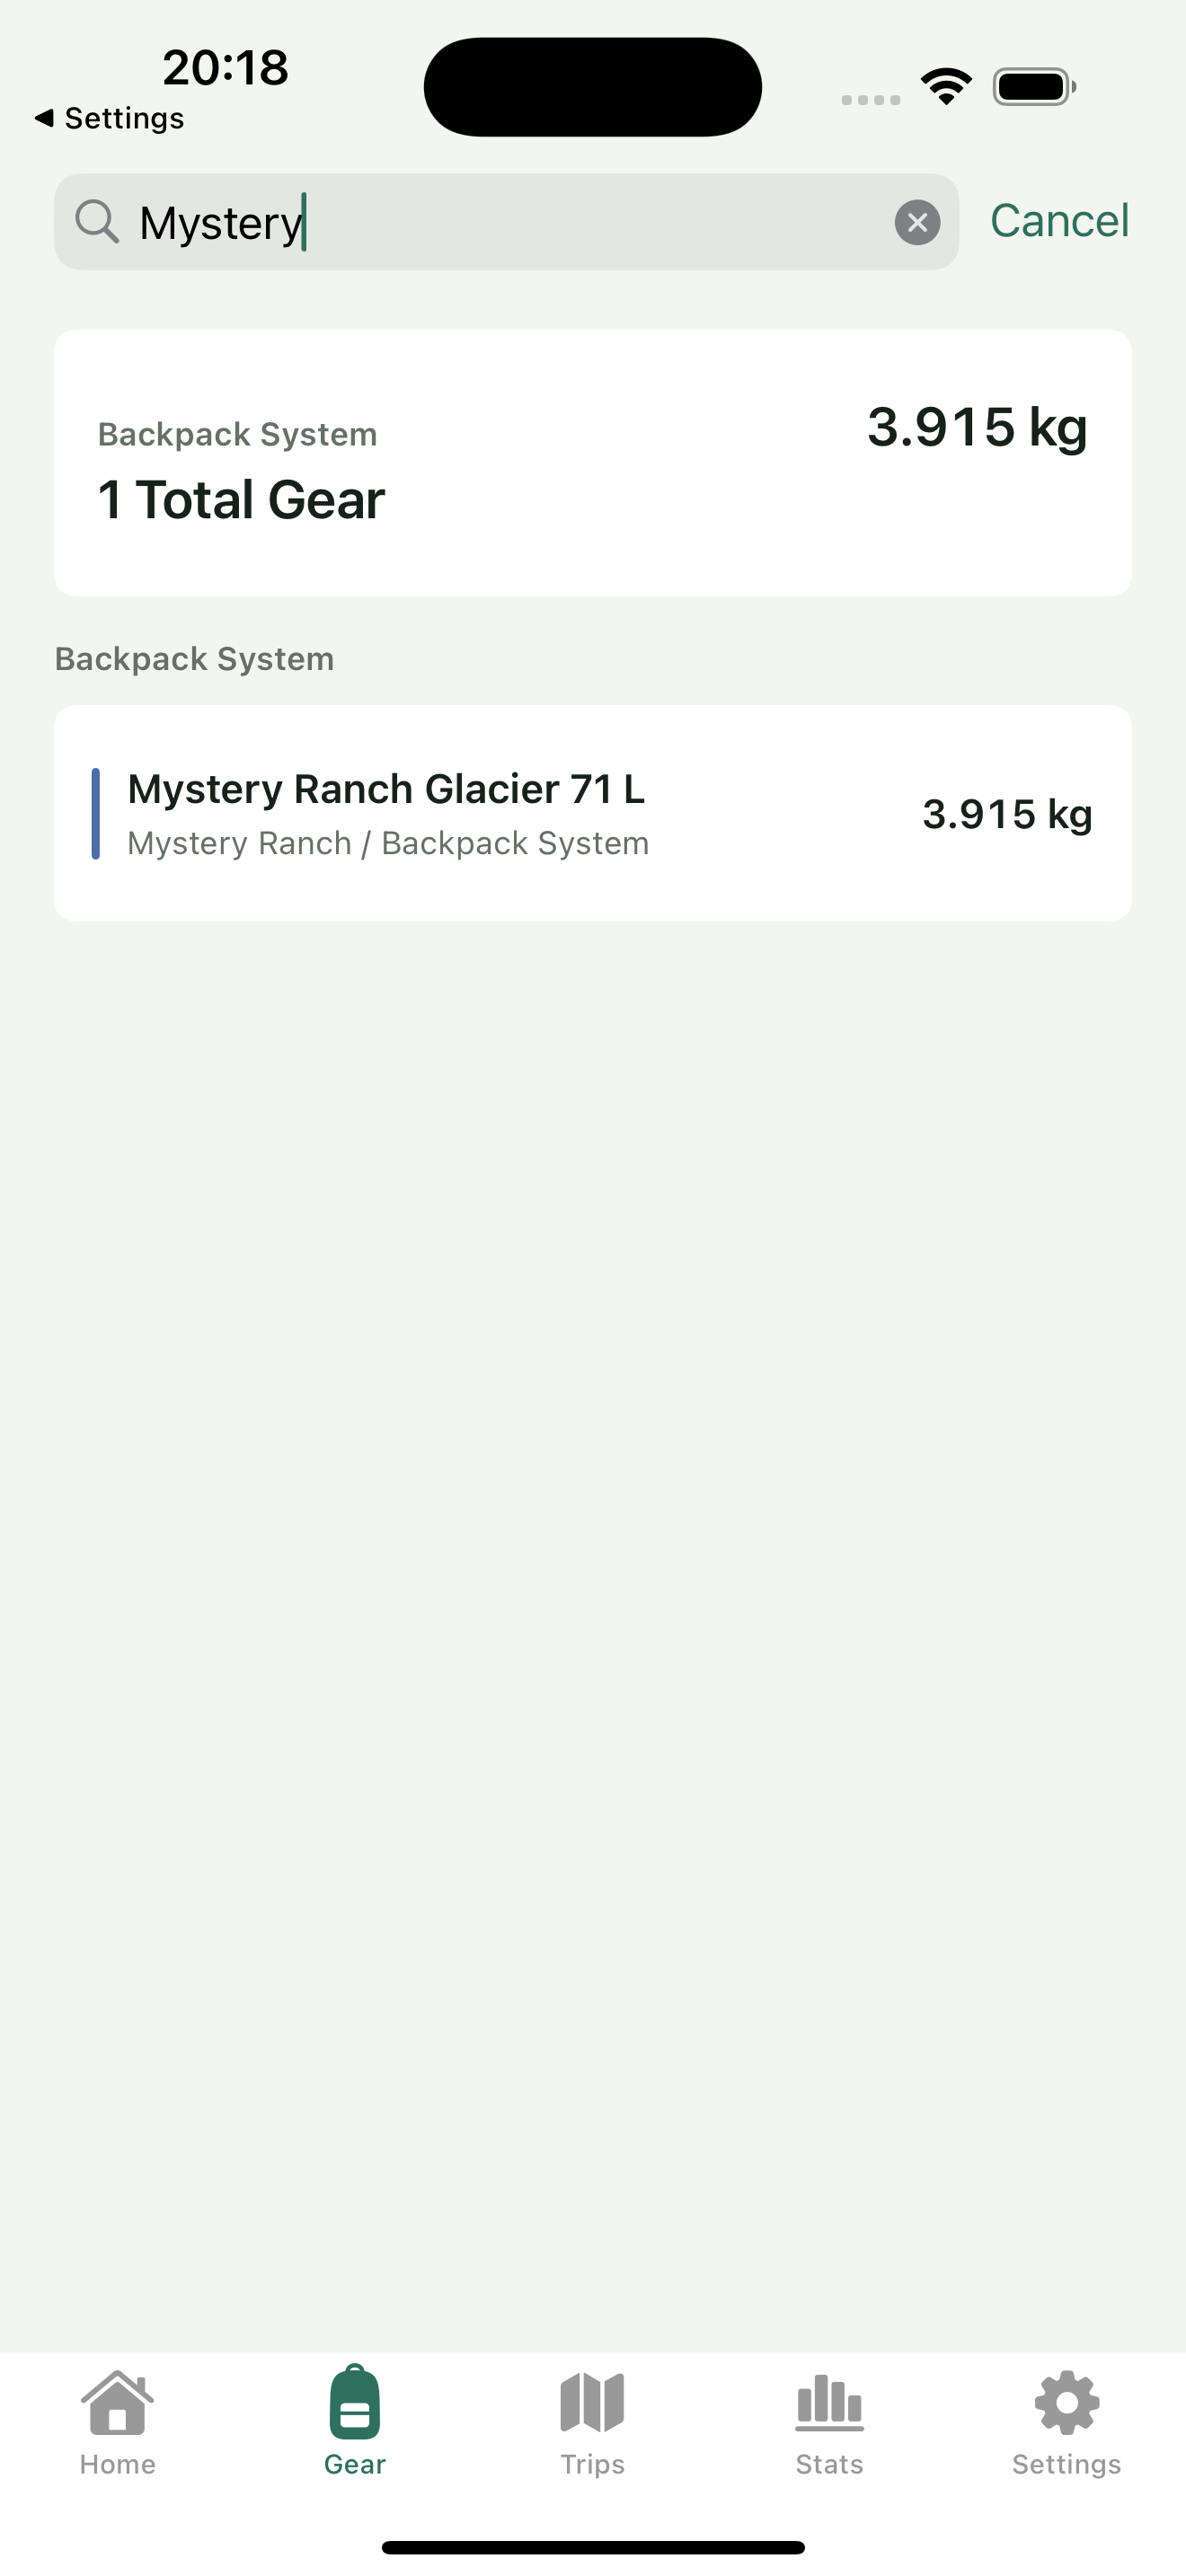
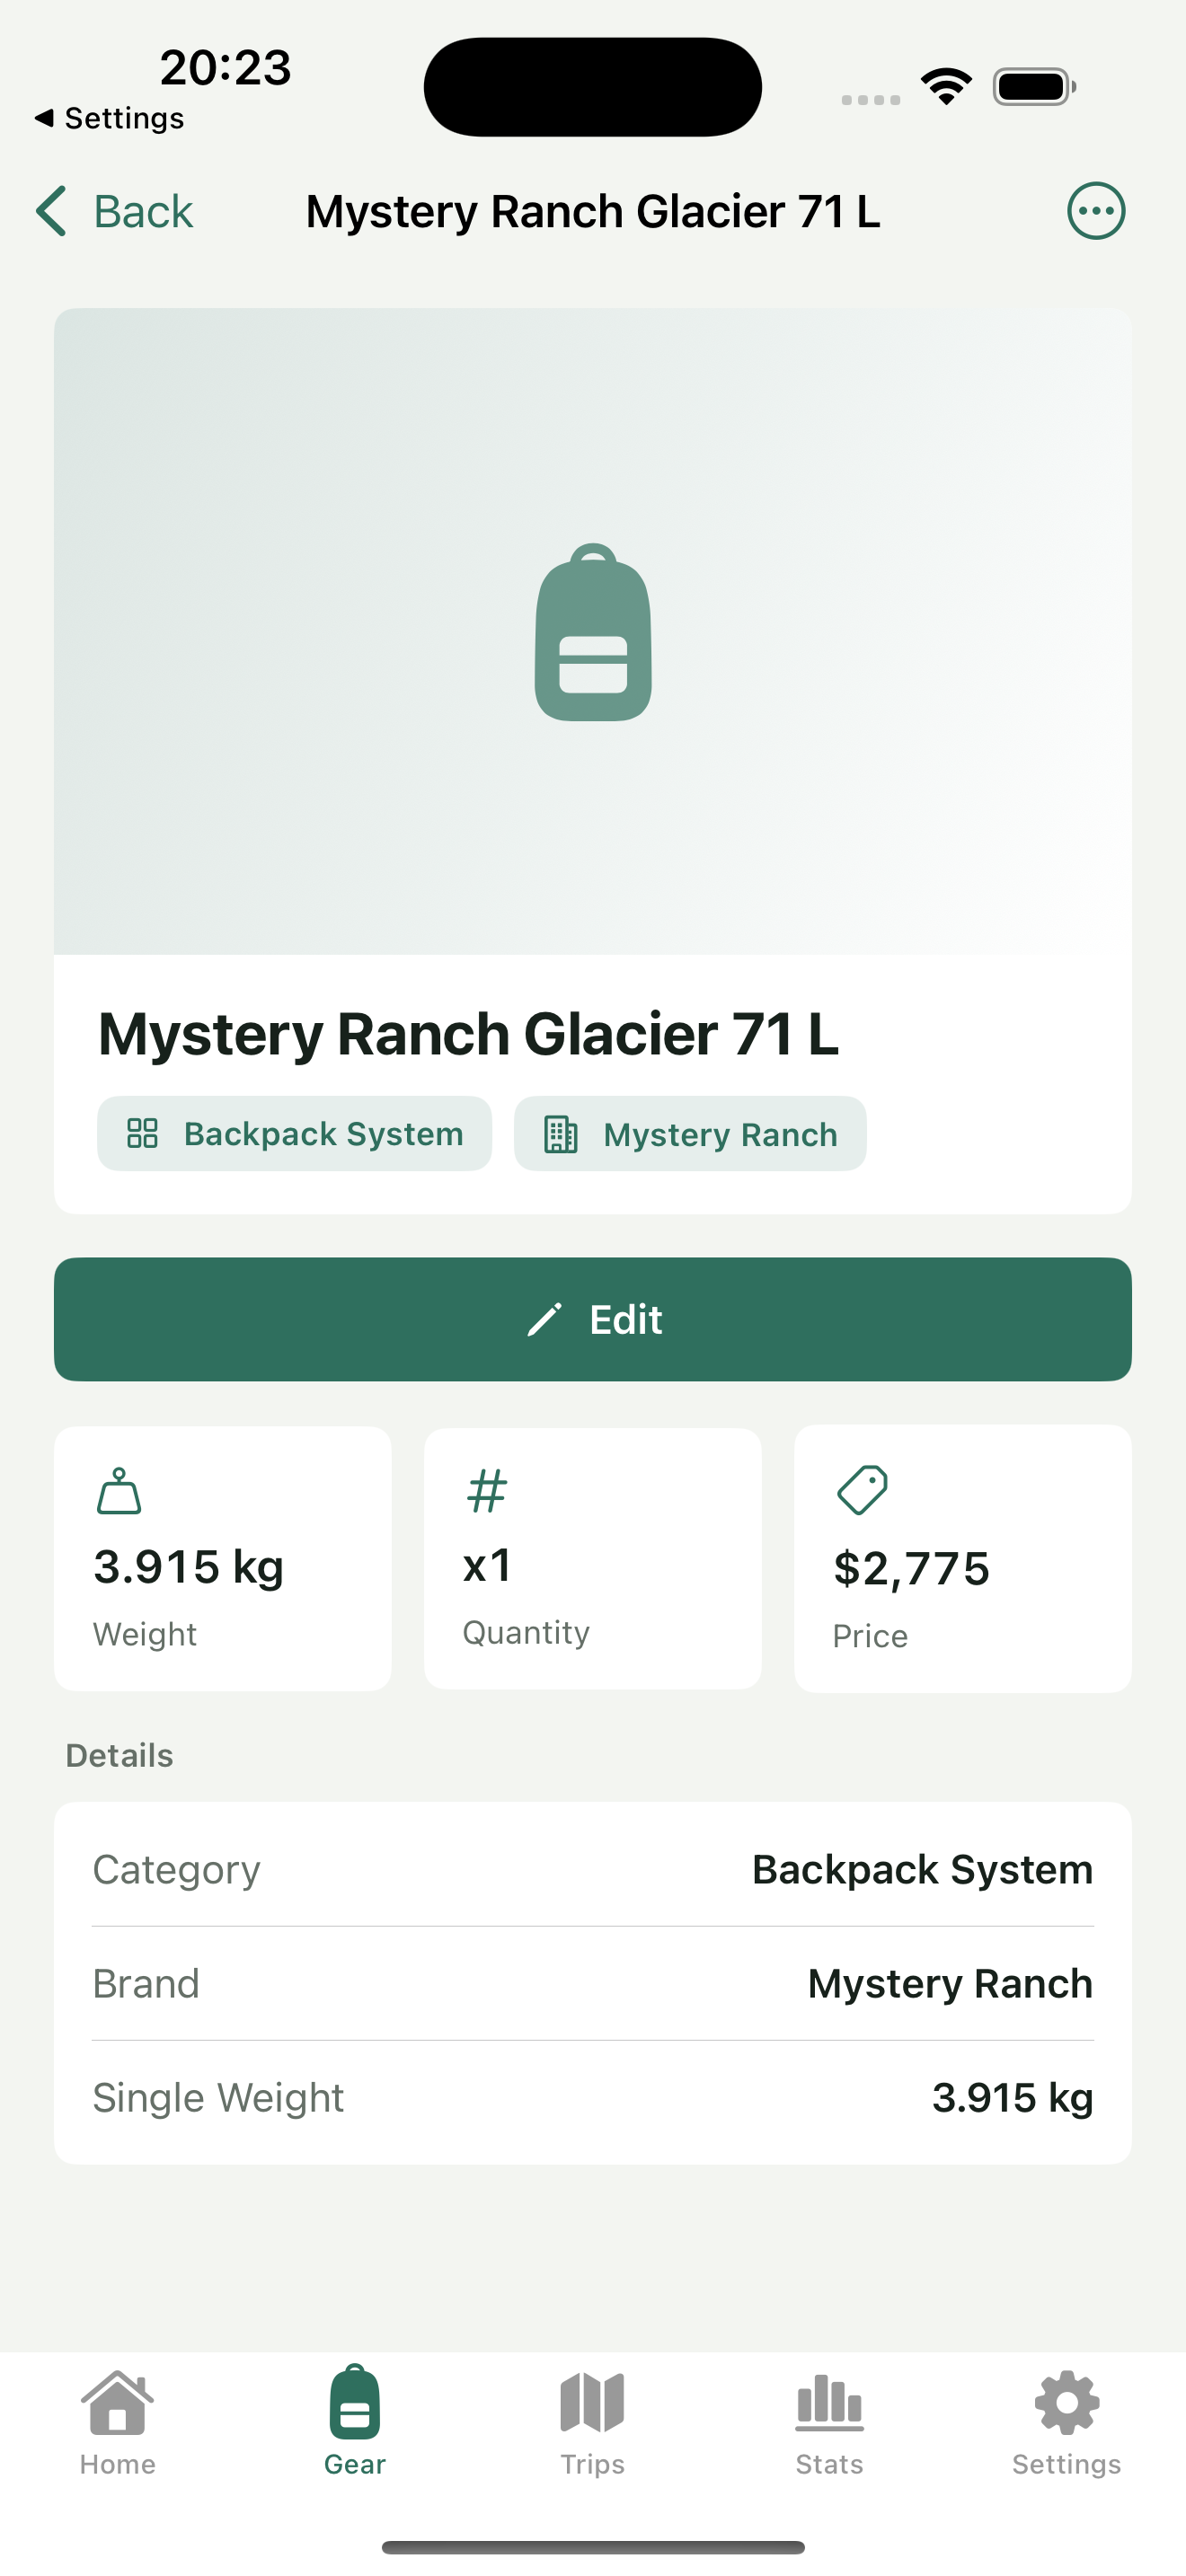
The example first checks the backpack named “Mystery Ranch Glacier 71 L,” then uses GoPro 8 to demonstrate carried quantities. They are different items. The “1 Total Gear” count and weight shown after searching describe the current filtered result, not the whole library or a trip.
The library holds reusable information. Owning an item does not mean carrying it on every outing, and its library quantity does not replace the quantity selected for a particular trip. A day hike, overnight camp, and photography outing can use different selections from the same records.
Step 2 Select trip gear and set carried quantities
- Open Trips and choose the unfinished trip you intend to pack. Check its name before changing the checklist.
- Tap the trip’s plus button, find the items you need in the library, select them, and check the selected state.
- Use the plus and minus controls on the selection screen to set carried quantities. Here, GoPro 8 is set to two, with a combined weight of 0.310 kg.
- Tap “Add” at the top to add the selection. Back in the trip, check the new entry, quantity, and total. Staying on the selection screen does not complete the addition.
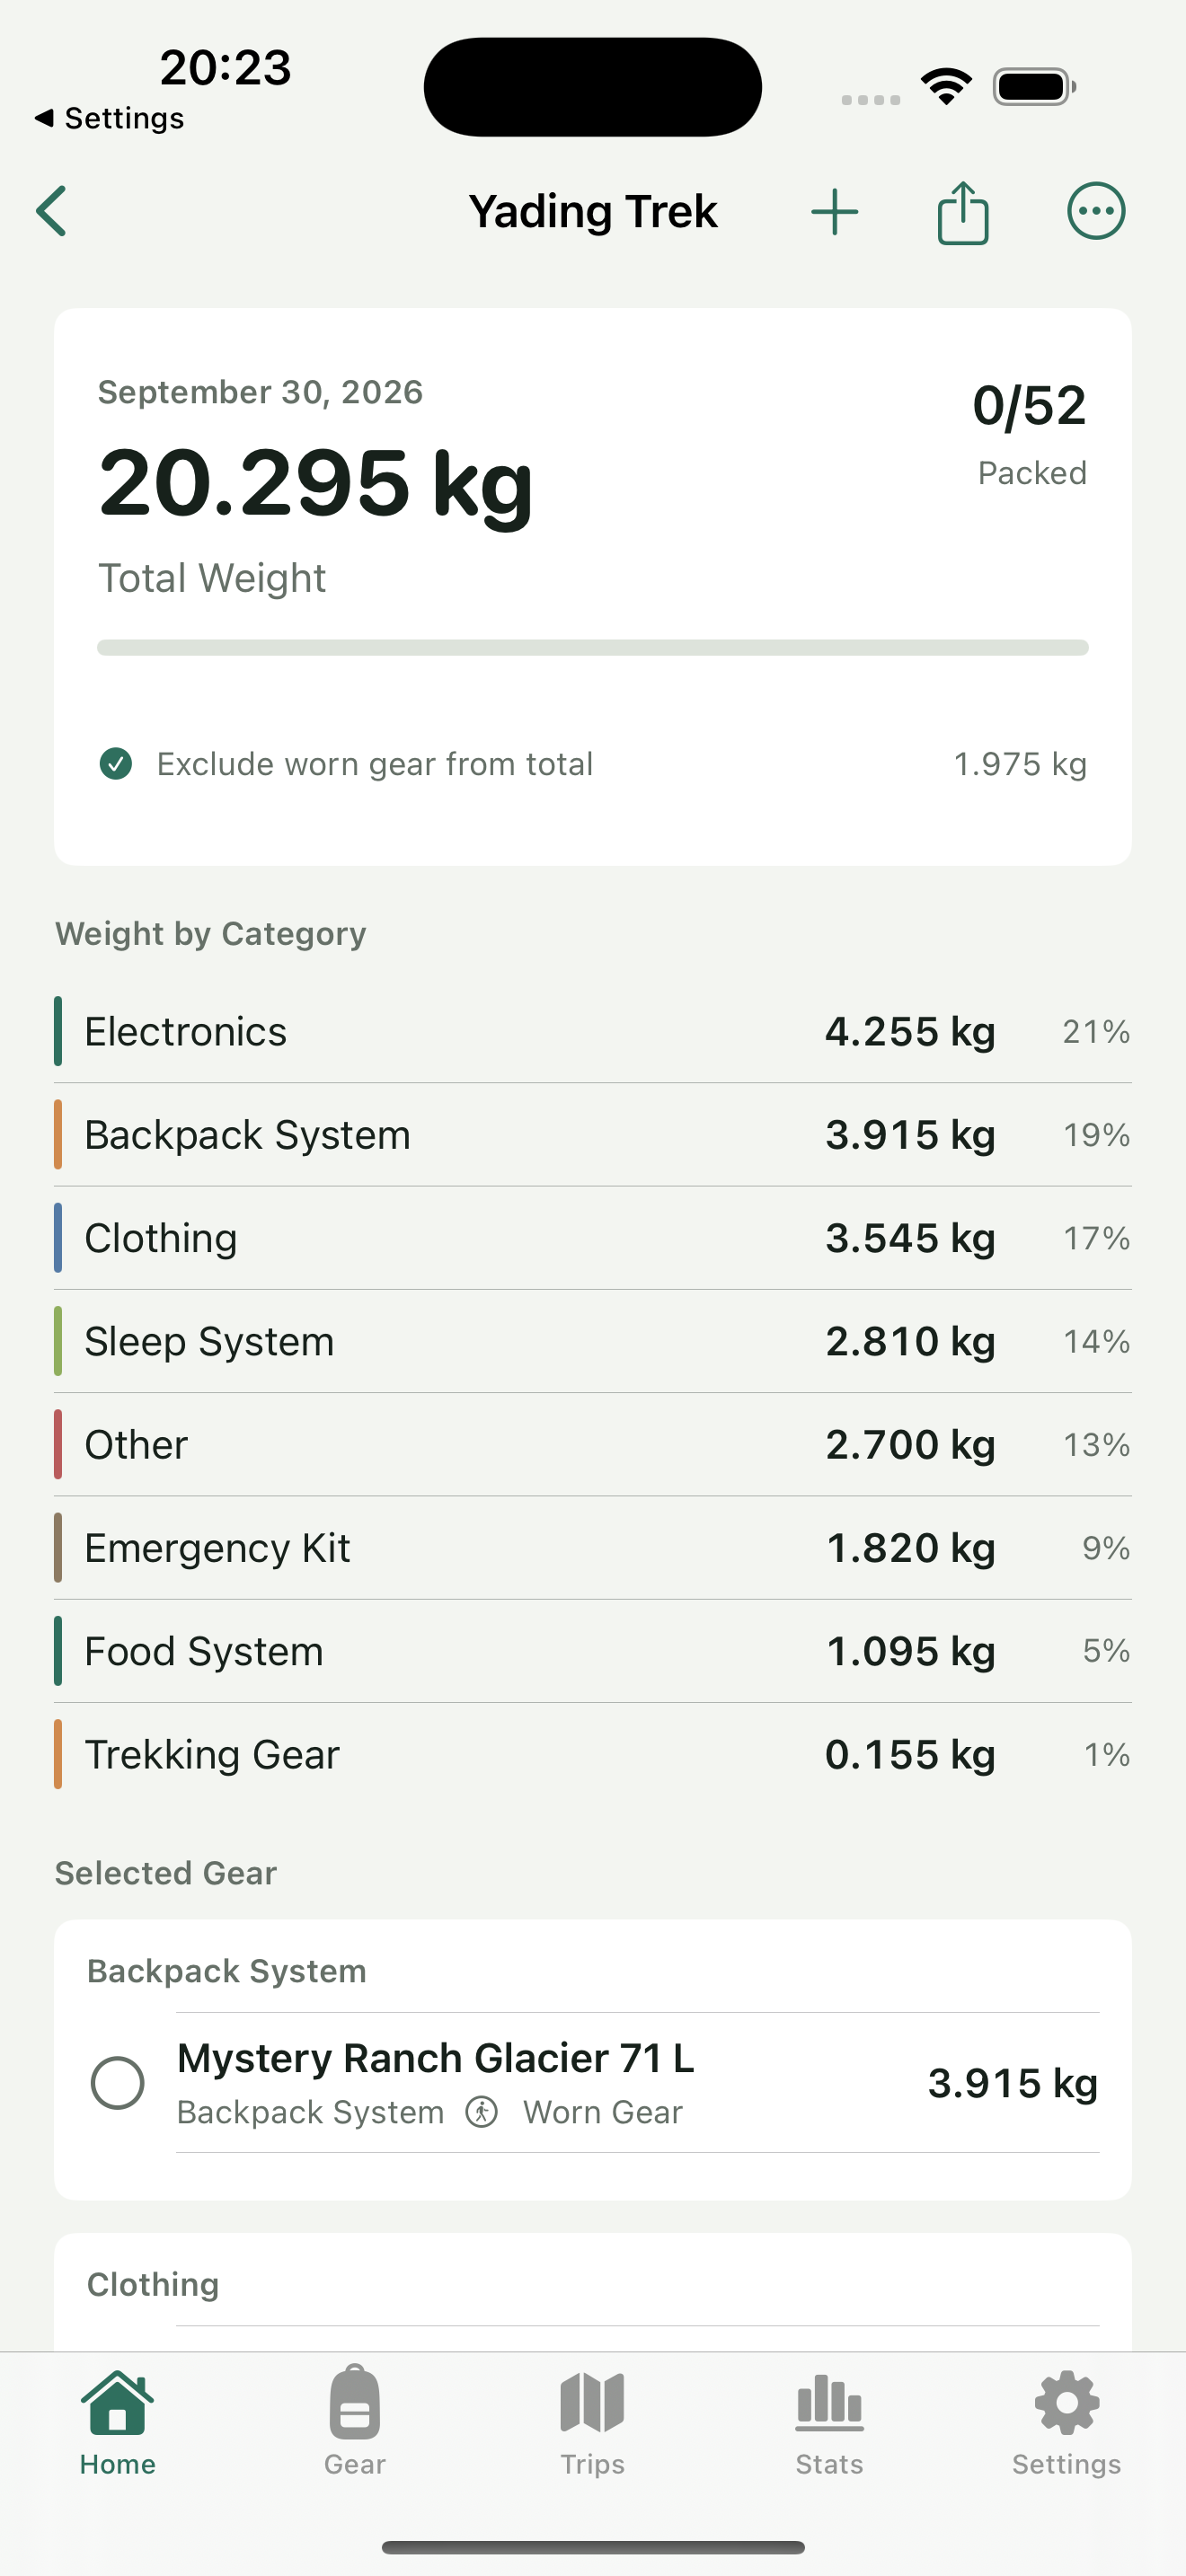
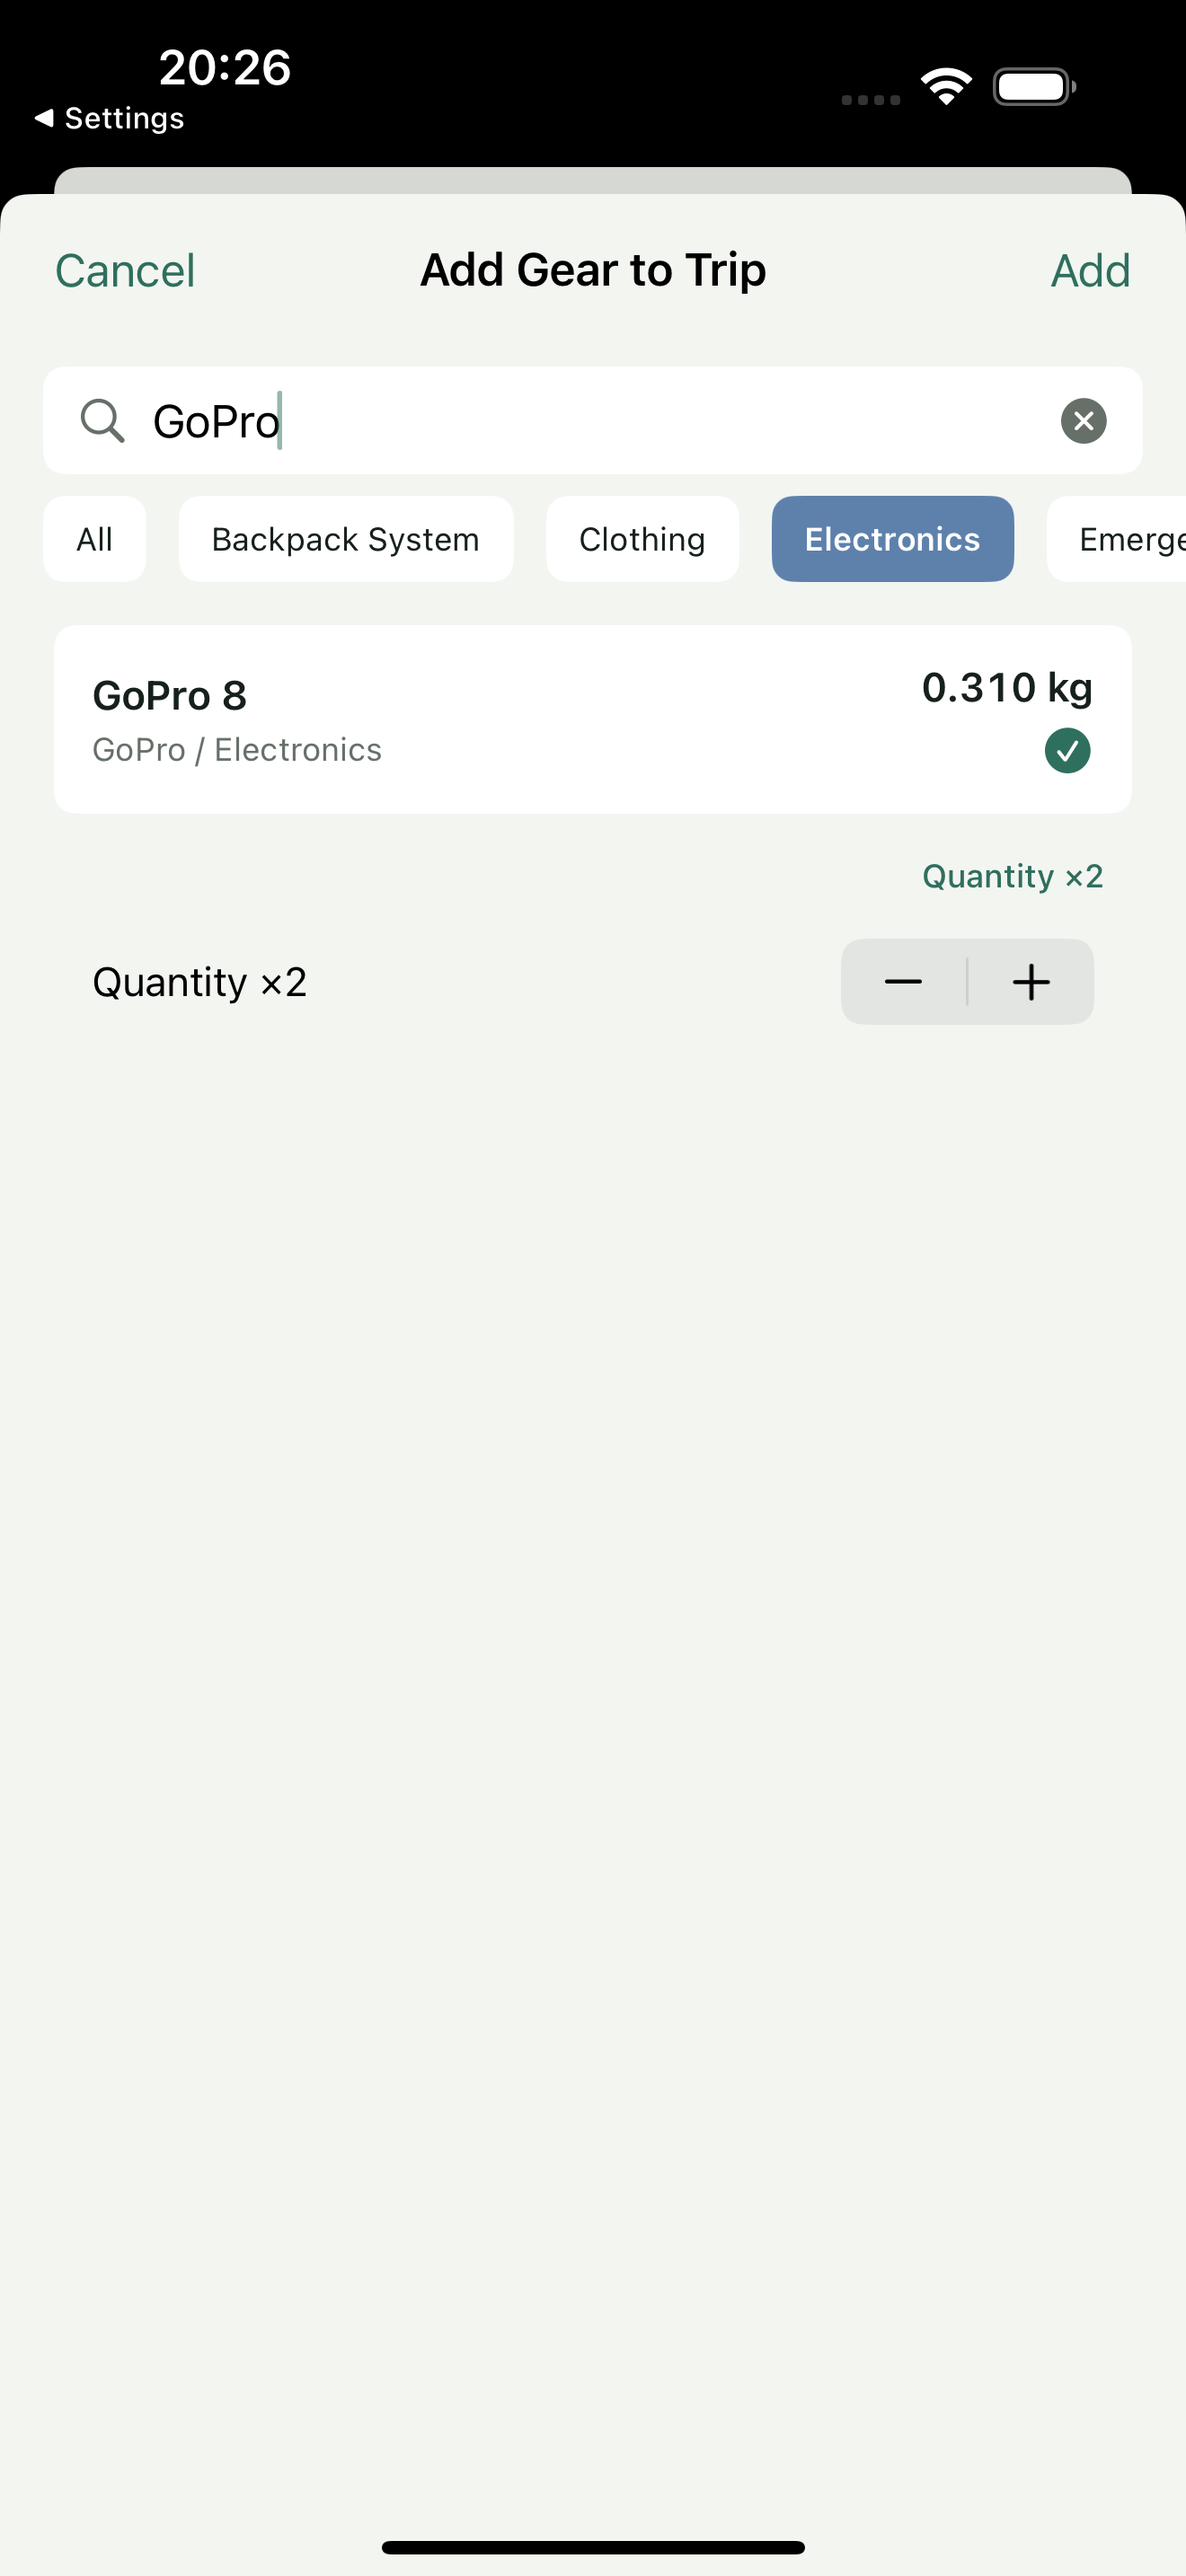
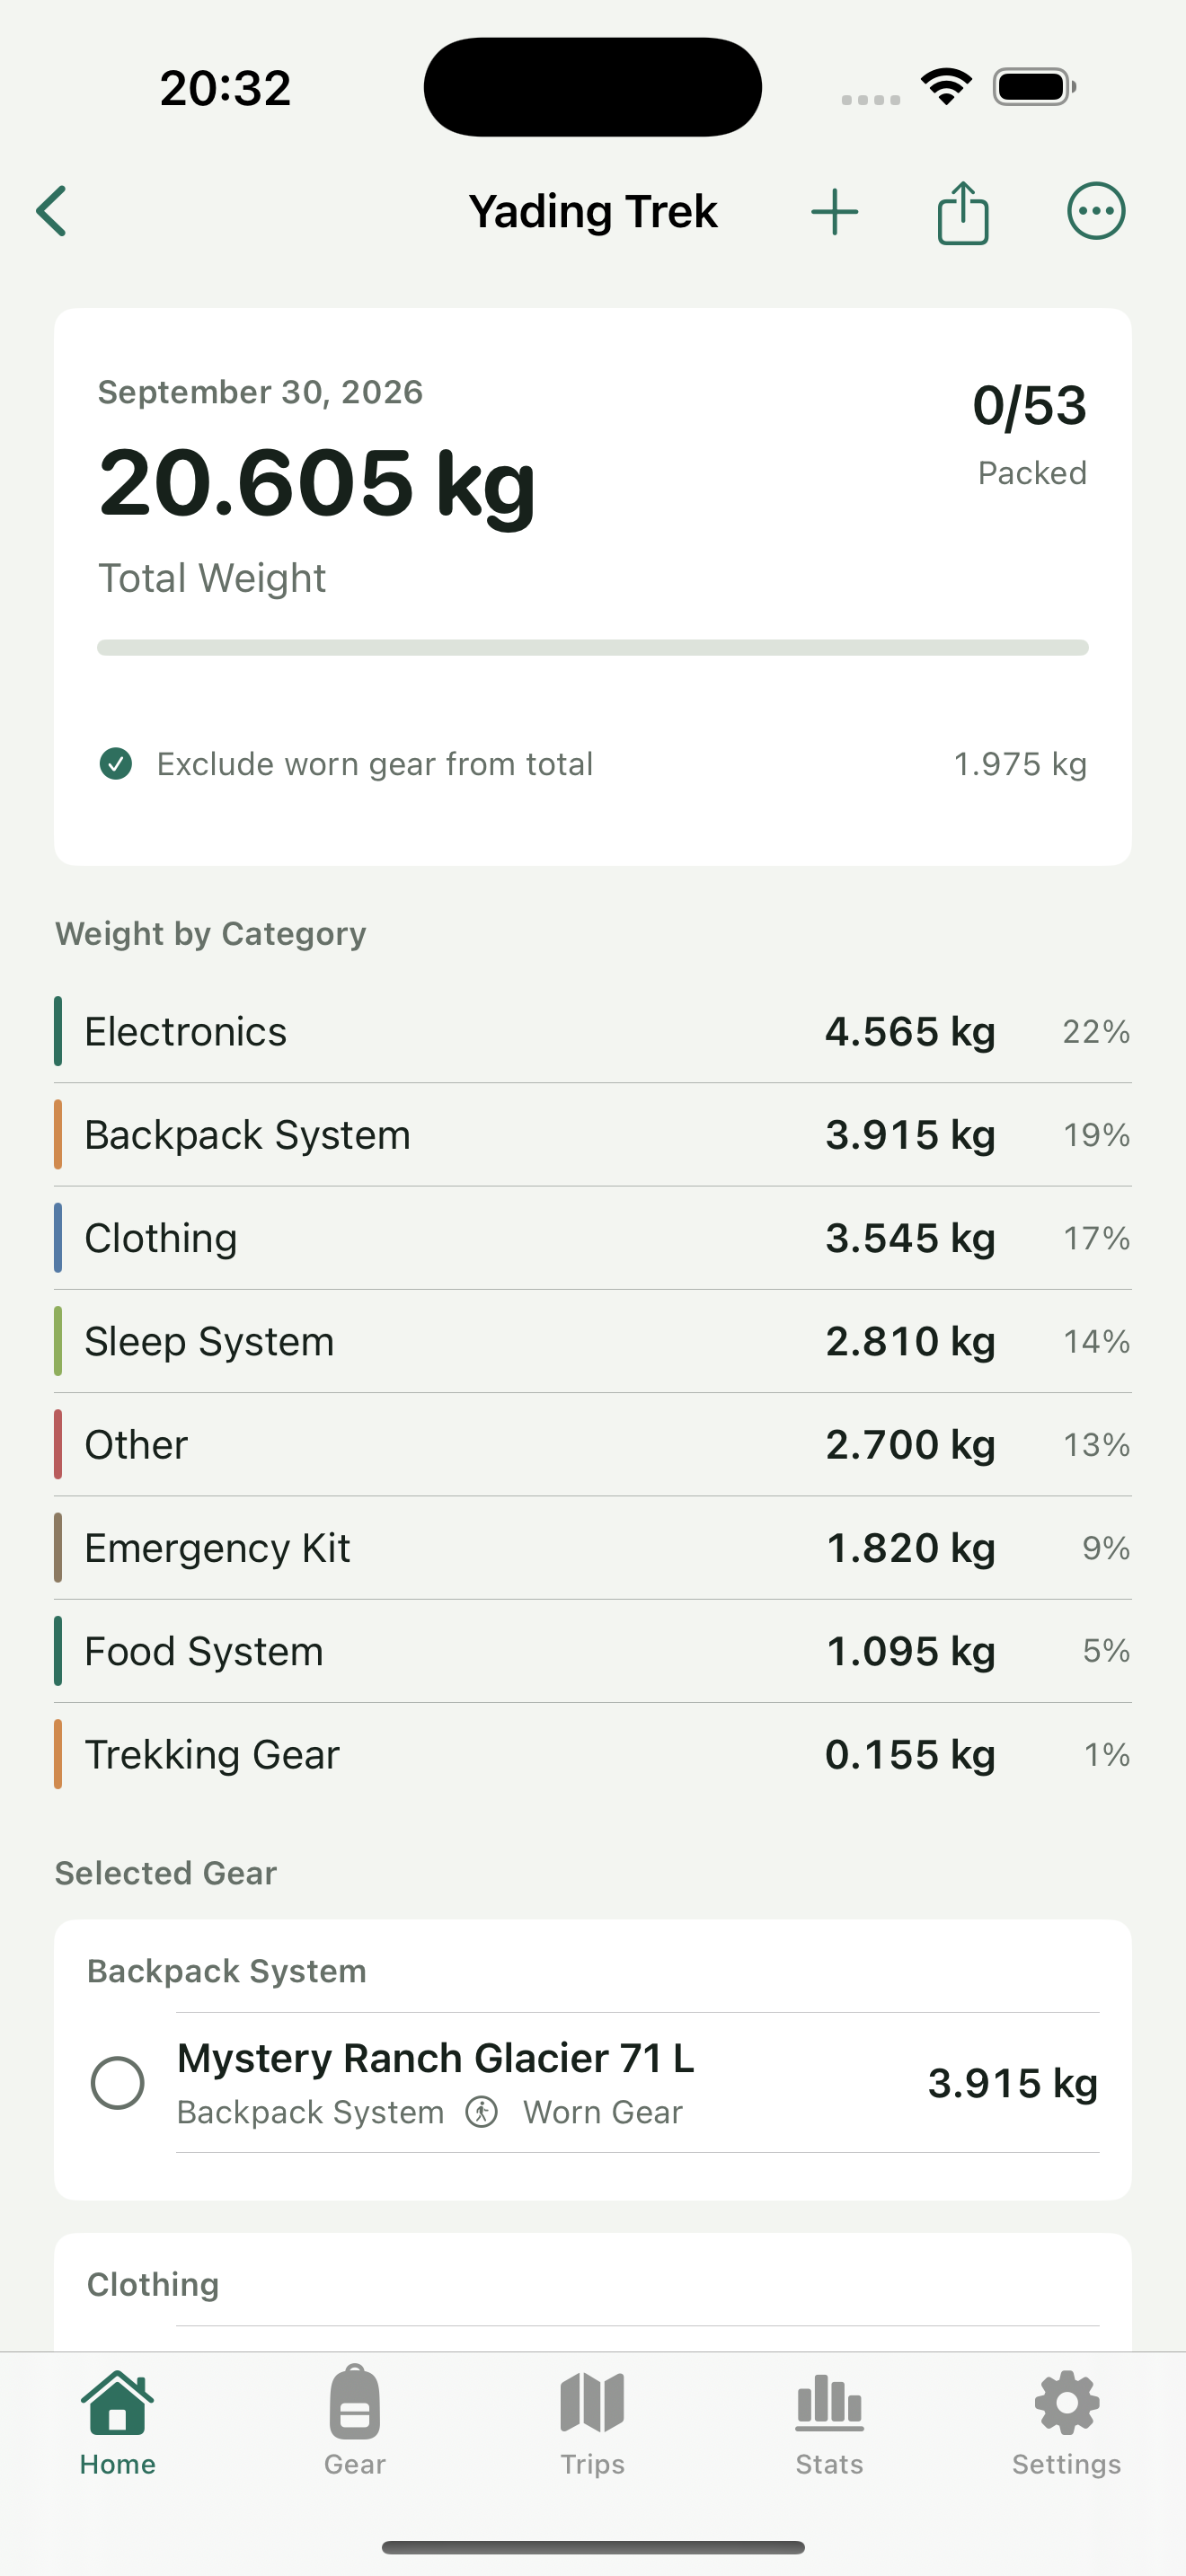
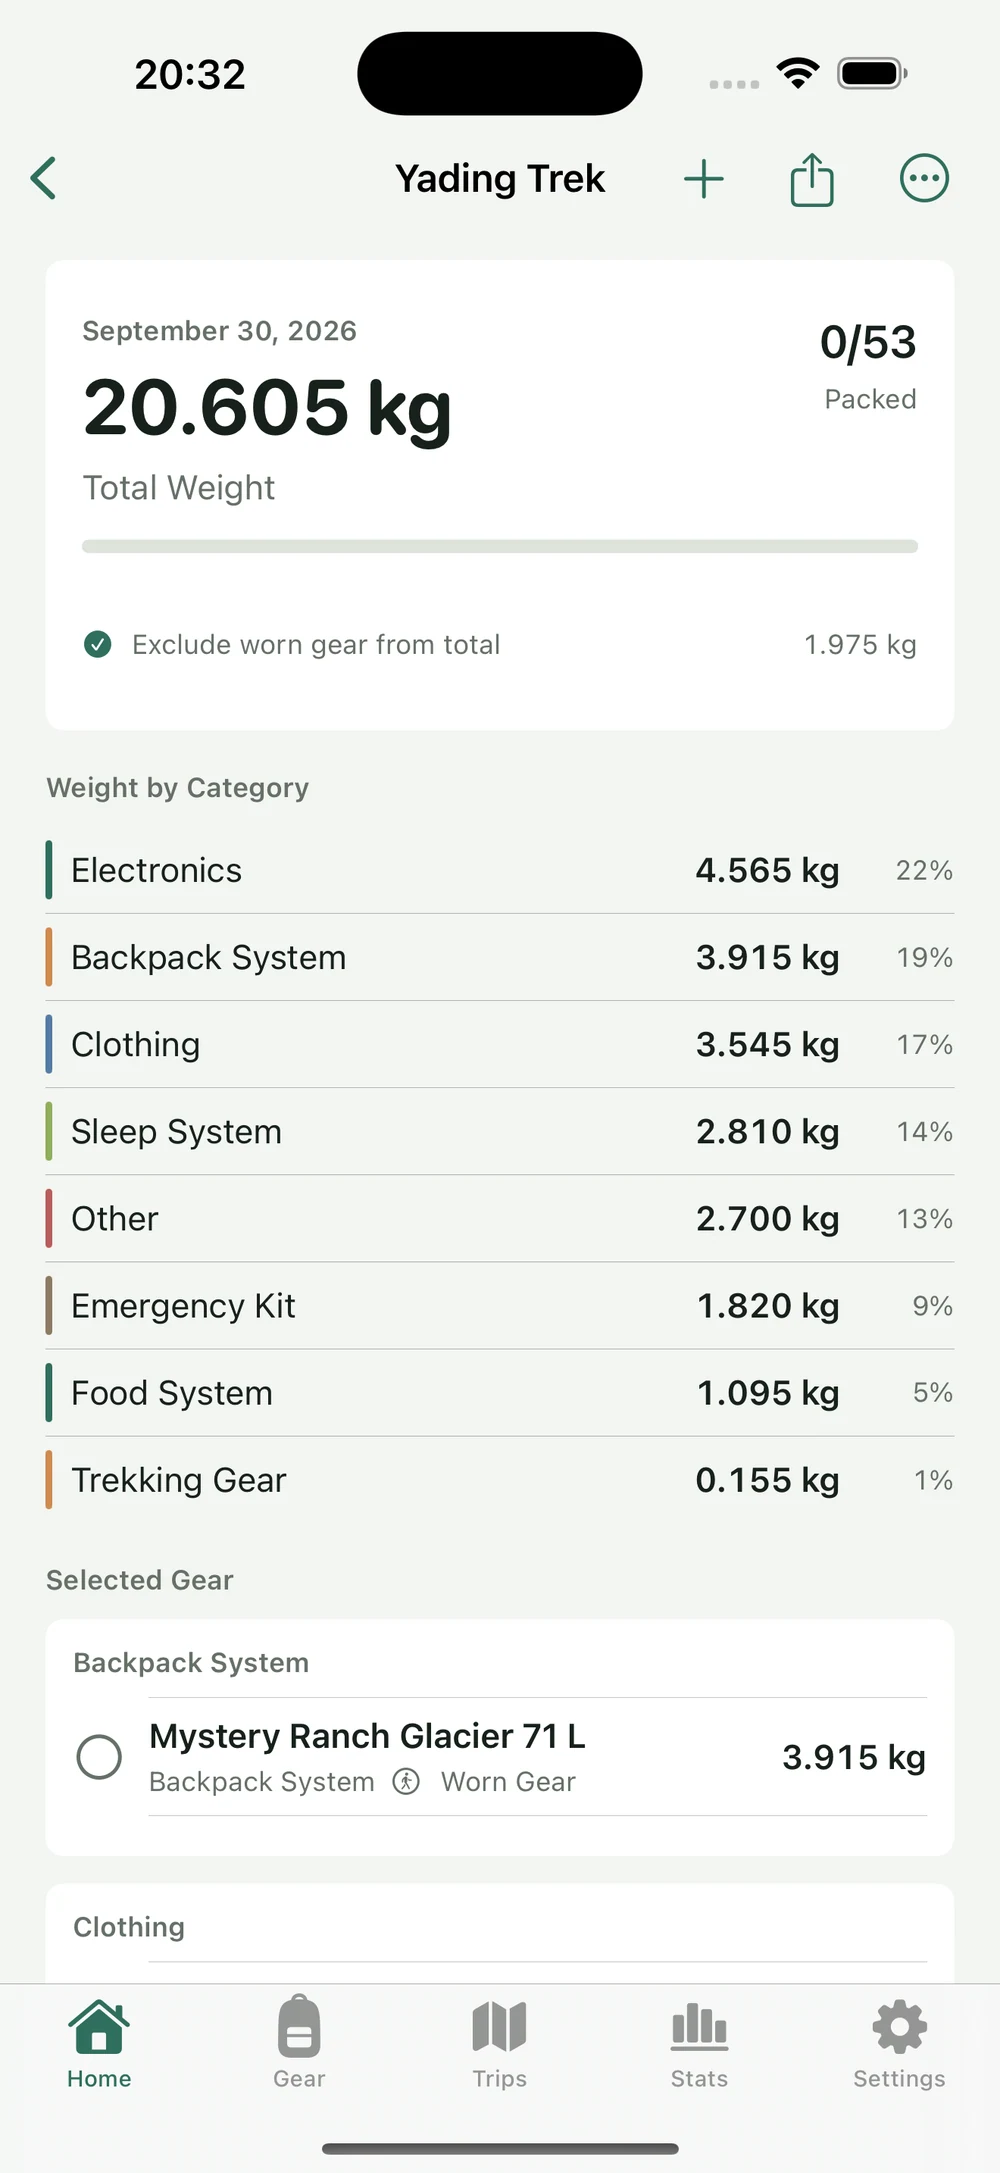
Before this addition, the same trip has 52 entries and weighs 20.295 kg. Adding the two GoPro 8 items contributes 0.310 kg, giving it 53 checklist entries and packing progress of 0/53. Its weight excluding worn gear is 20.605 kg. The two GoPro items contribute 0.310 kg; 53 entries should not be read as 53 individual physical objects. To adjust a quantity later, swipe left on the trip item and use “Quantity,” then check the updated result.
Include the accessories you will actually use, such as lenses, batteries, and a tripod. Avoid selecting both a complete kit and duplicate component records. If the total changes unexpectedly, check the single-item weight, carried quantity, and overlapping selections first.
Step 3 Check items after packing them
After you have checked an item and placed it where it belongs, tap its circle on the left of the checklist. Worn items, small accessories, and supplies added at the last minute still need a physical check.
Checking the backpack changes progress from 0/53 to 1/53, labeled “Packed.” The total excluding worn gear stays at 20.605 kg. The circle records preparation progress; it does not remove other selected items that have not been packed yet. At this point one entry is checked; continue through the remaining 52 in the same way.
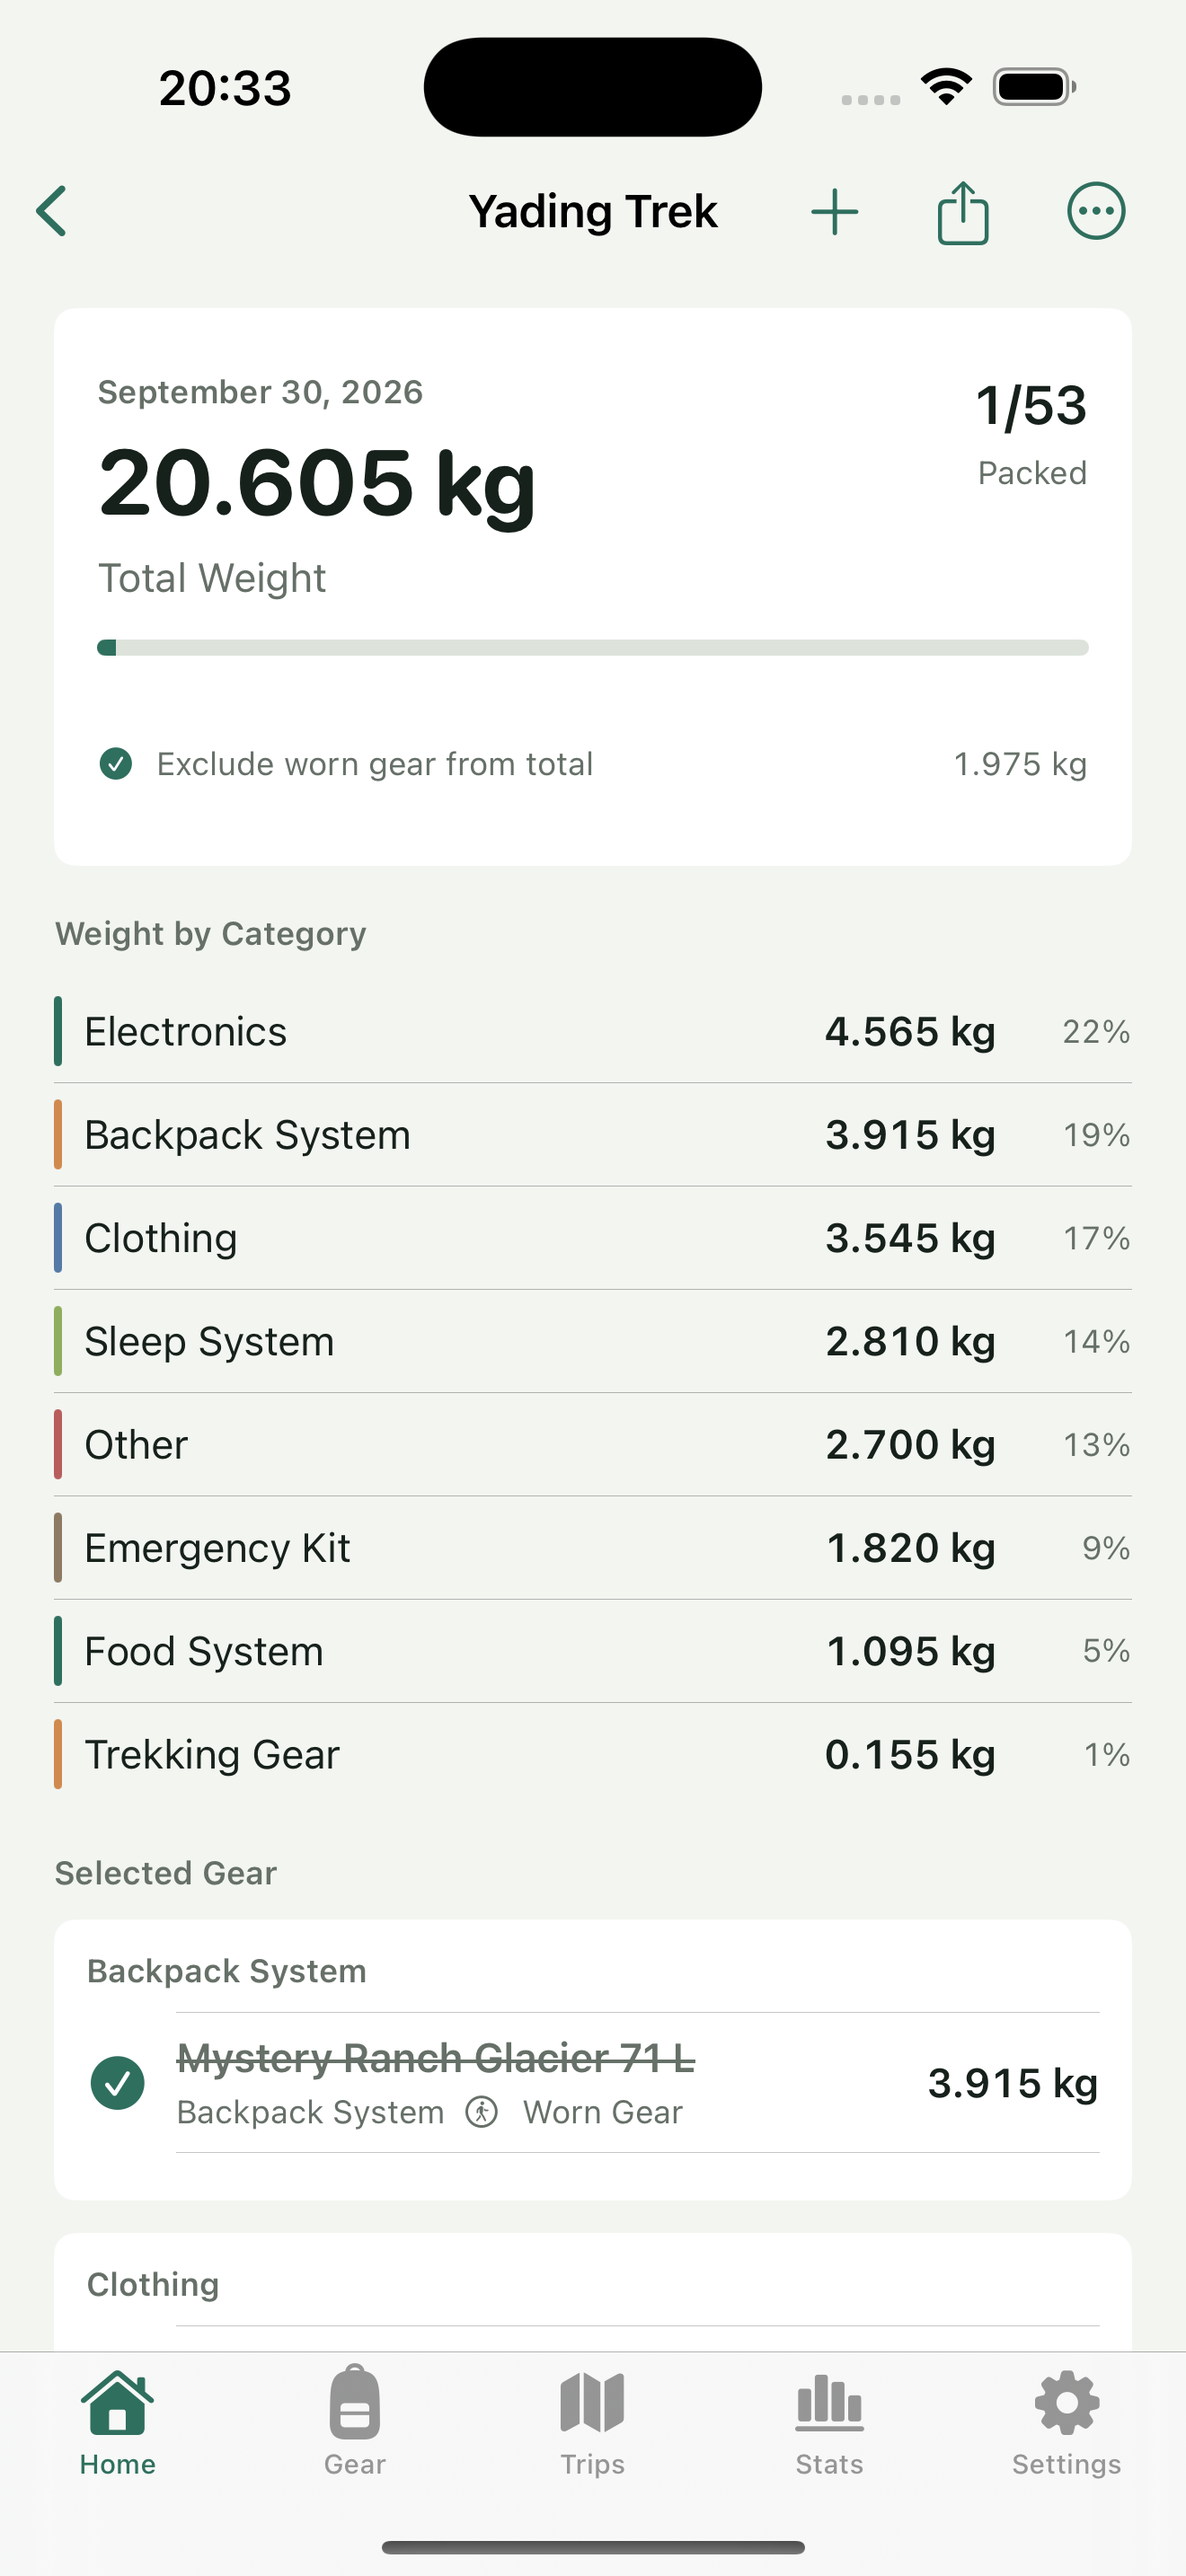
Selected but unchecked equipment still counts toward weight. If you decide not to bring an item, change the trip selection or quantity so the list reflects the actual configuration. Clearing a packing checkmark alone does not reduce the calculated load.
Step 4 Check whether worn gear is included
Open the trip’s three-dot menu and check “Exclude worn gear from total,” the setting that excludes worn gear from the total. This controls how already-marked worn items are counted. It is separate from packing checkmarks.
The example has 1.975 kg of worn gear. With exclusion off, the total is 22.580 kg. With exclusion on again, the total is 20.605 kg. The difference is the worn weight, and those items remain in the checklist.
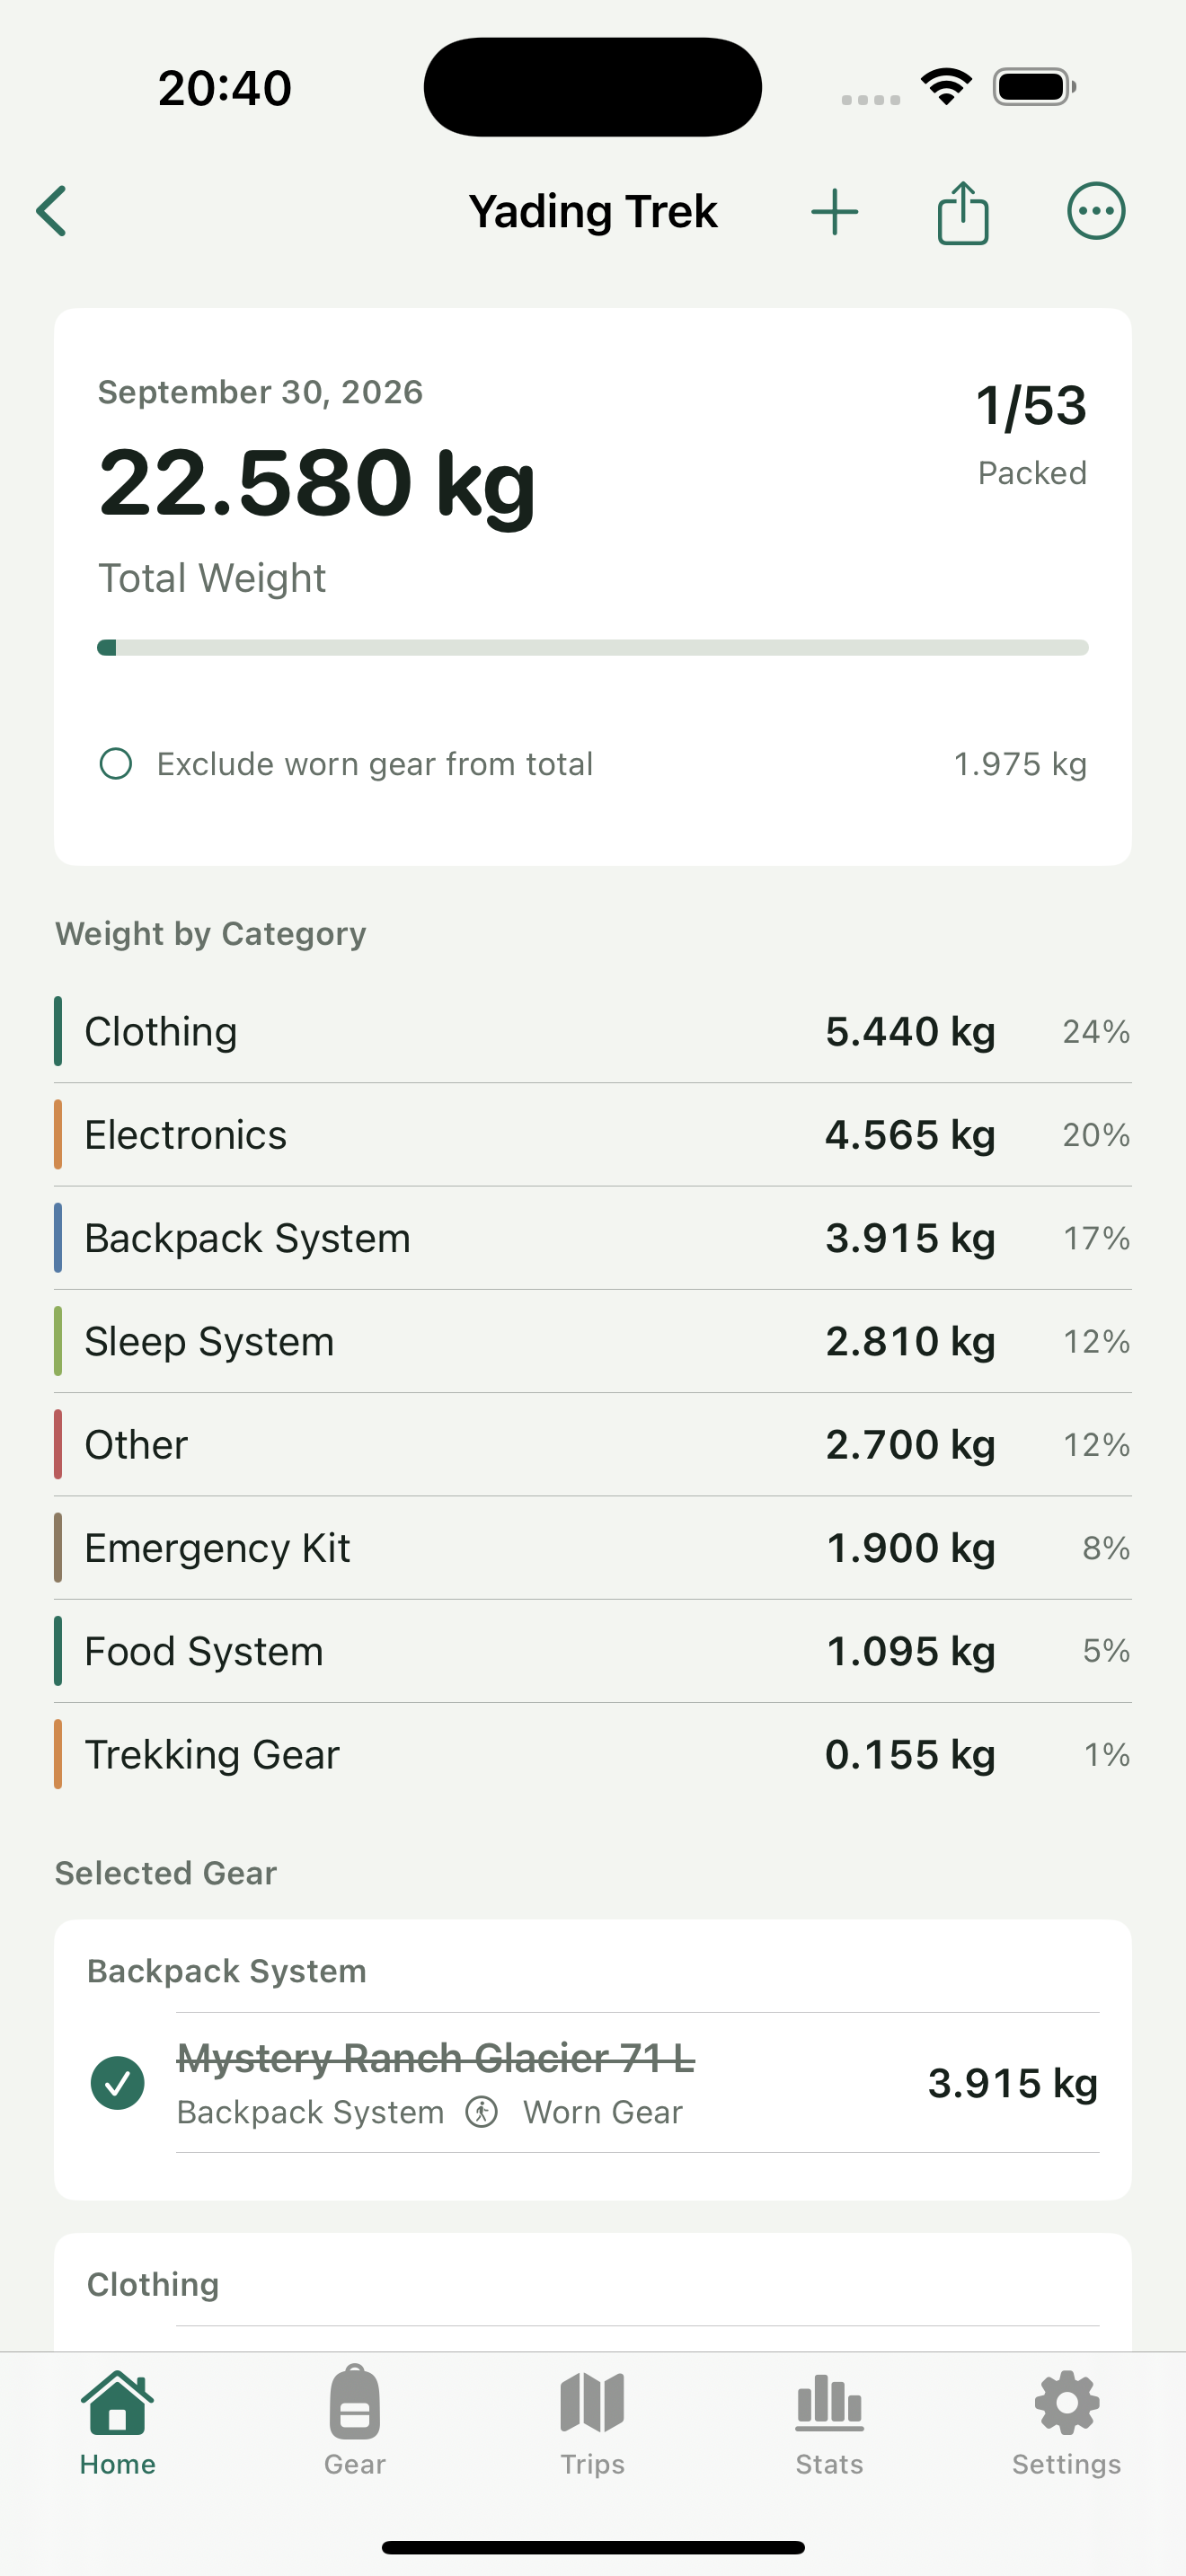
A worn marker should match how you will carry an item. Use the trip’s “Worn Gear” action when marking equipment, then check the worn weight. Do not use the marker merely to make the number smaller. This example’s pack weight includes listed supplies, so it is not base weight or a recommended load.
Step 5 Review charts and save a checklist image
Open the trip’s three-dot menu and choose “View Charts.” Check the weight basis before reviewing categories and individual items. Charts explain the selected configuration; they do not replace checking your physical equipment. The weight-analysis tutorial covers the chart views in detail.
To create a list image, choose Share configuration from the trip menu, or Create share card from the chart’s sharing menu. In Share preview, select the gear-list content, check the category scope, and choose Pages or Long image according to the length. Save at the top retains the settings. Save to Photos at the bottom saves an image; Share Image opens the sharing flow.
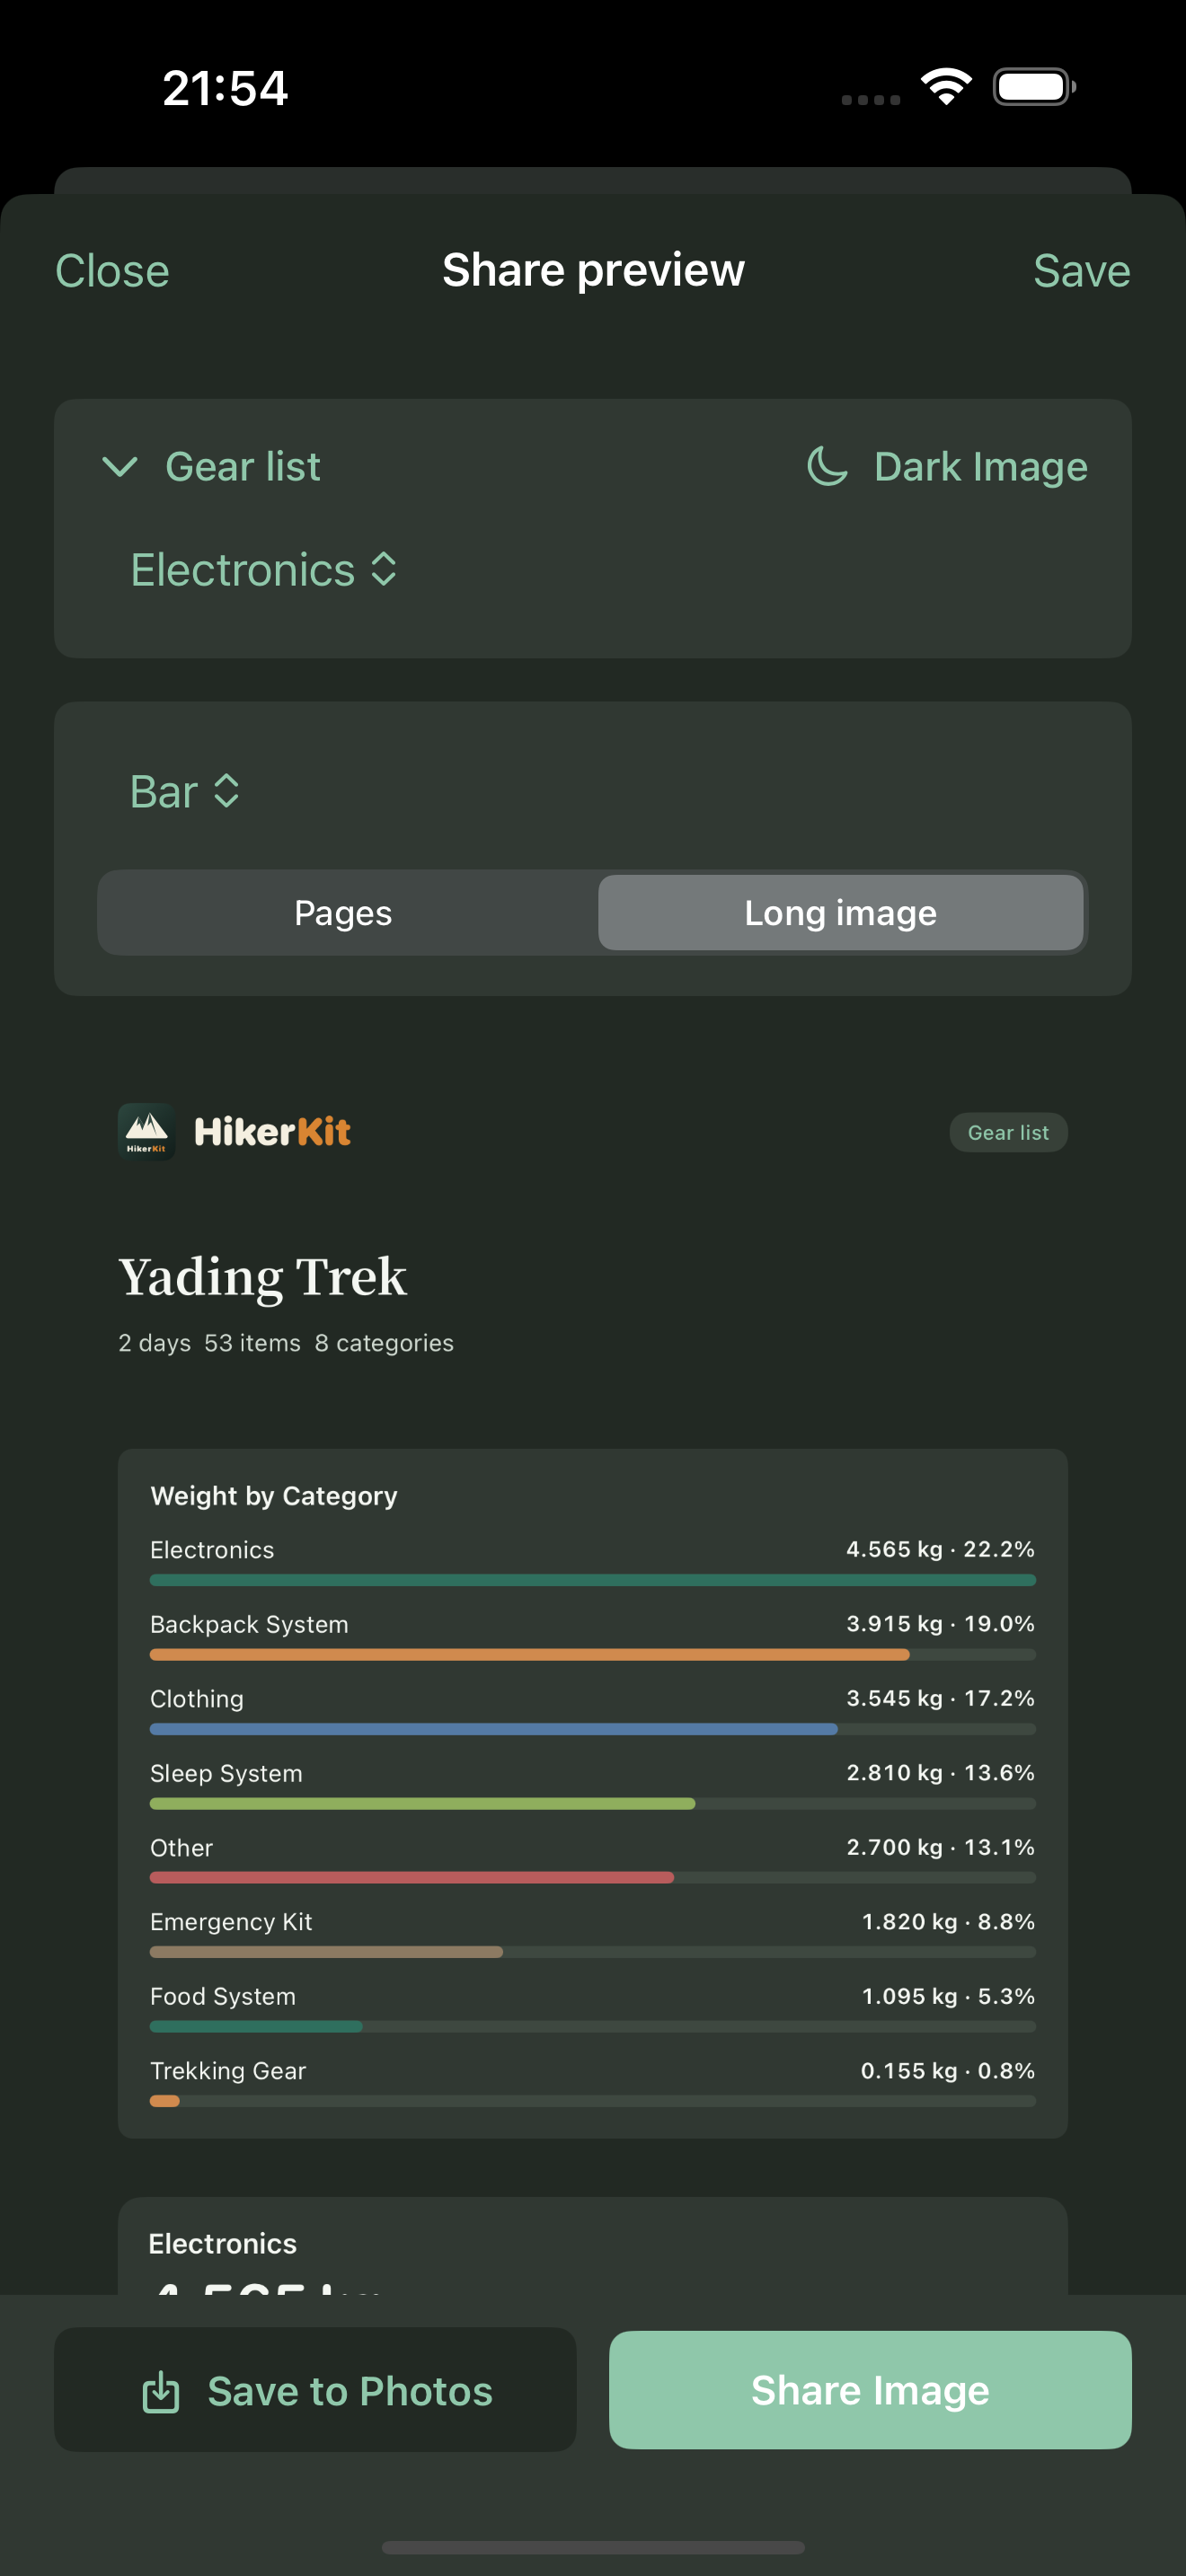 Dark app: dark image, Bar, Long image
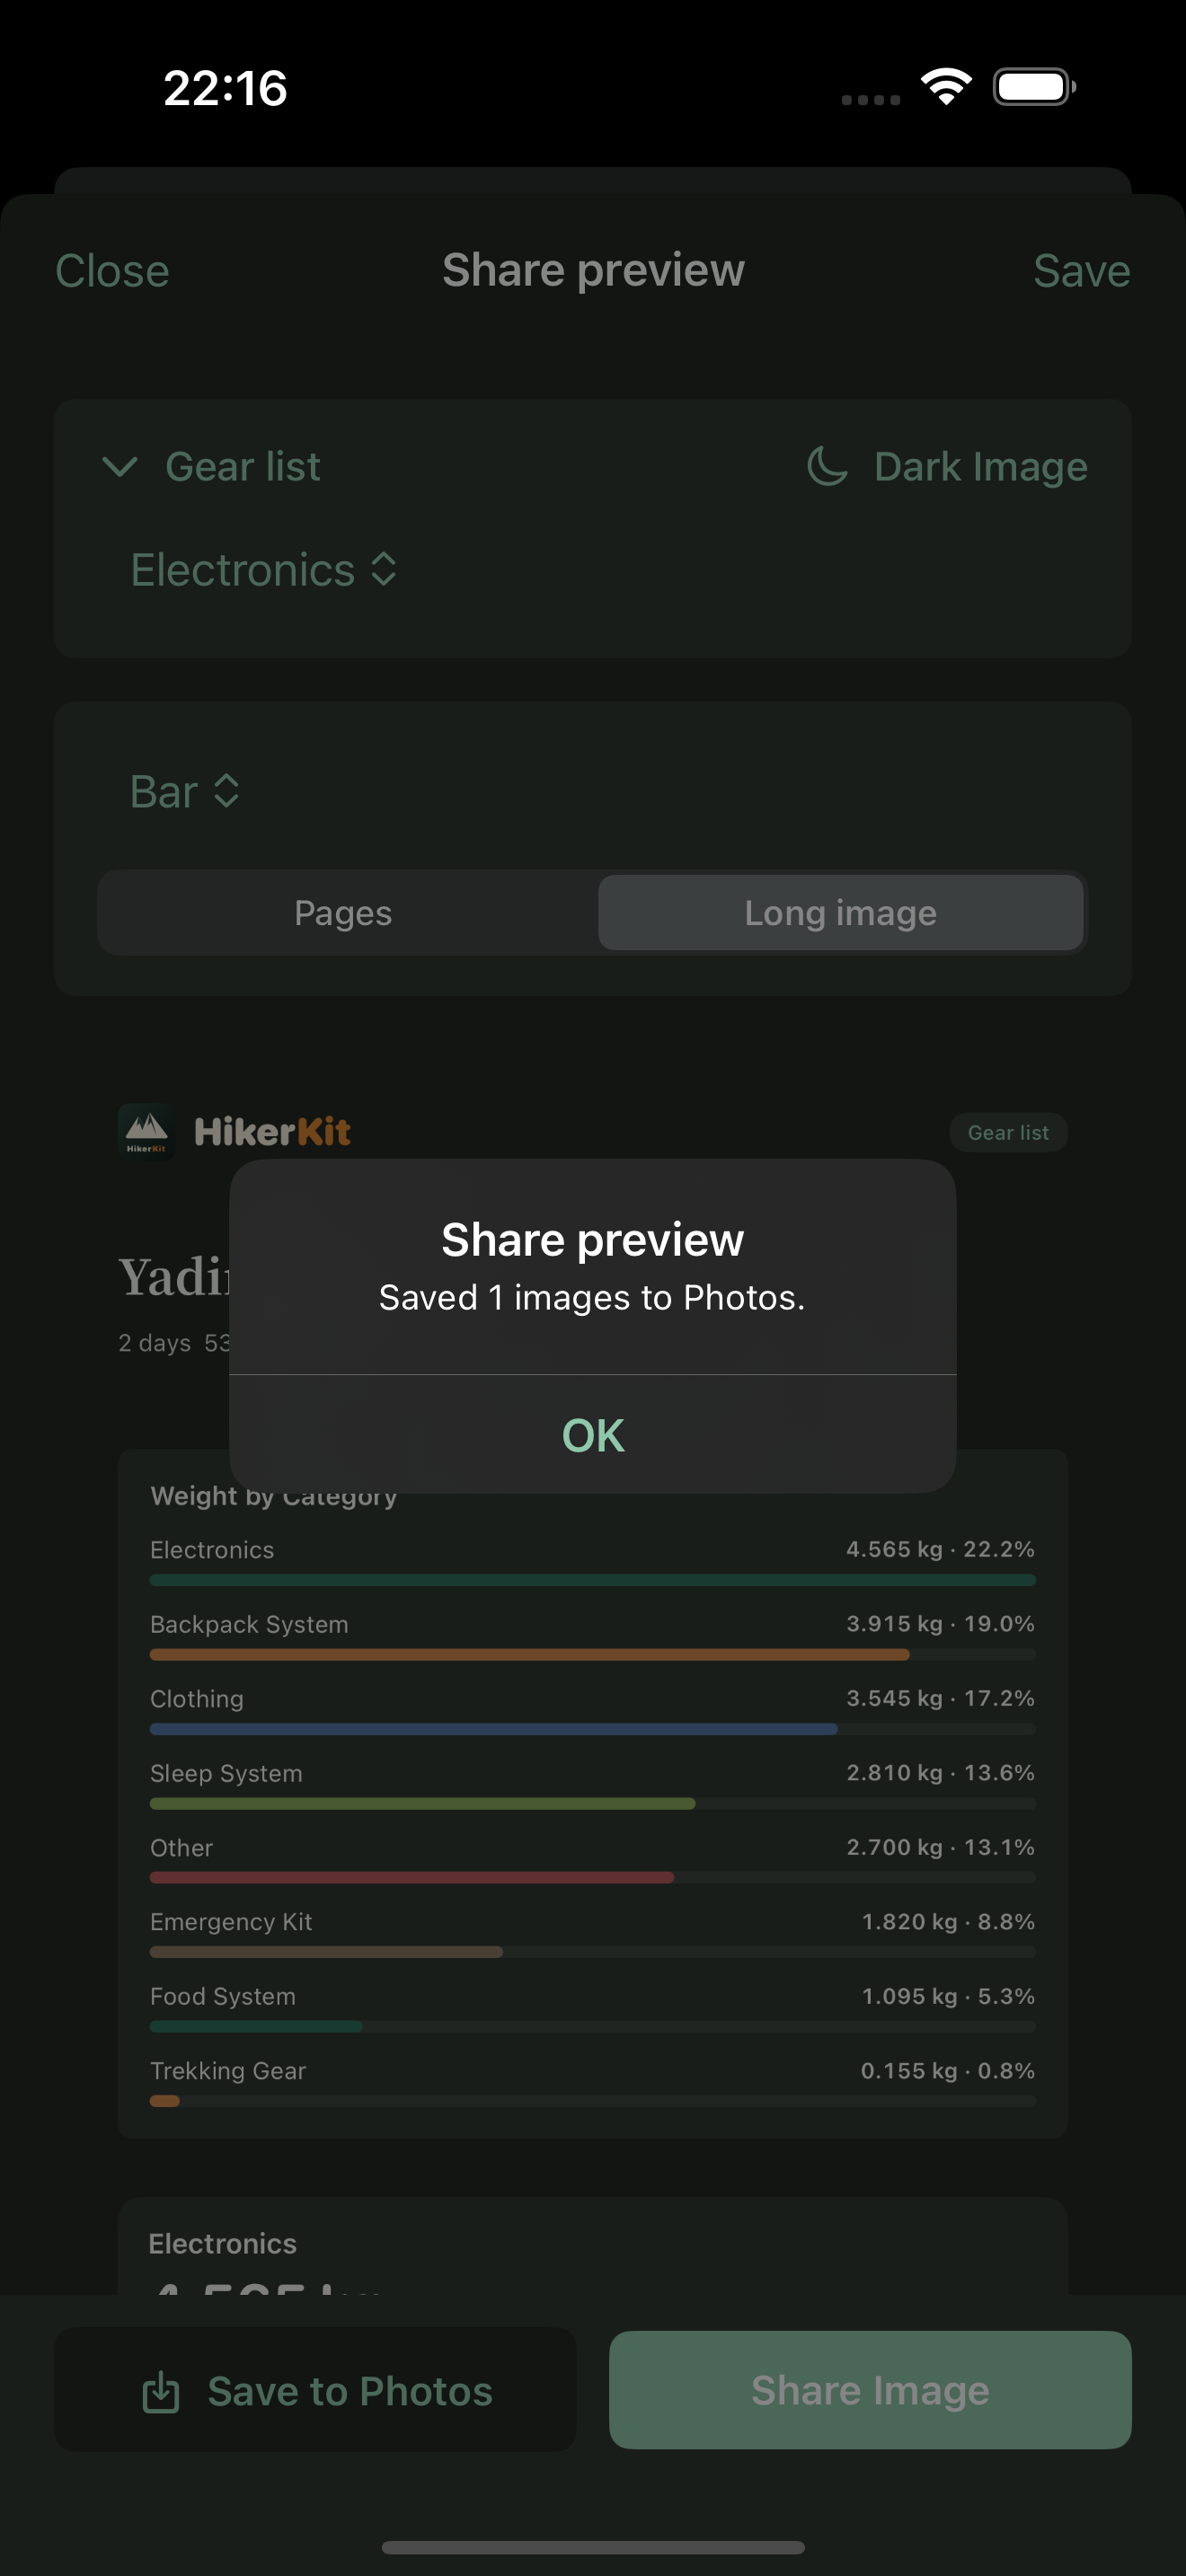 Dark long image: saved to Photos
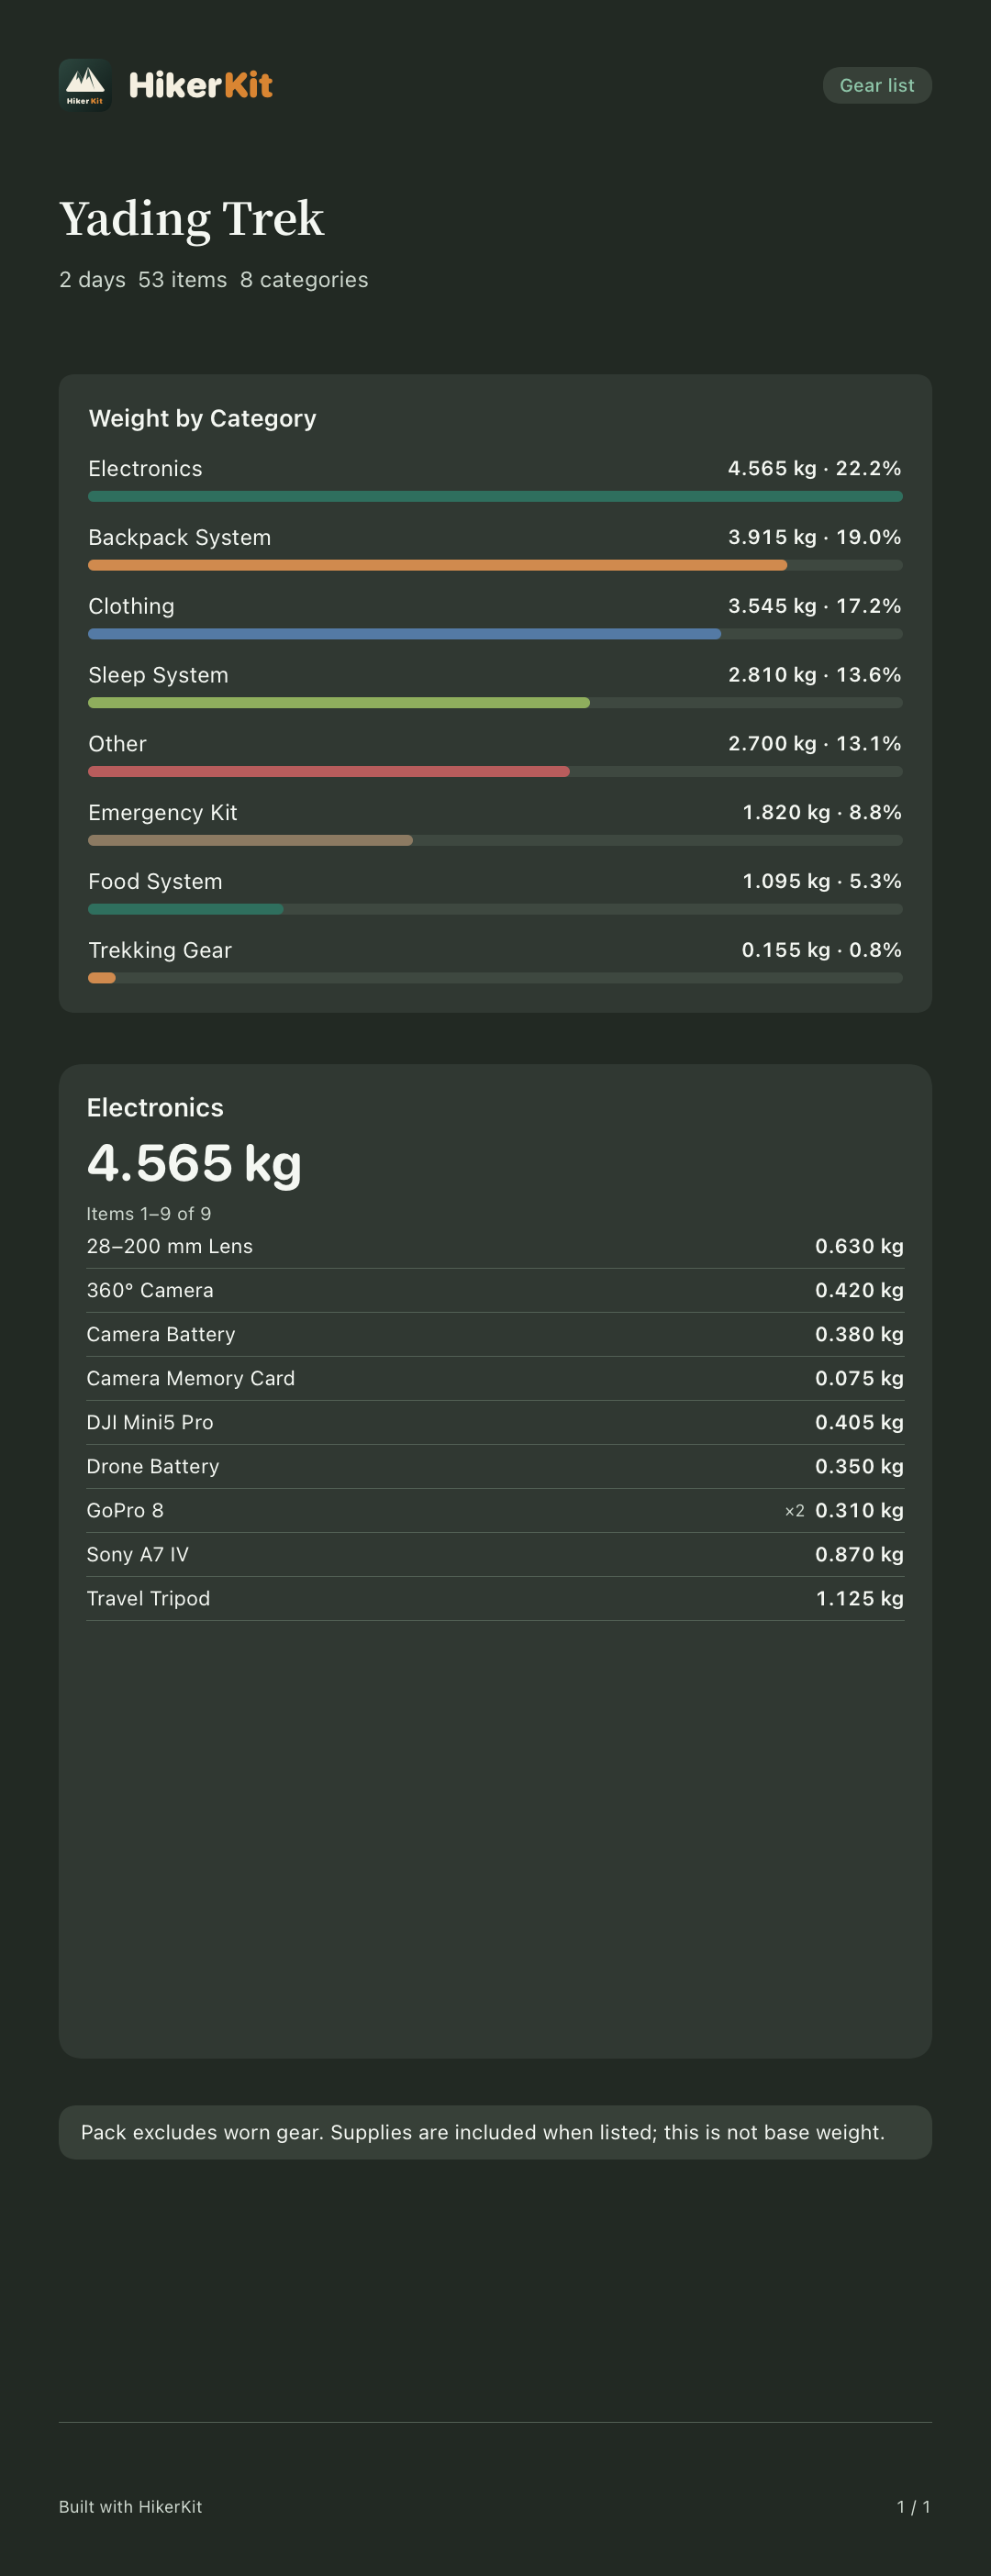 Actual dark Electronics long-image PNG
This example selects only the 9-entry electronics category, not all 53 trip entries. For the entire checklist, select all required categories and verify the output scope. Open the actual saved image to check small text, categories, and the beginning and end of the list. Before departure, check the real equipment once more. Completing the trip after returning preserves its gear snapshot. Later library edits do not rewrite the names, weights, or quantities in that completed history.
Frequently asked questions
Must I enter all my gear before starting
No. Prepare the records needed for this outing and an unfinished trip, then expand the library over time.
How do 72 records, 53 entries, and two GoPros differ
72 describes the whole library, 53 describes this trip’s checklist entries, and ×2 is the carried quantity for its GoPro 8 entry. Filtered results have their own scope too; these counts are not interchangeable.
Do only packed items count toward weight
No. Selected items count using weight and carried quantity. Checkmarks change preparation progress; the worn-weight setting is separate.
Can I do this with the free version
Yes. Gear management, charts, and image sharing remain available. The free tier allows up to two trips; Pro unlocks unlimited trips only.