
Once a checklist shows a total weight, the next question is what makes up that number. HikerKit groups the equipment selected for a trip by category, then lets you check the individual items behind those totals. This tutorial starts with the checklist, moves through the overview and category charts, and finishes with a readable image of the analysis.
Weight statistics and basic charts are established HikerKit features. Version 2.0 refines carried quantities, weight units, chart sharing, and snapshots for completed trips. The charts support checking records and comparing configurations. The route, weather, task, and safety requirements still determine what you need to carry.
This walkthrough uses the English interface and the Yading Trek demonstration. Counts and weights describe the illustrated configuration.
Prepare a checklist with a consistent weight basis
Open Trips and select the trip you want to analyze. If it has no checklist yet, create the trip and use the plus button in its details to select library gear. Check these three things before interpreting the total:
- Is the weight for one item or a complete kit, and are accessories already included?
- Is the carried quantity correct, without selecting both a kit and the same components separately?
- Which items are marked as worn, and does this trip include worn gear in its total?
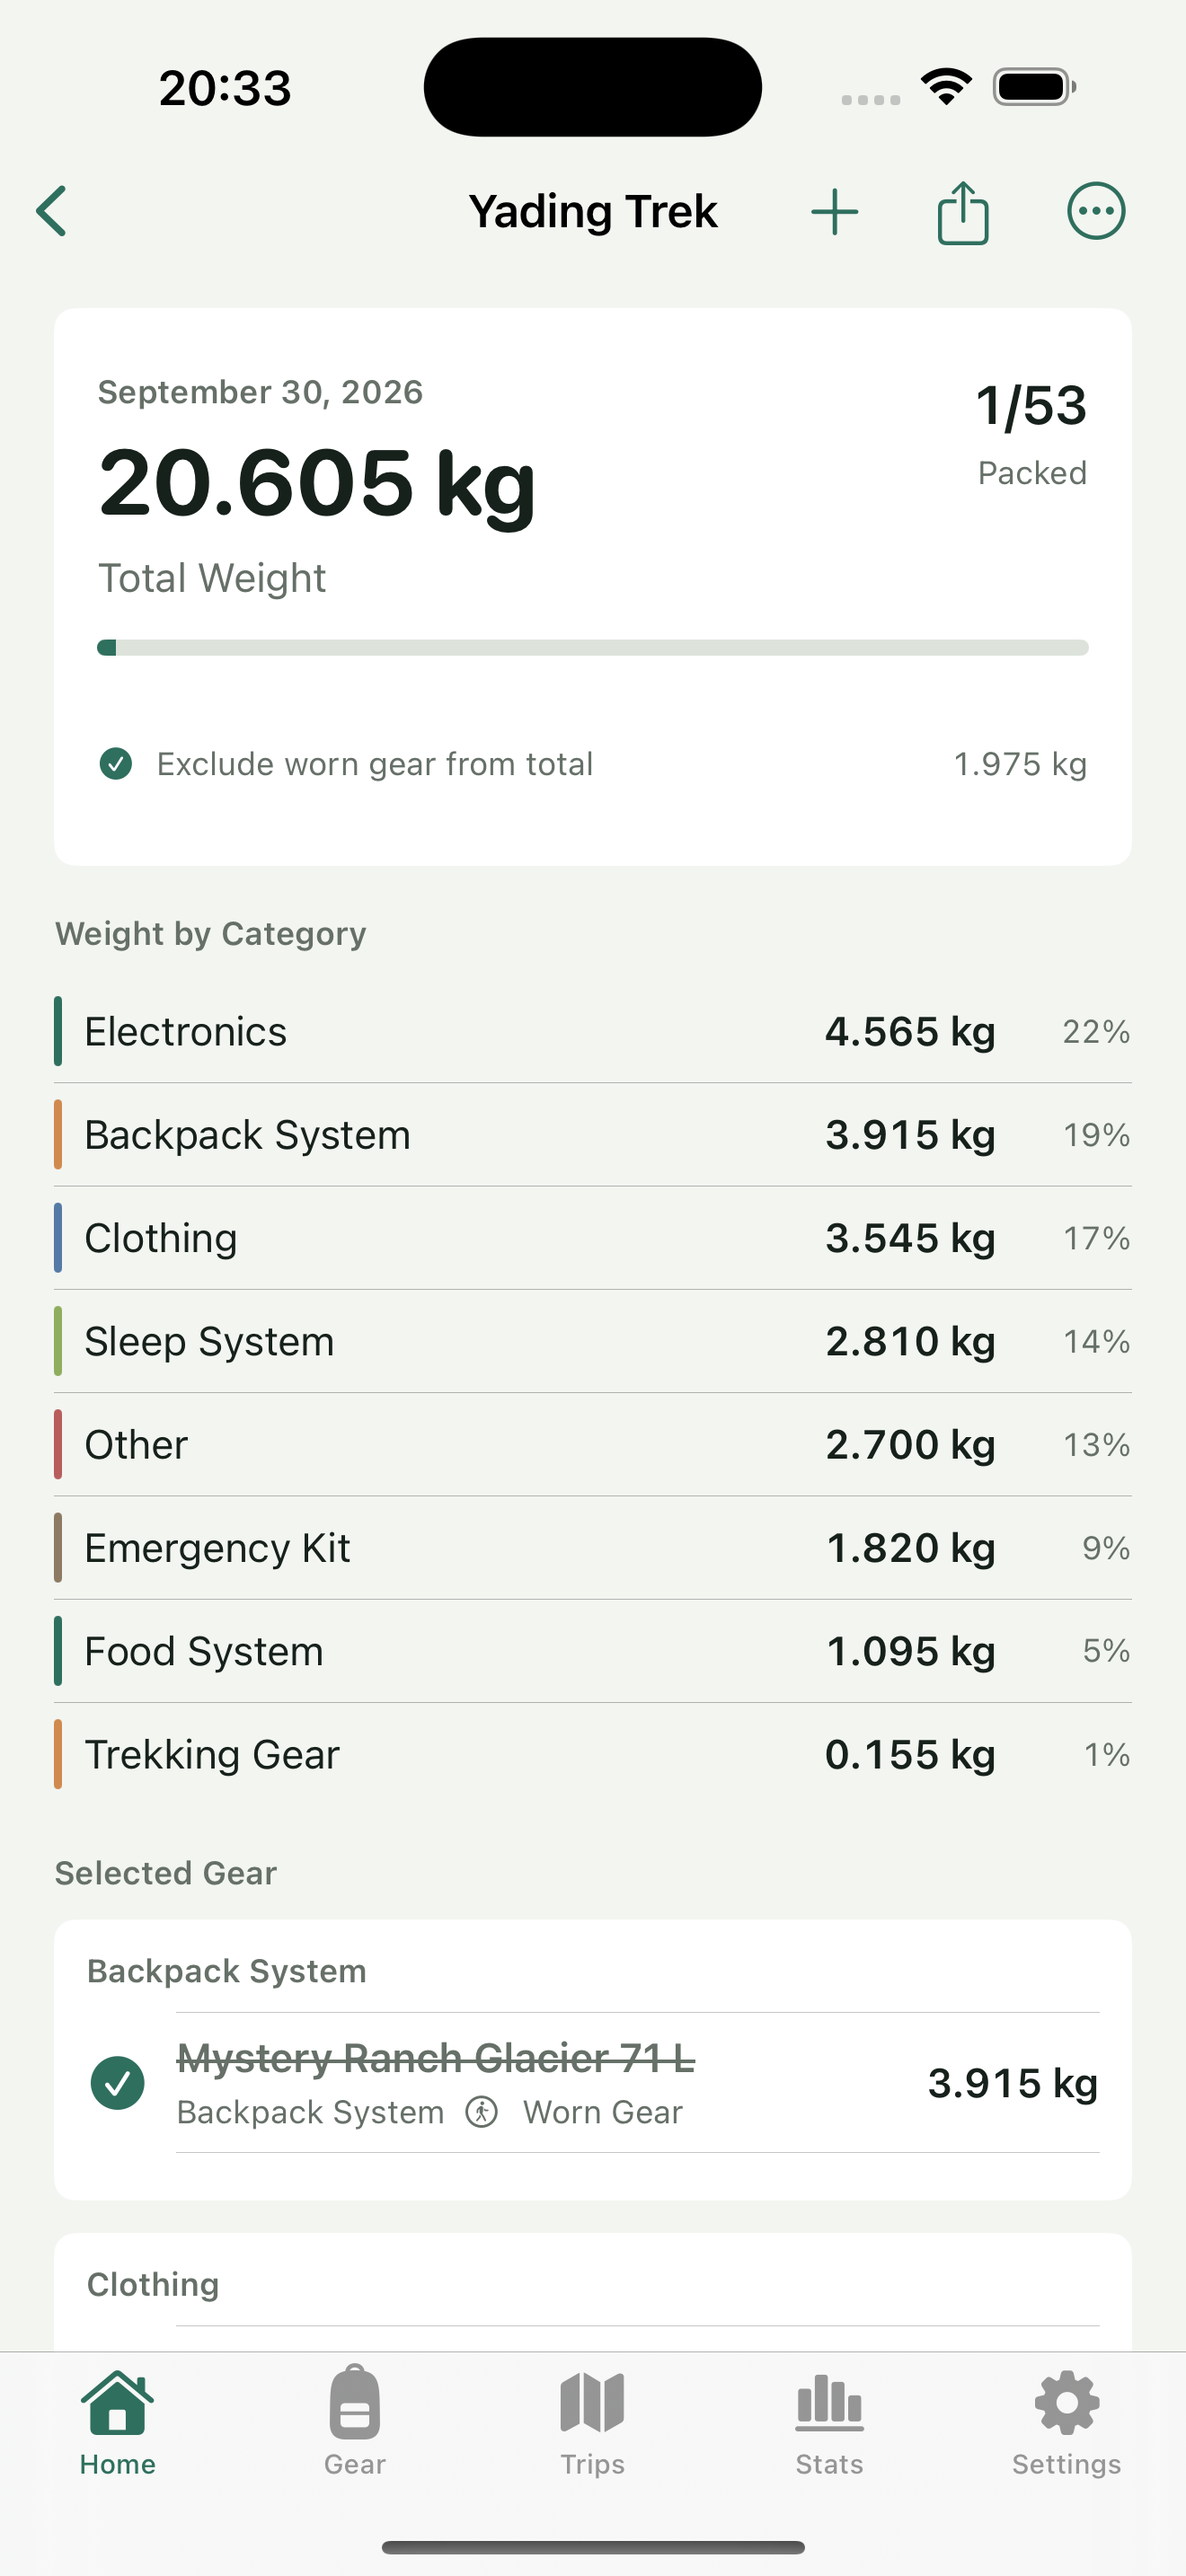
Selected items still count before you mark them as packed. Clearing a packing checkmark is not a way to model a lighter configuration. To compare another setup, change the actual selection or carried quantities. The units g, kg, oz, and lb express weights differently; raw numbers in different units should not be added together.
Step 1 Open the charts from the trip
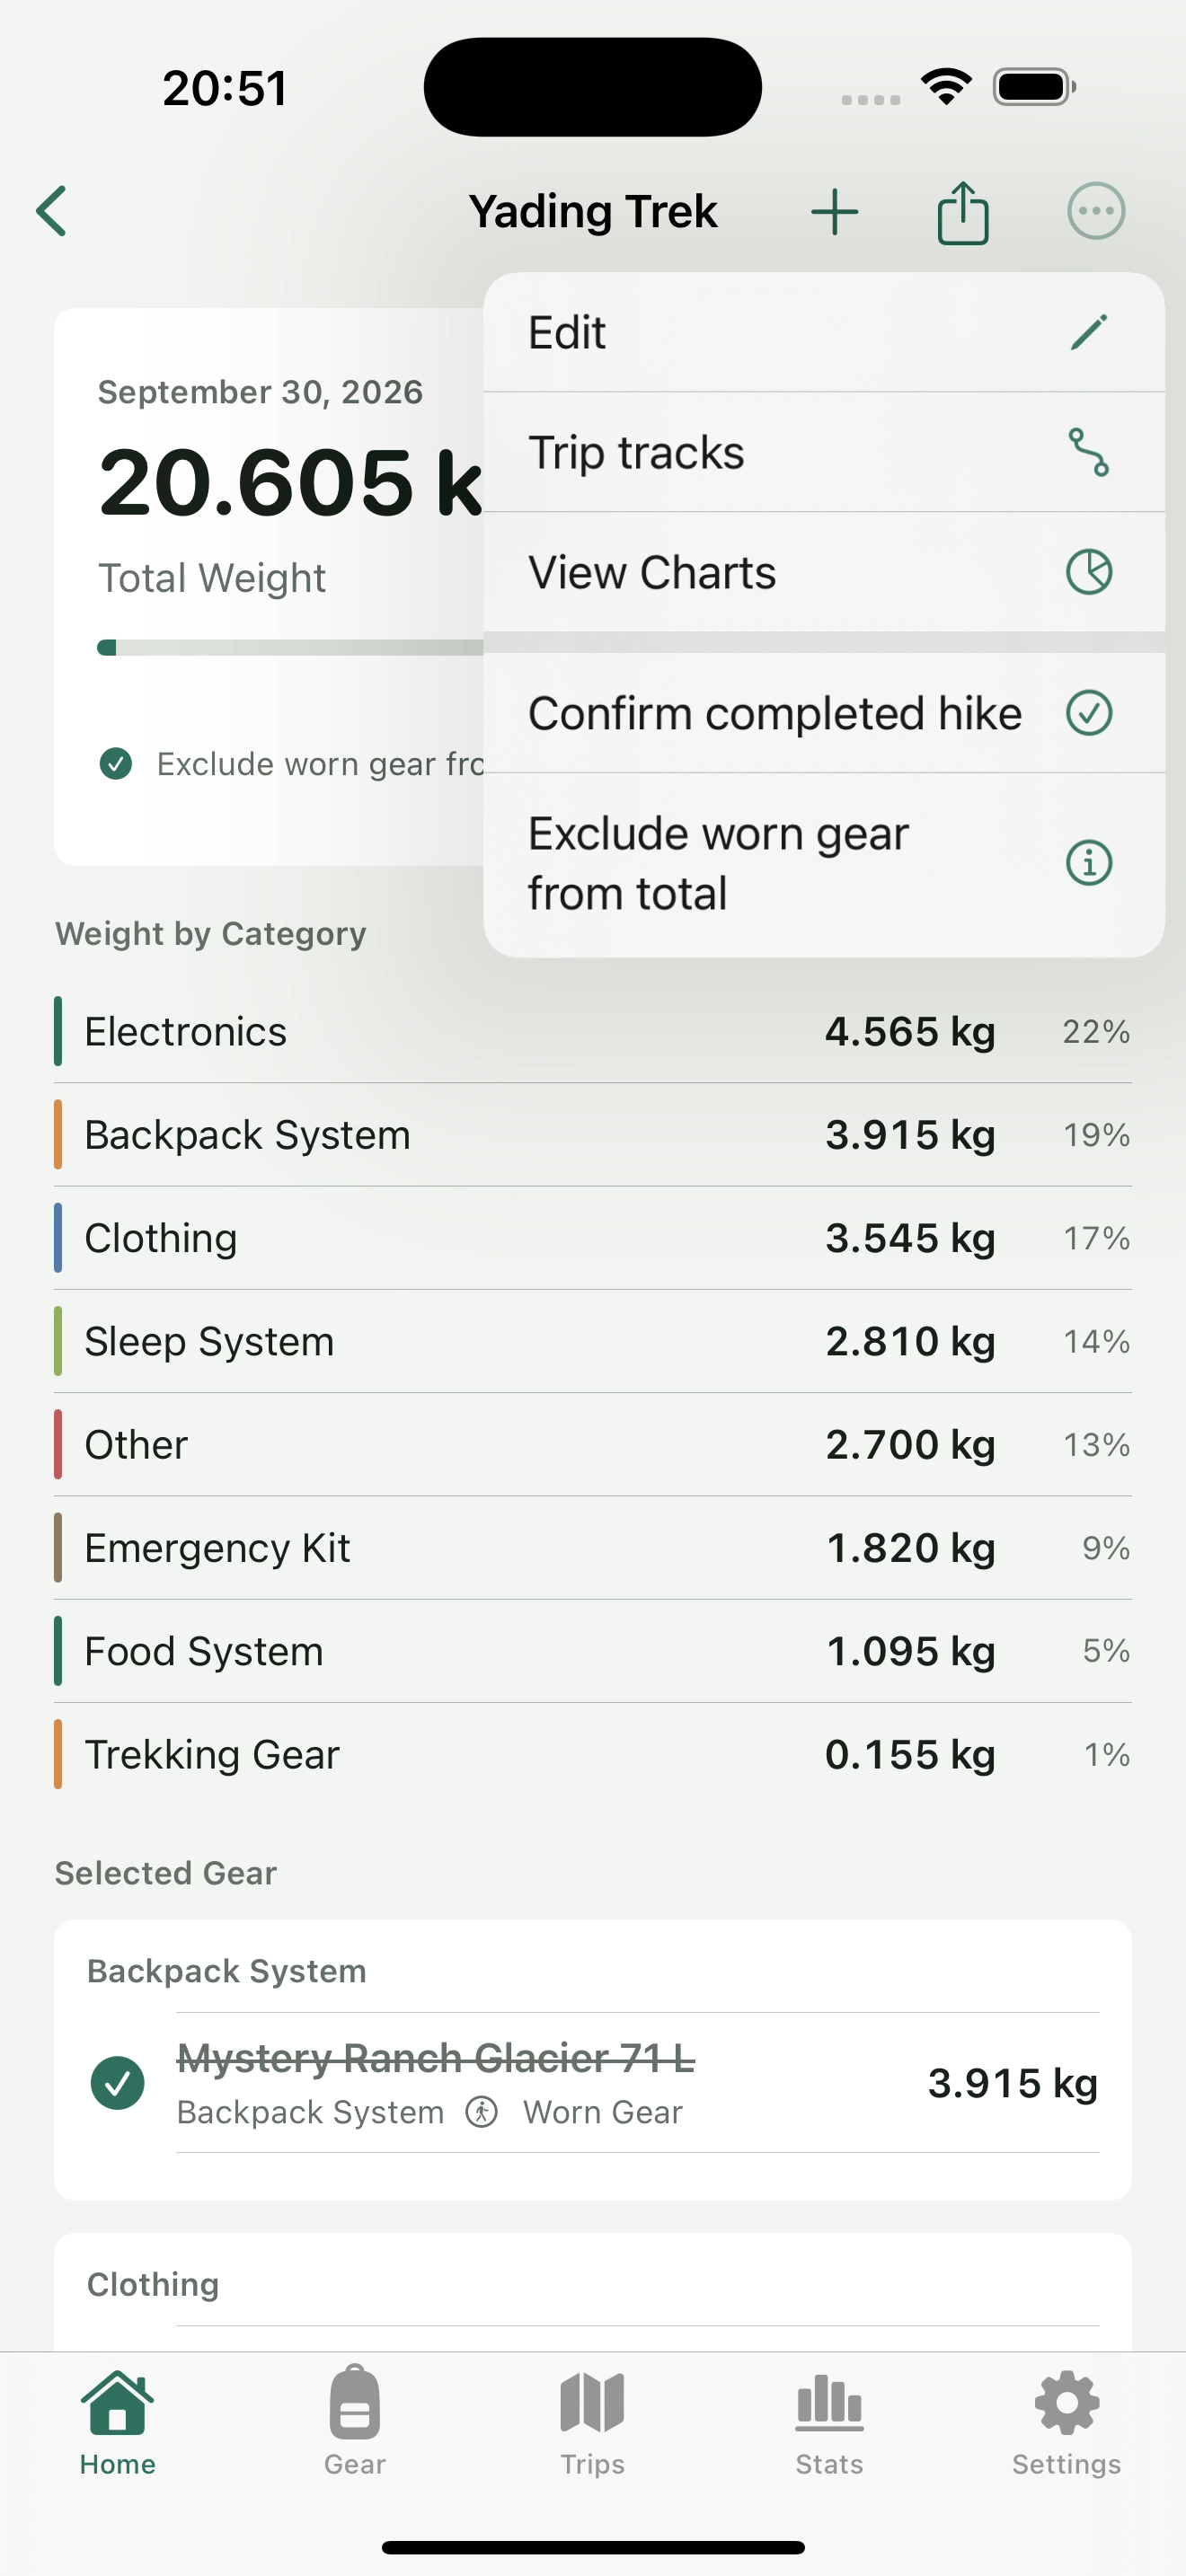
Use the three-dot menu at the top right of the trip details and choose “View Charts,” the view-charts action. This analyzes the trip’s selection rather than everything in the gear library. When you open charts from a completed trip, they use the historical gear snapshot captured at completion.
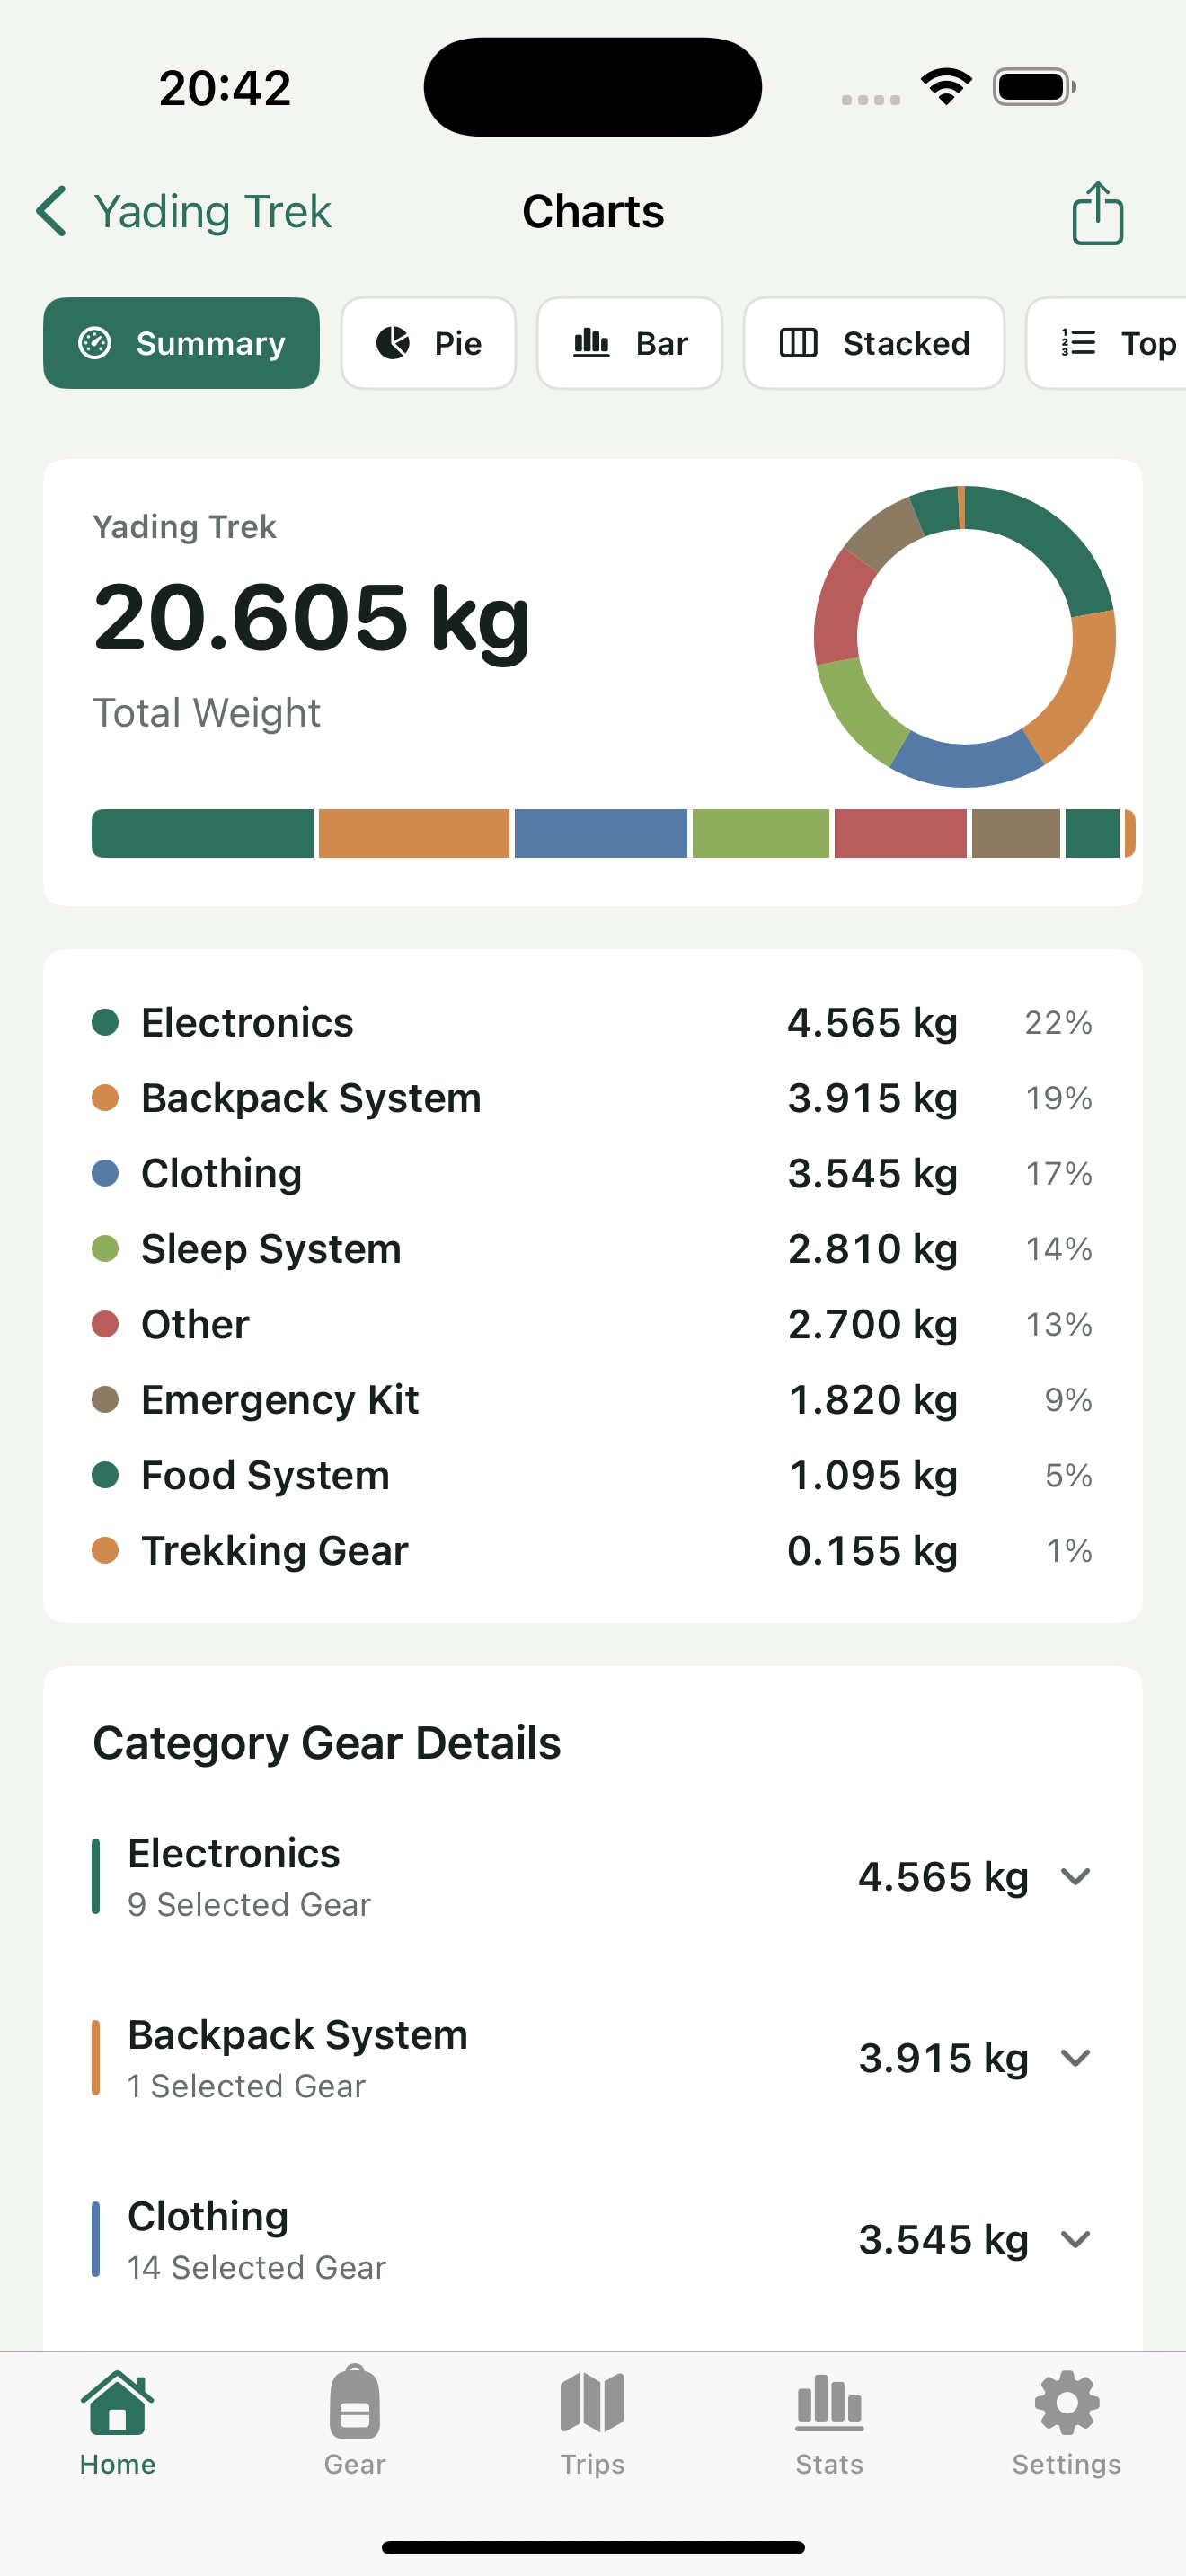
Check the trip name and unit first, especially when comparing outings. The library total, the trip’s selected entries, and a category’s item count each refer to a different scope. A higher item count also does not necessarily mean a heavier configuration.
Step 2 Read the overview and category details
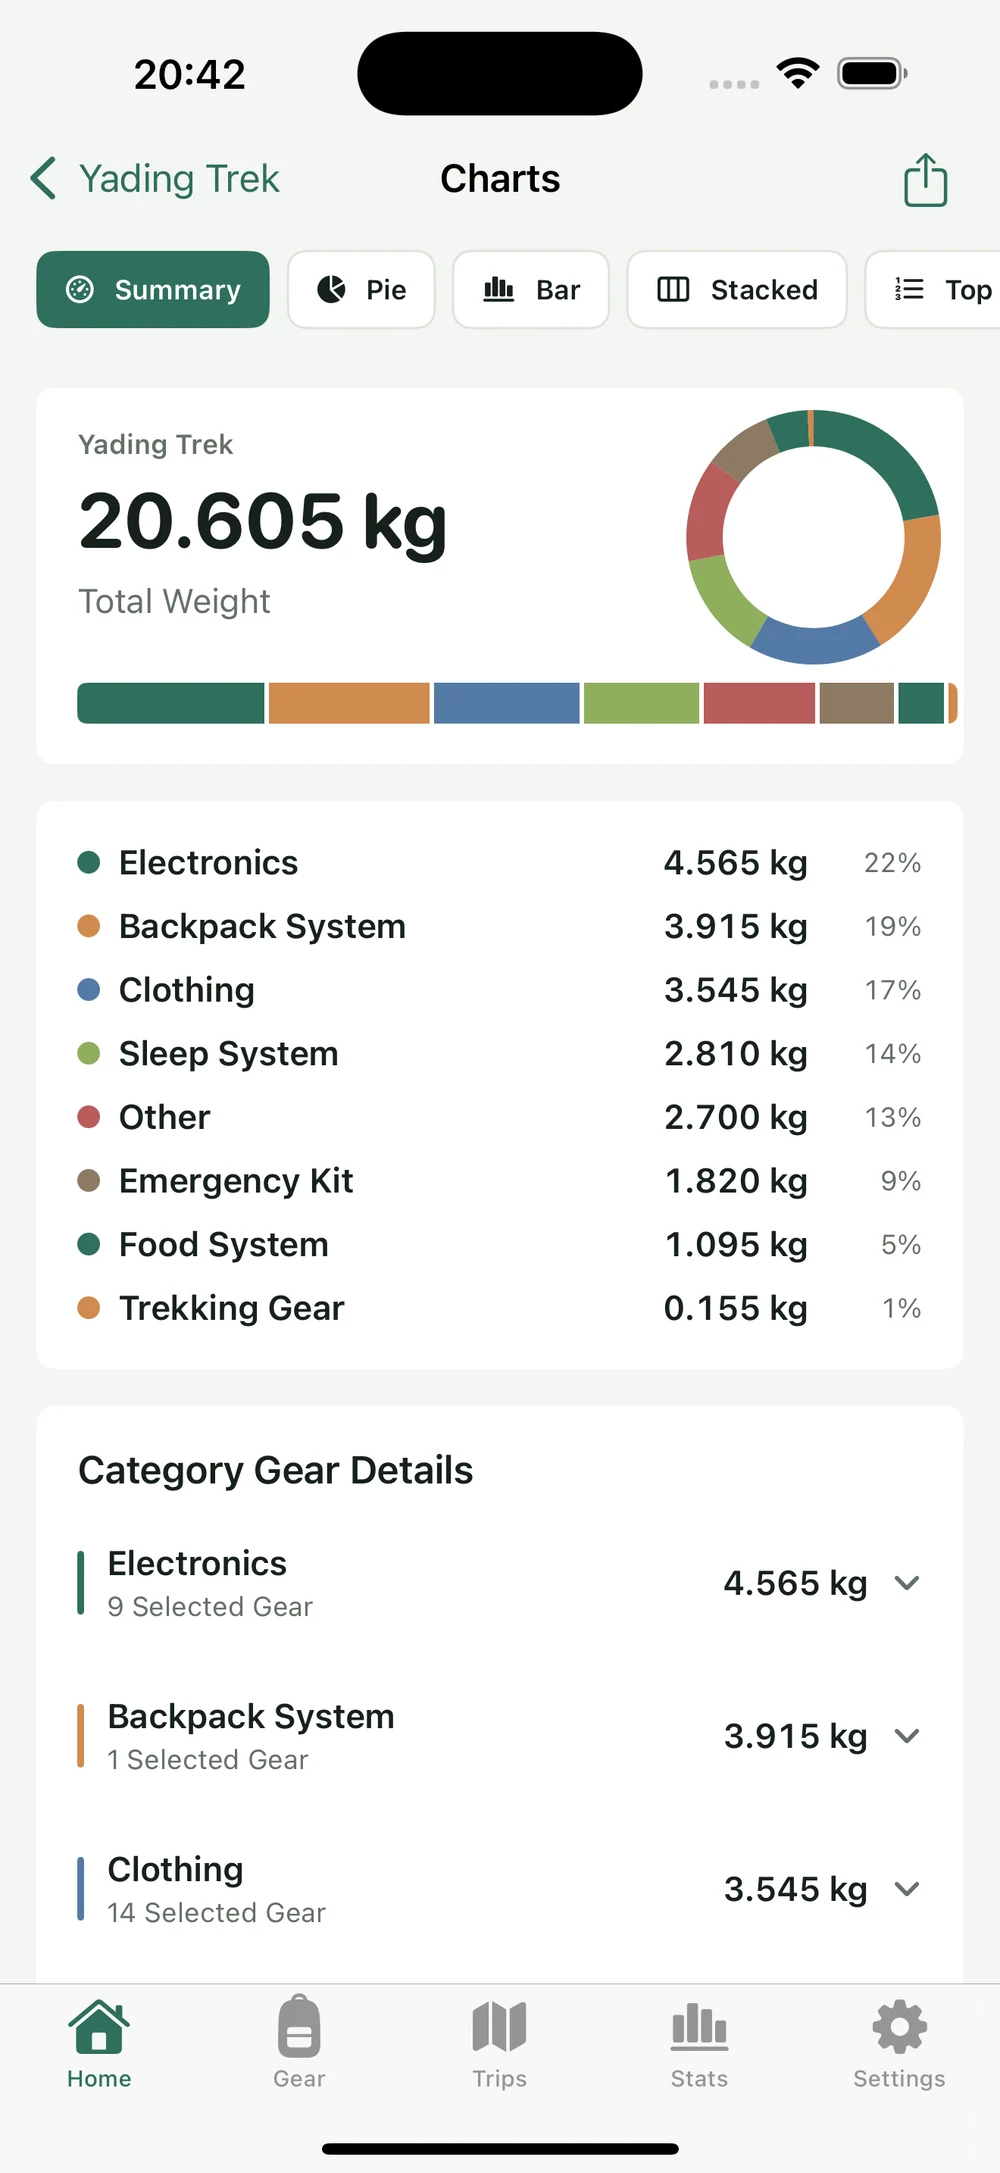
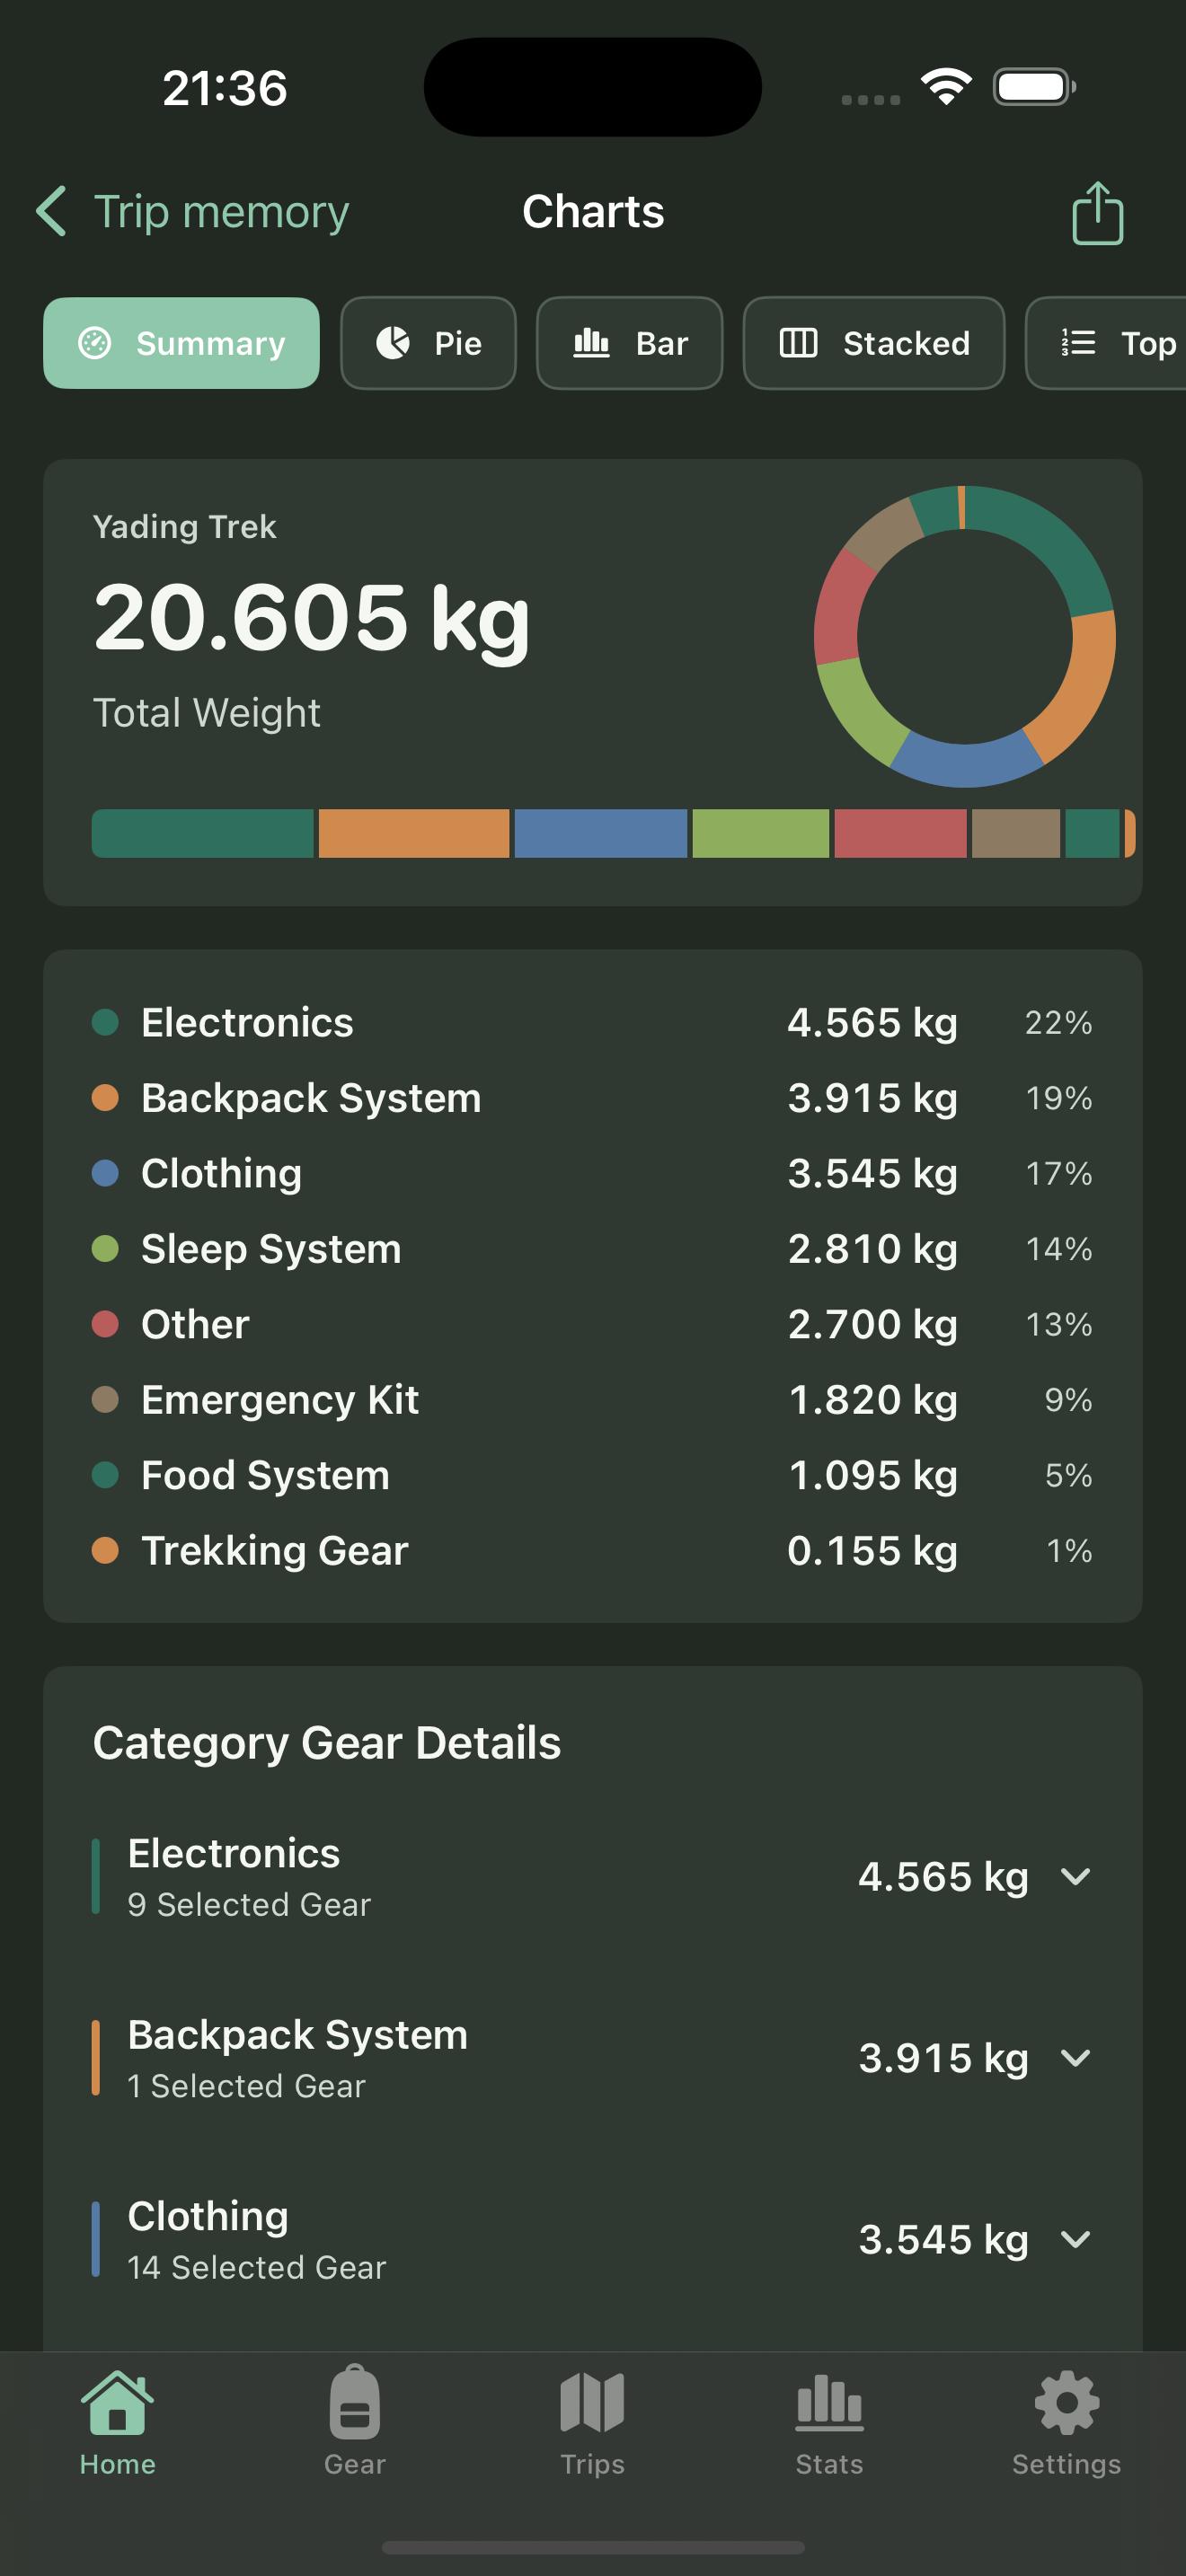
The Summary view combines total weight, category shares, and grouped gear details. Read the total first, compare category weights, then expand a category you want to inspect. You can follow a large share back to the particular equipment that contributes to it.
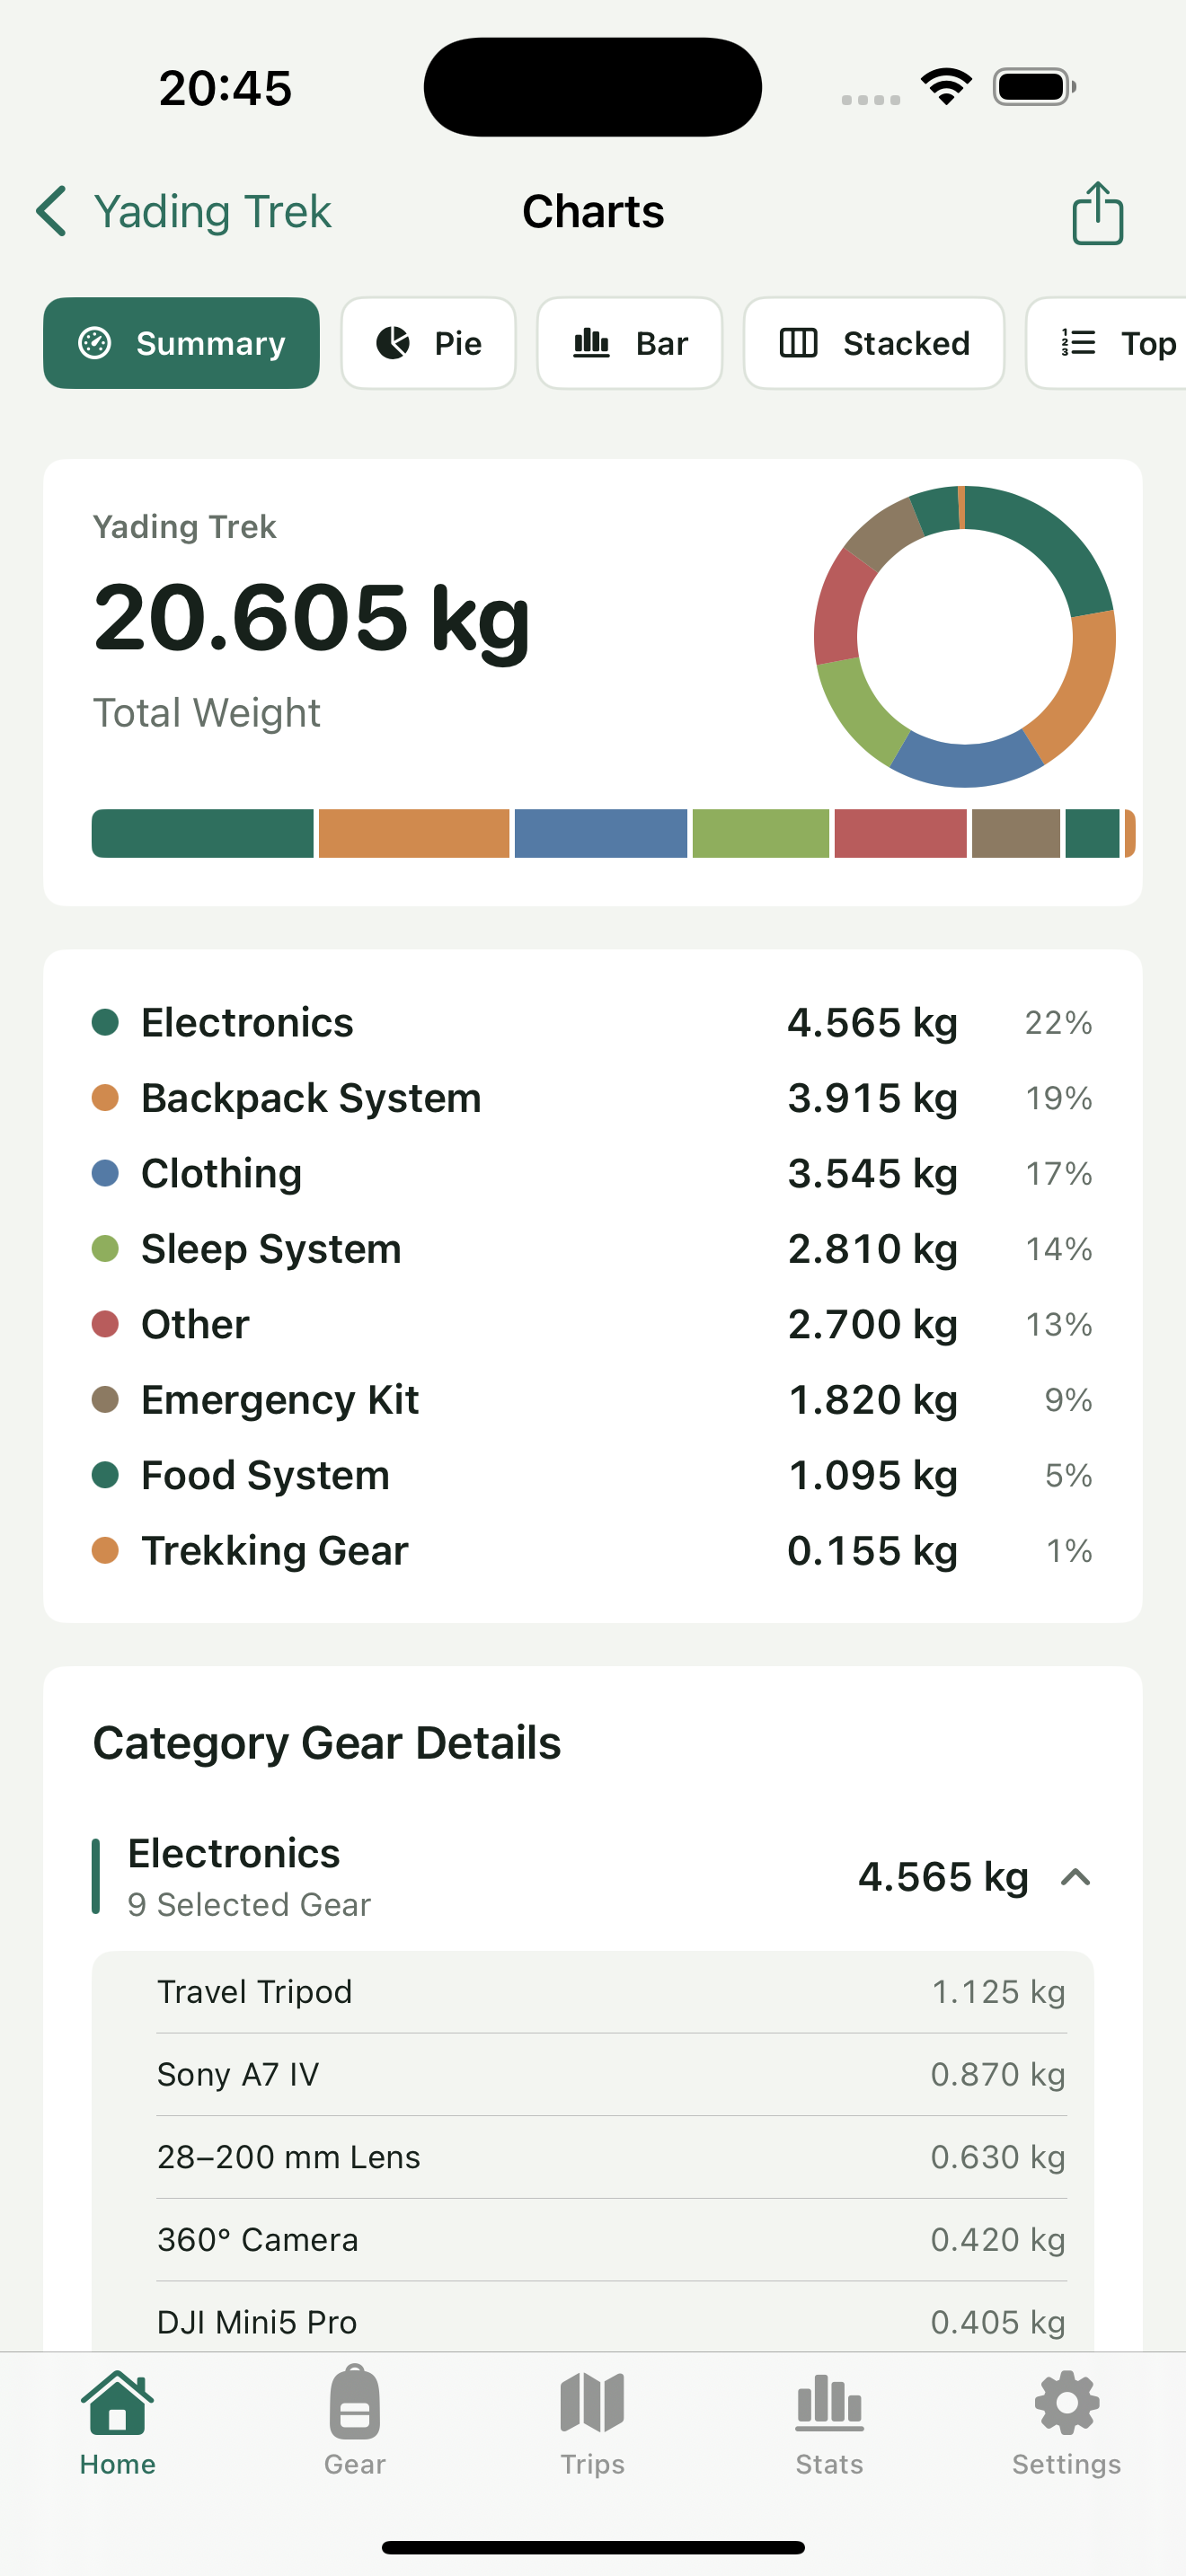
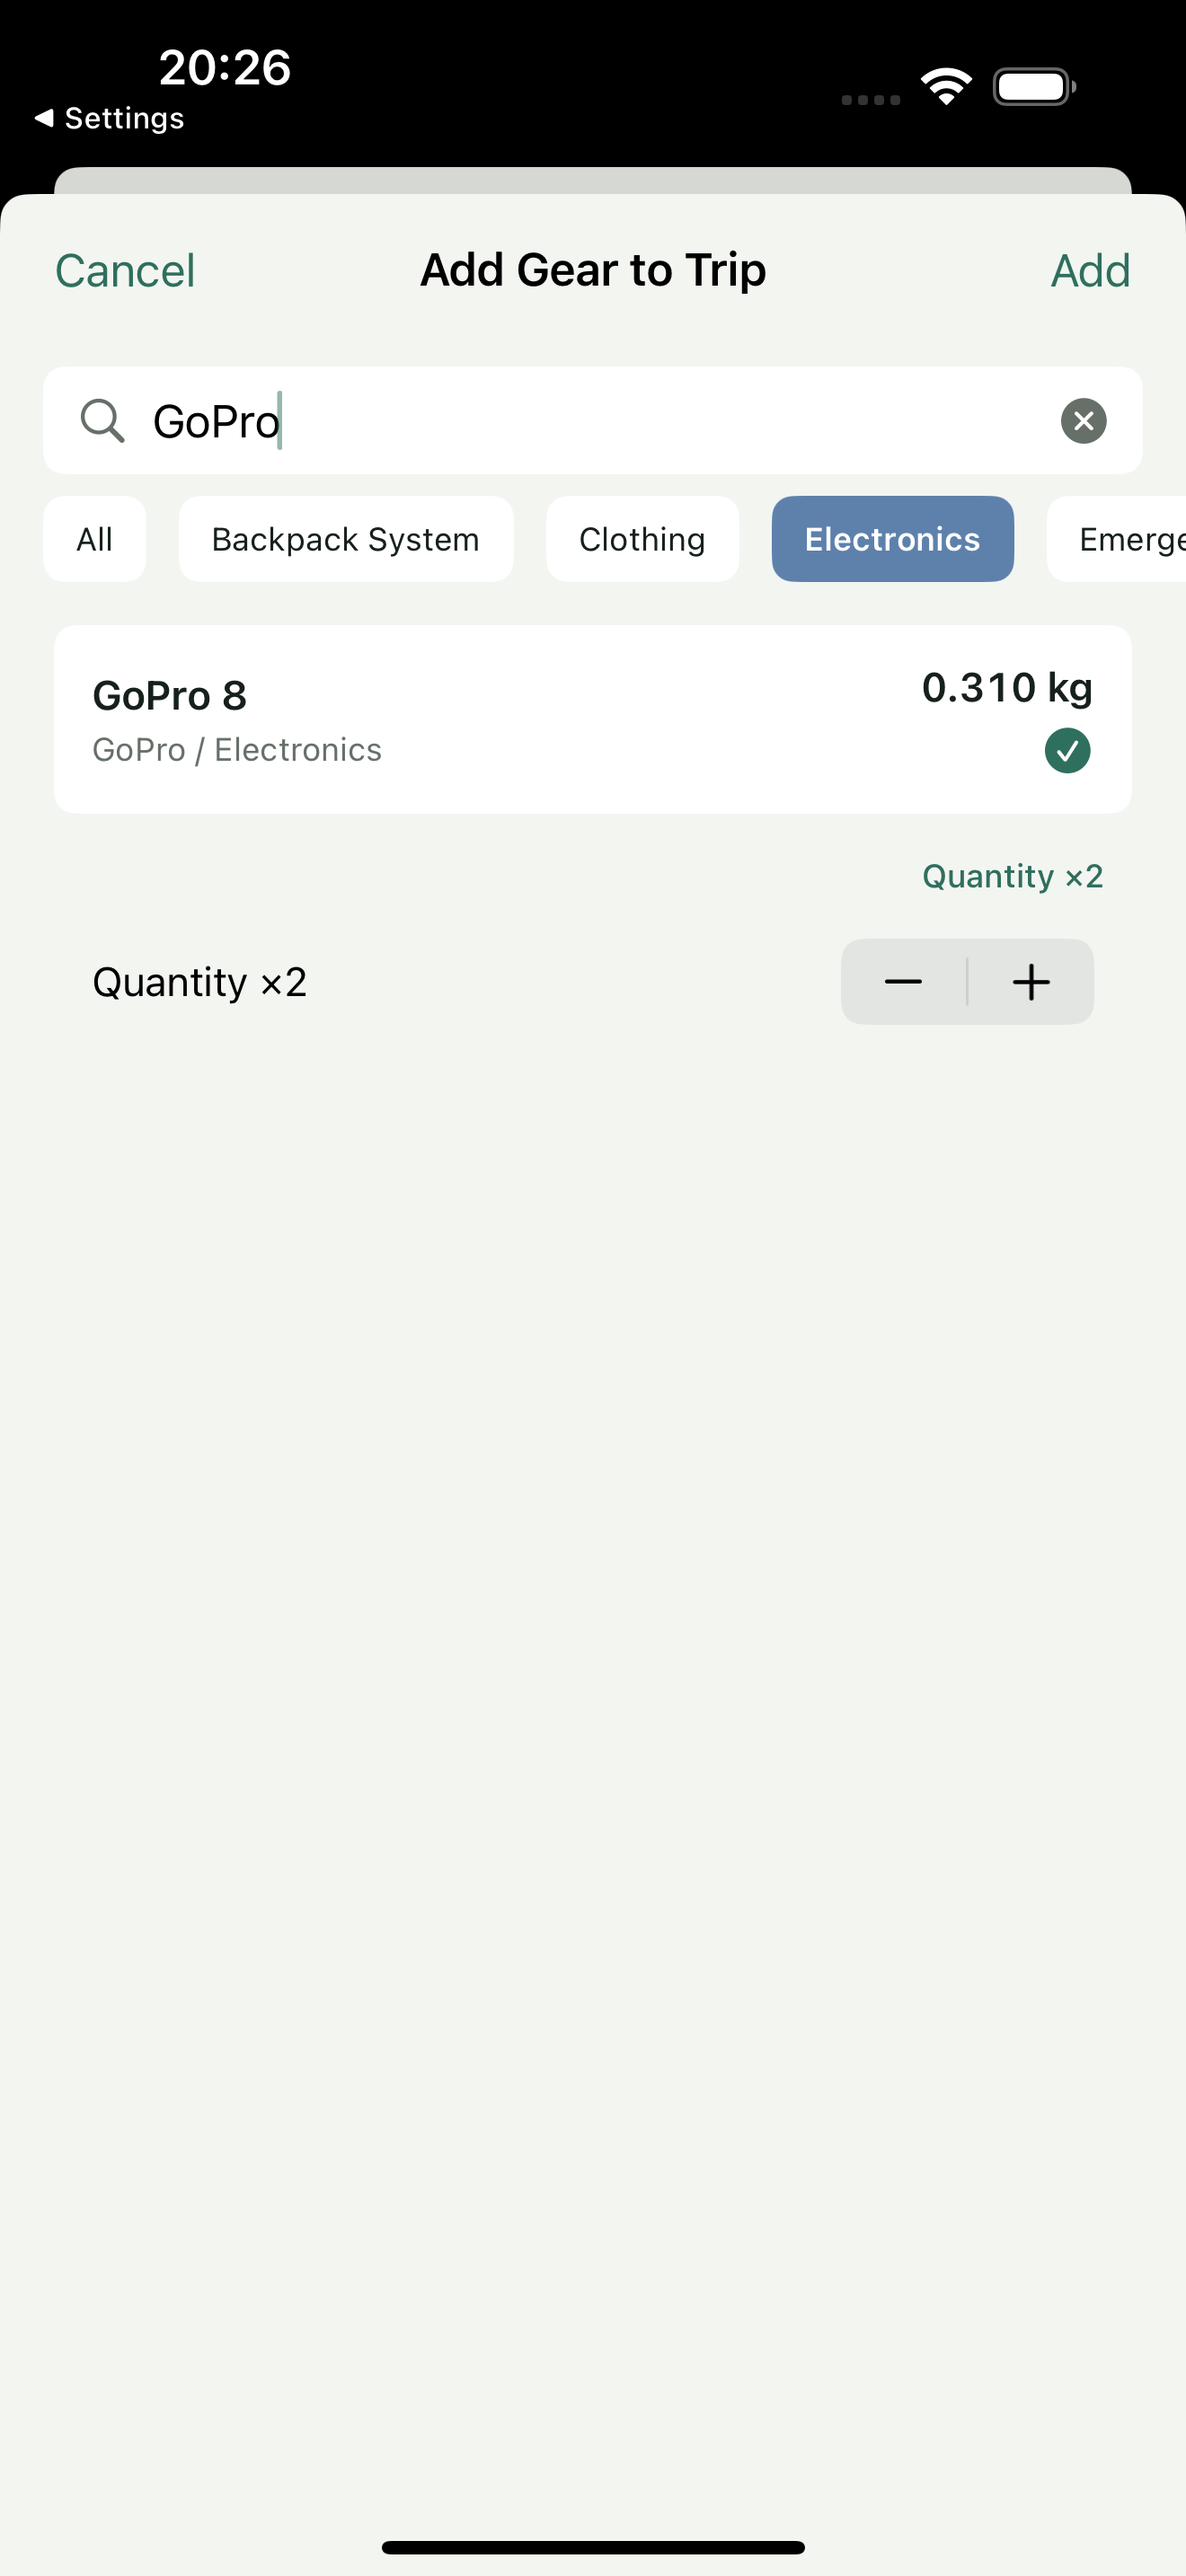
In configuration sharing, Pack weight, Worn weight, and All carried have different meanings. In this demonstration, adding GoPro 8 with a carried quantity of two brings the checklist to 53 gear entries. It shows 20.605 kg with worn gear excluded, 1.975 kg worn, and 22.580 kg with worn gear included. These figures describe this demonstrated configuration and are not a recommended load. Pack weight excludes worn gear but includes supplies listed in the checklist, so it is not base weight.
If your trip total includes worn equipment while the sharing card shows pack weight, the two numbers may differ for that reason. Read the labels and settings before treating a difference as a calculation error. For a comparison between trips, also check quantities, supplies, and how worn equipment is handled.
Step 3 Compare category weights with the bar chart
Choose “Bar” at the top of the main chart and compare bar lengths and weights. Continue to the grouped gear details (“Category Gear Details”) below and expand a category to inspect its items. In this demonstration, electronics contains nine selected entries weighing 4.565 kg; the details and overview use the same checklist.
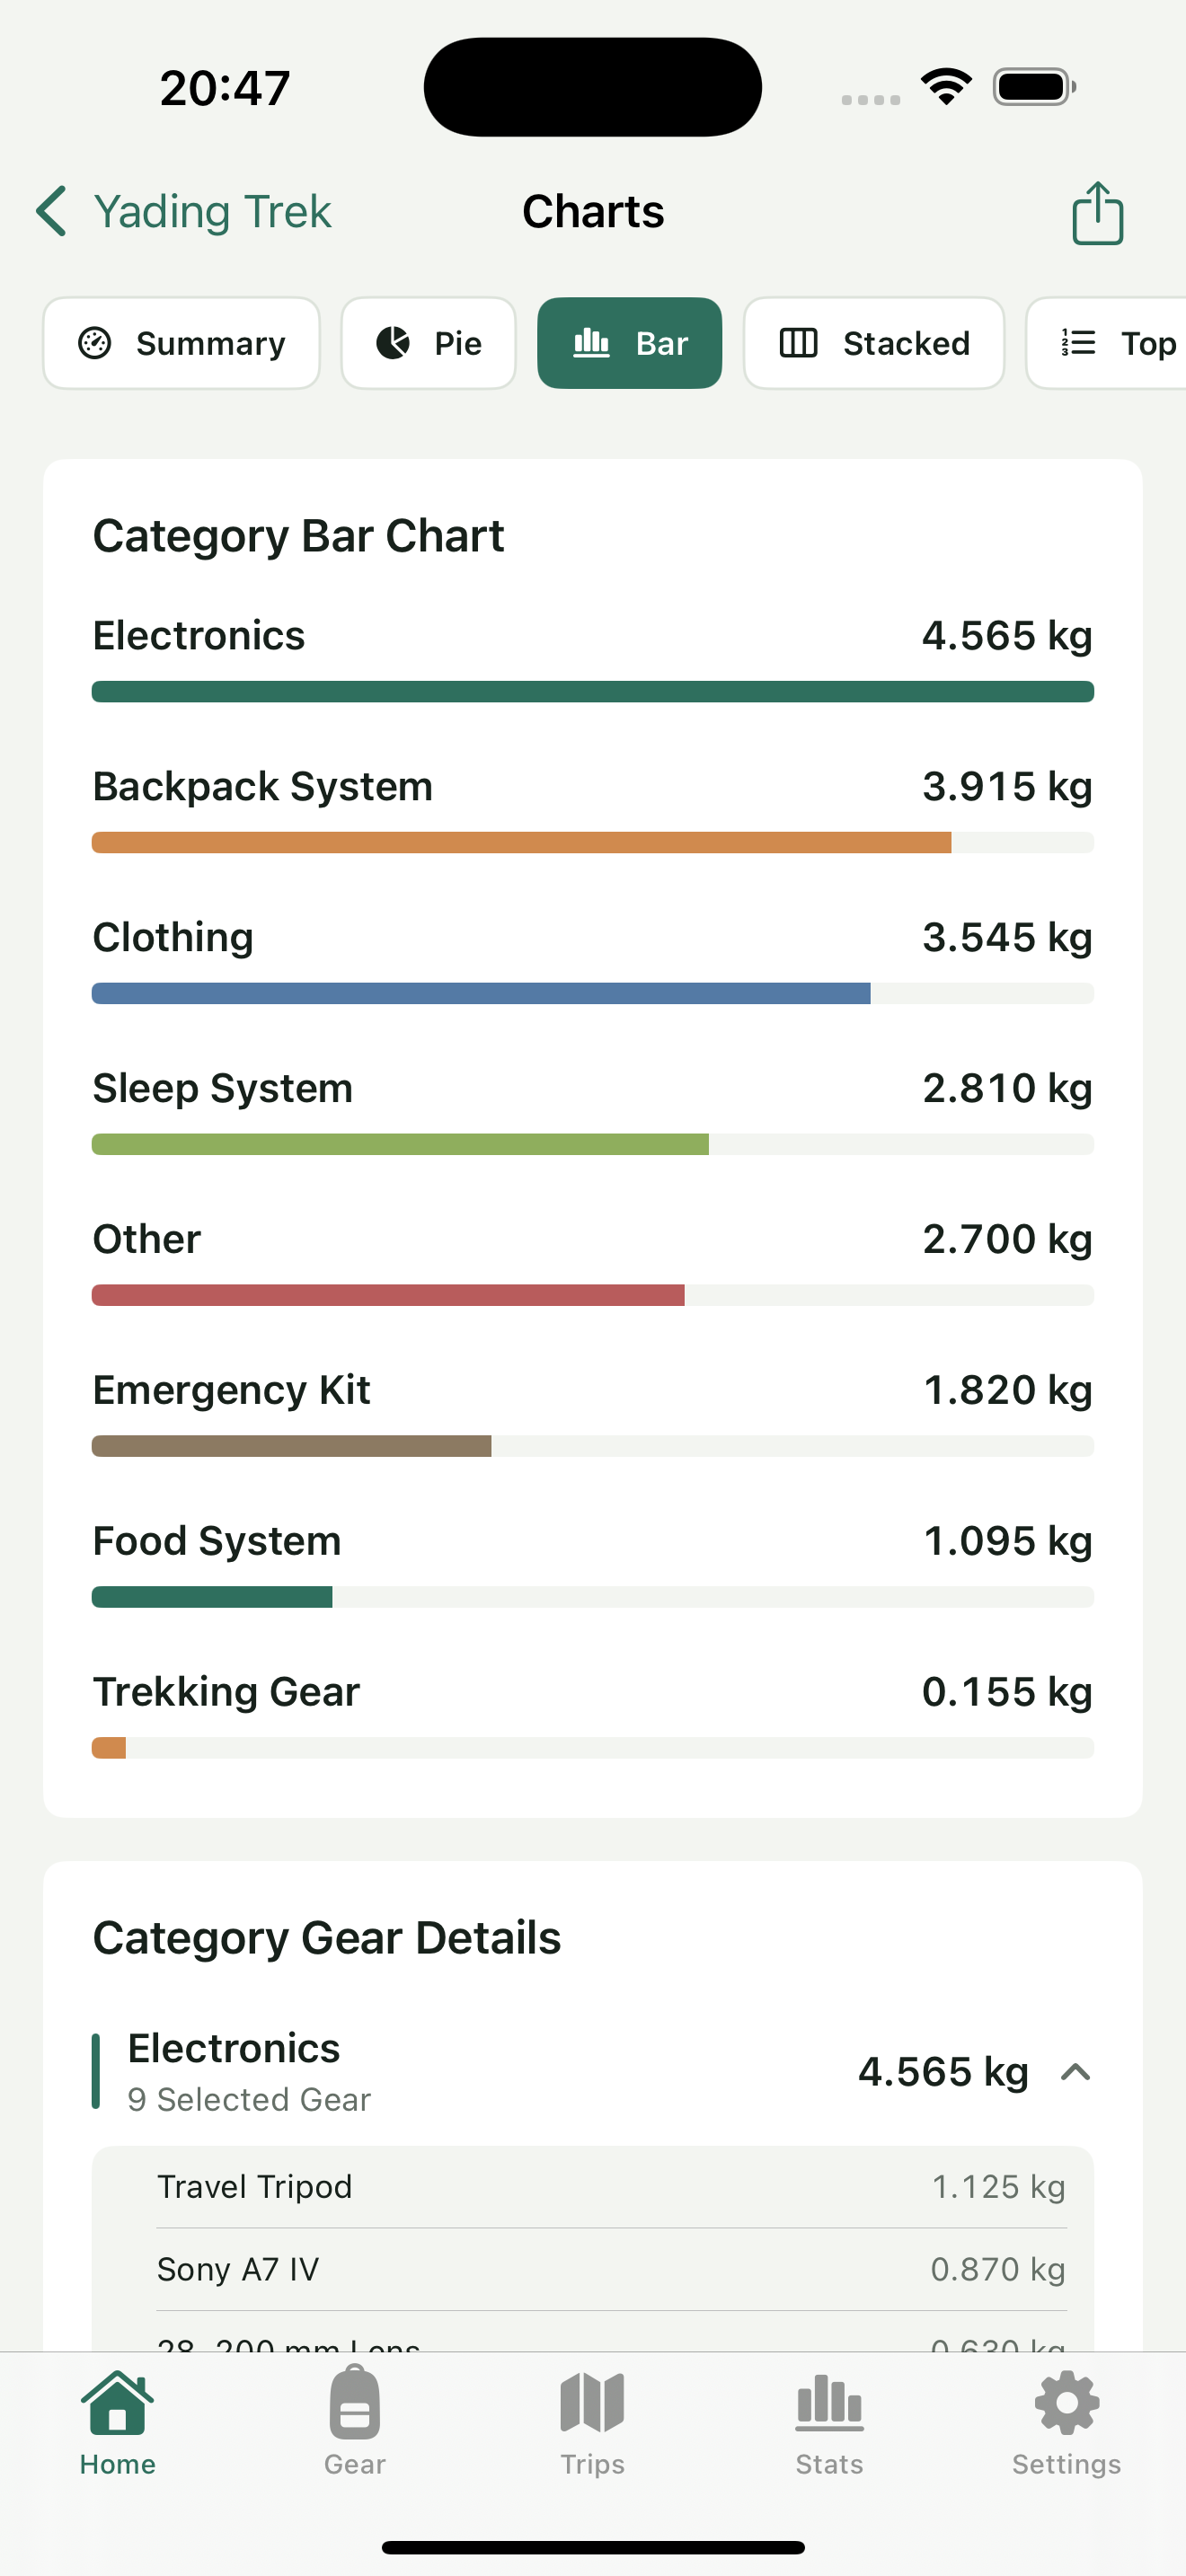
Check the information before changing the configuration. A category may have become heavier because of extra batteries, supplies, or accessories, or because a record is incorrect. A useful before-and-after comparison starts with quantities checked against the physical equipment. Changing the worn marker changes the calculation scope; it does not decrease the equipment’s physical weight.
Step 4 Read category shares with the stacked chart
Choose “Stacked” to view the category-weight stack. Each colored section corresponds to the category name, weight, and percentage below it. The full strip shows the composition of the same configuration. Colors connect categories to the chart rather than score equipment or indicate importance.
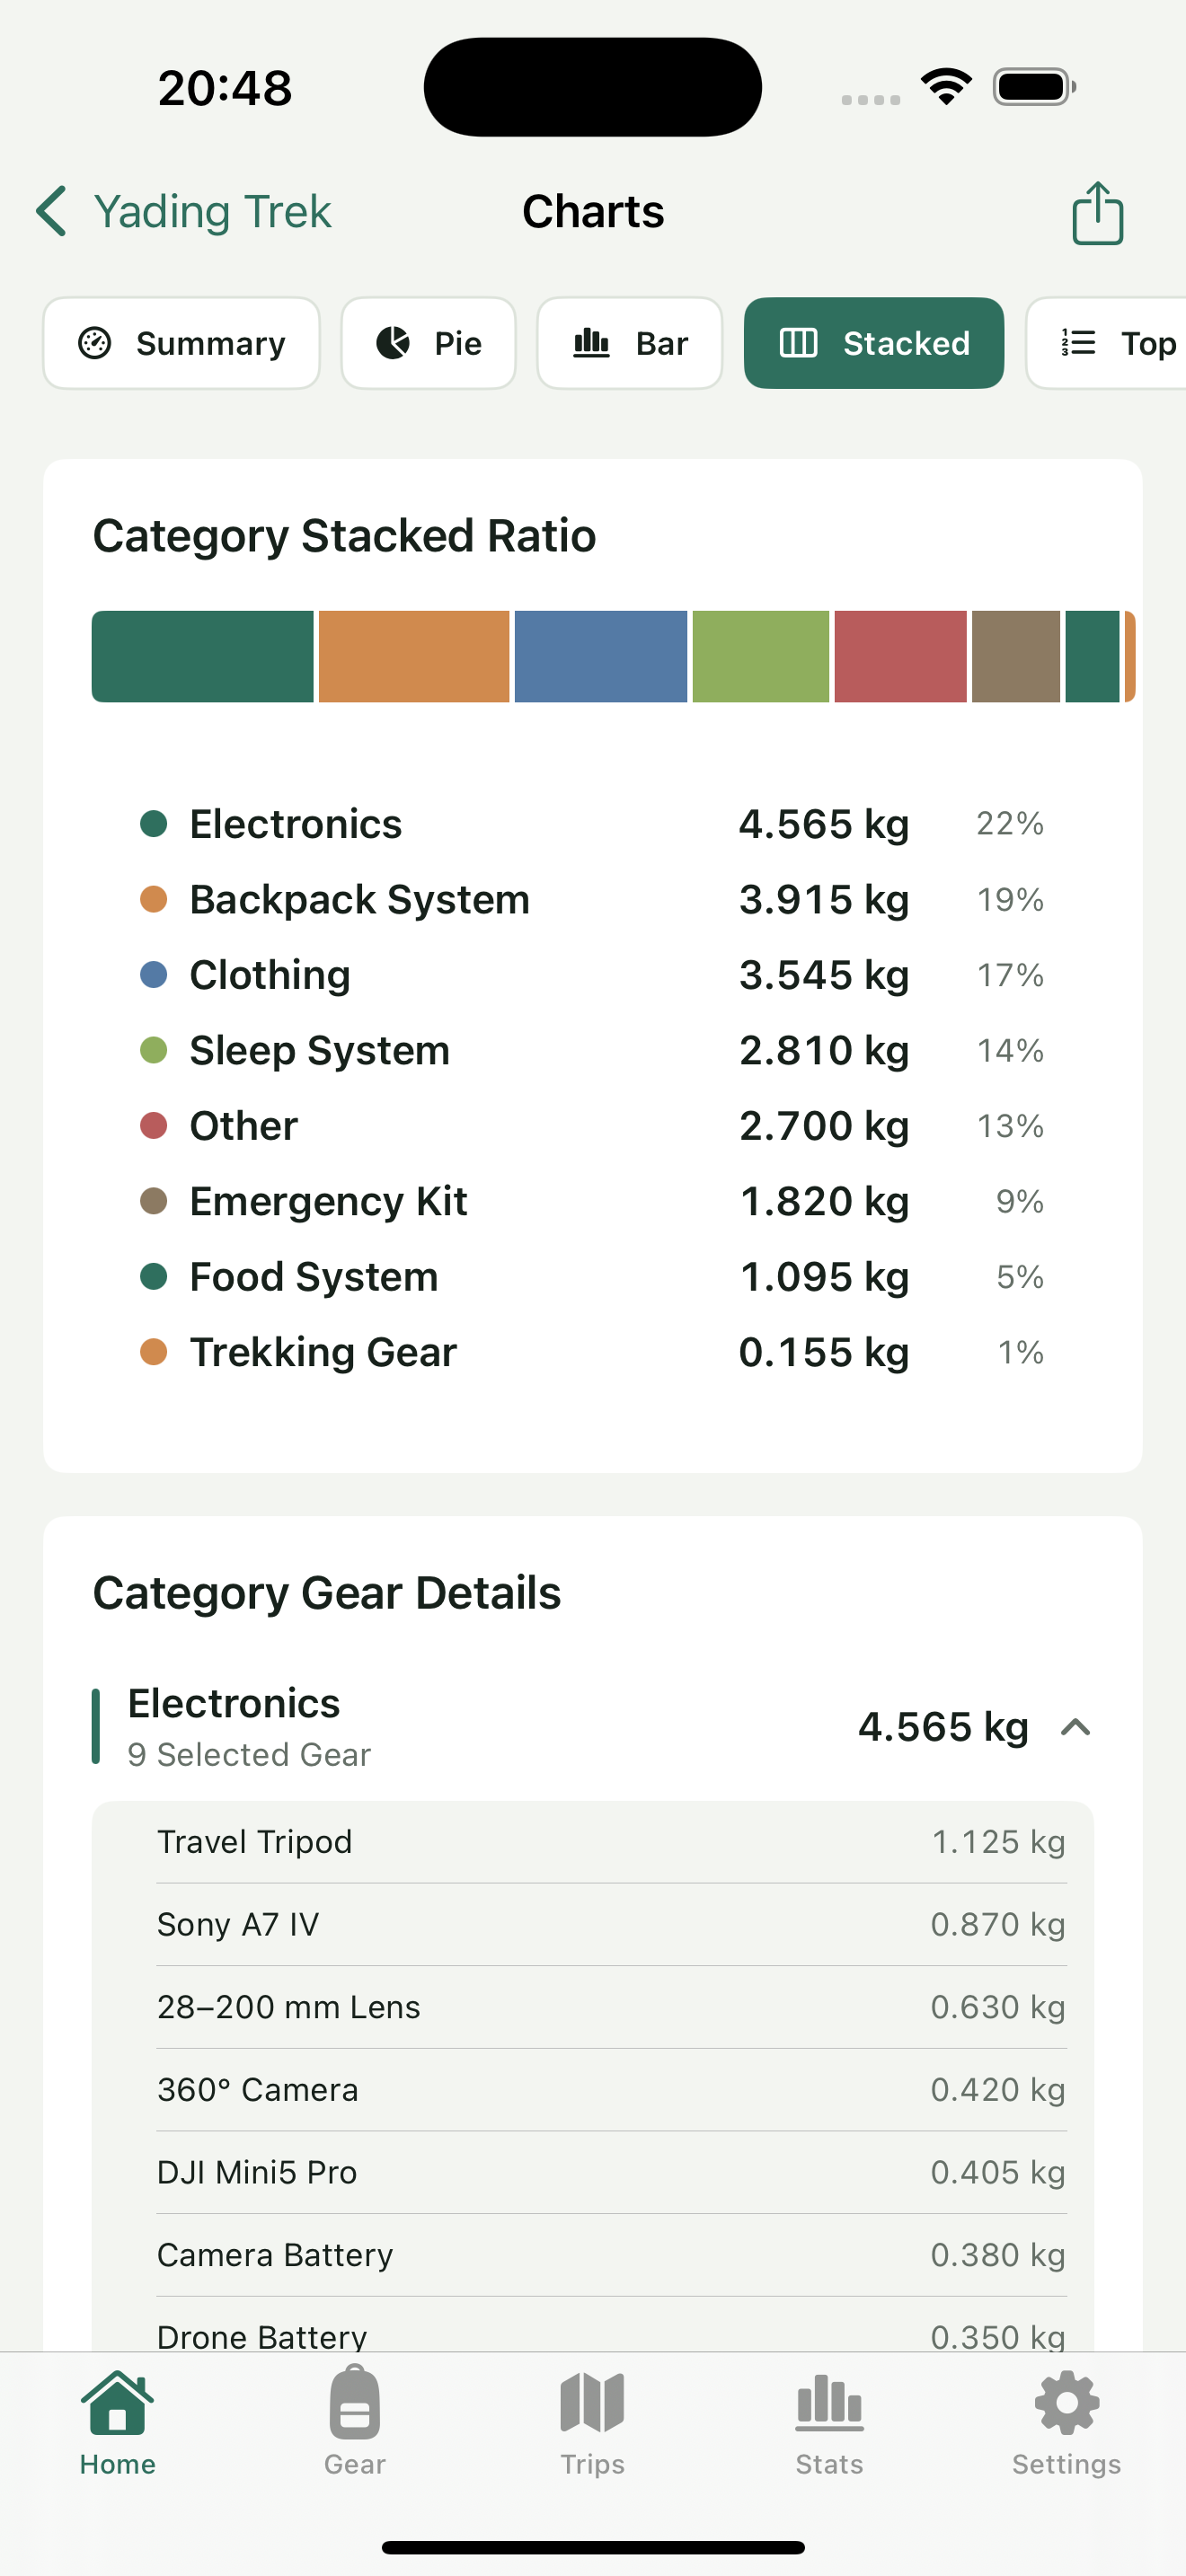
A large share can be a useful place to start checking. Look for accessories counted twice or a complete kit’s weight entered for a single component. Electronics can contribute substantially to a photography trip, and a sleeping system can weigh more on an overnight outing. A percentage alone cannot decide which category to remove.
Displayed percentages are rounded and may not total exactly 100%. Use actual weights and the same checklist to check totals rather than treating display rounding as an omitted item.
Step 5 Find heavier individual entries with Top 10
Choose Top 10 at the top to see the heaviest entries, their names, and weights. This moves the view from whole categories to individual equipment so you can check the records and carried quantities. Food appears among the heavier entries in this list, illustrating that supplies remain included in the weight calculation.
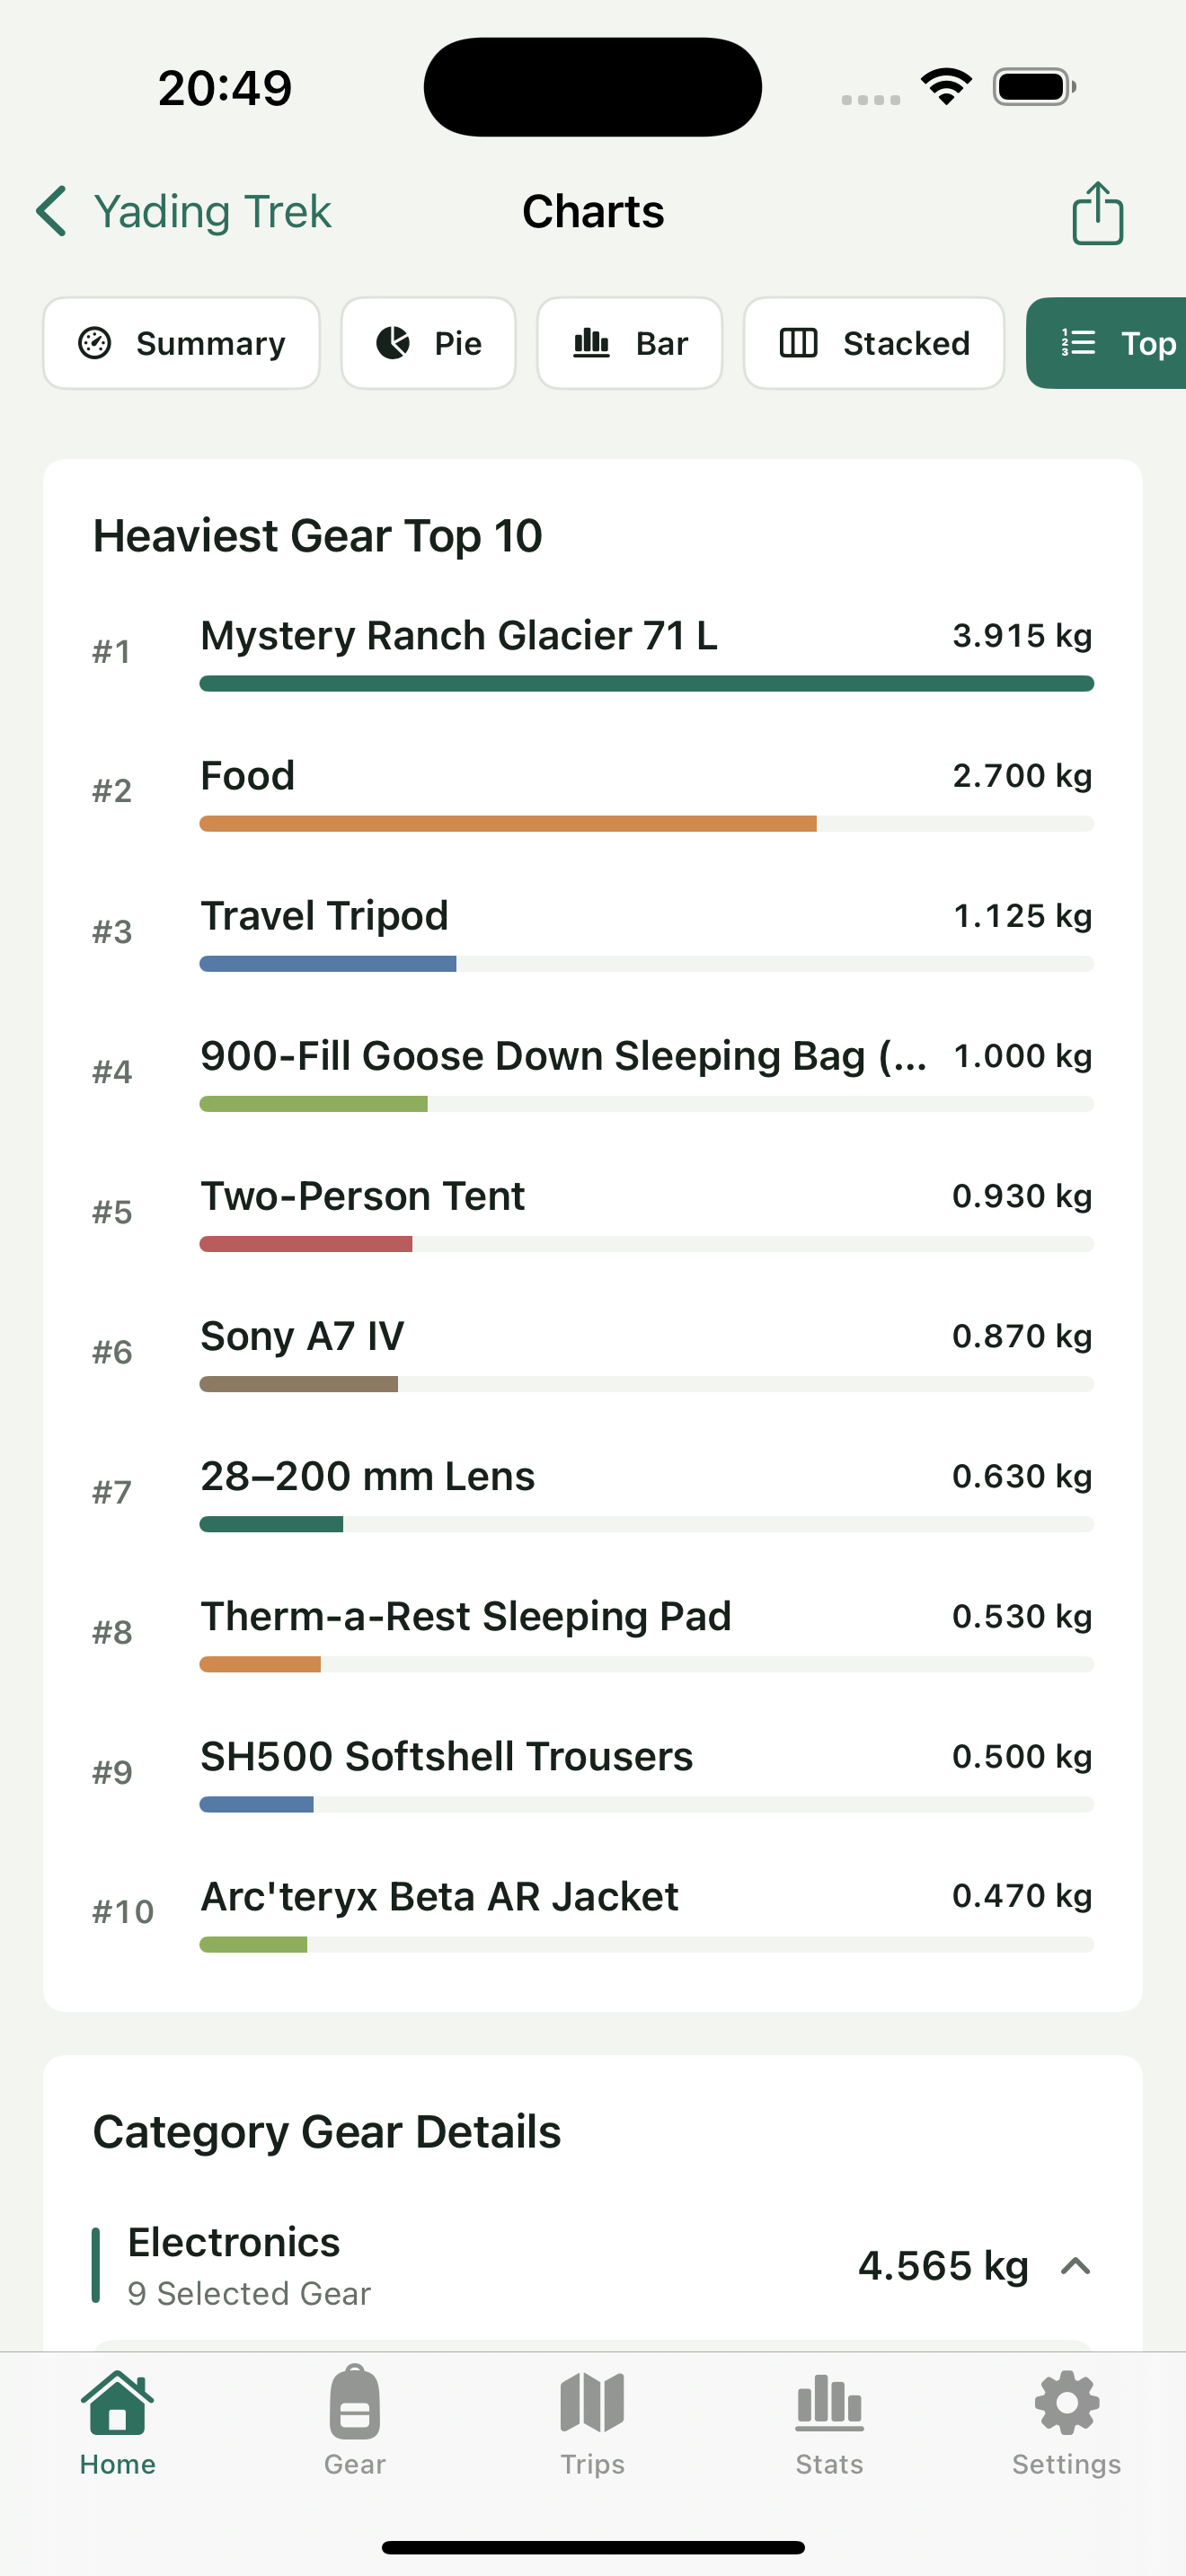
A high rank means an entry is heavier under the current weight basis, not that it should be removed. To compare another configuration after checking the records, return to the unfinished trip, adjust the actual selection, and reopen the charts.
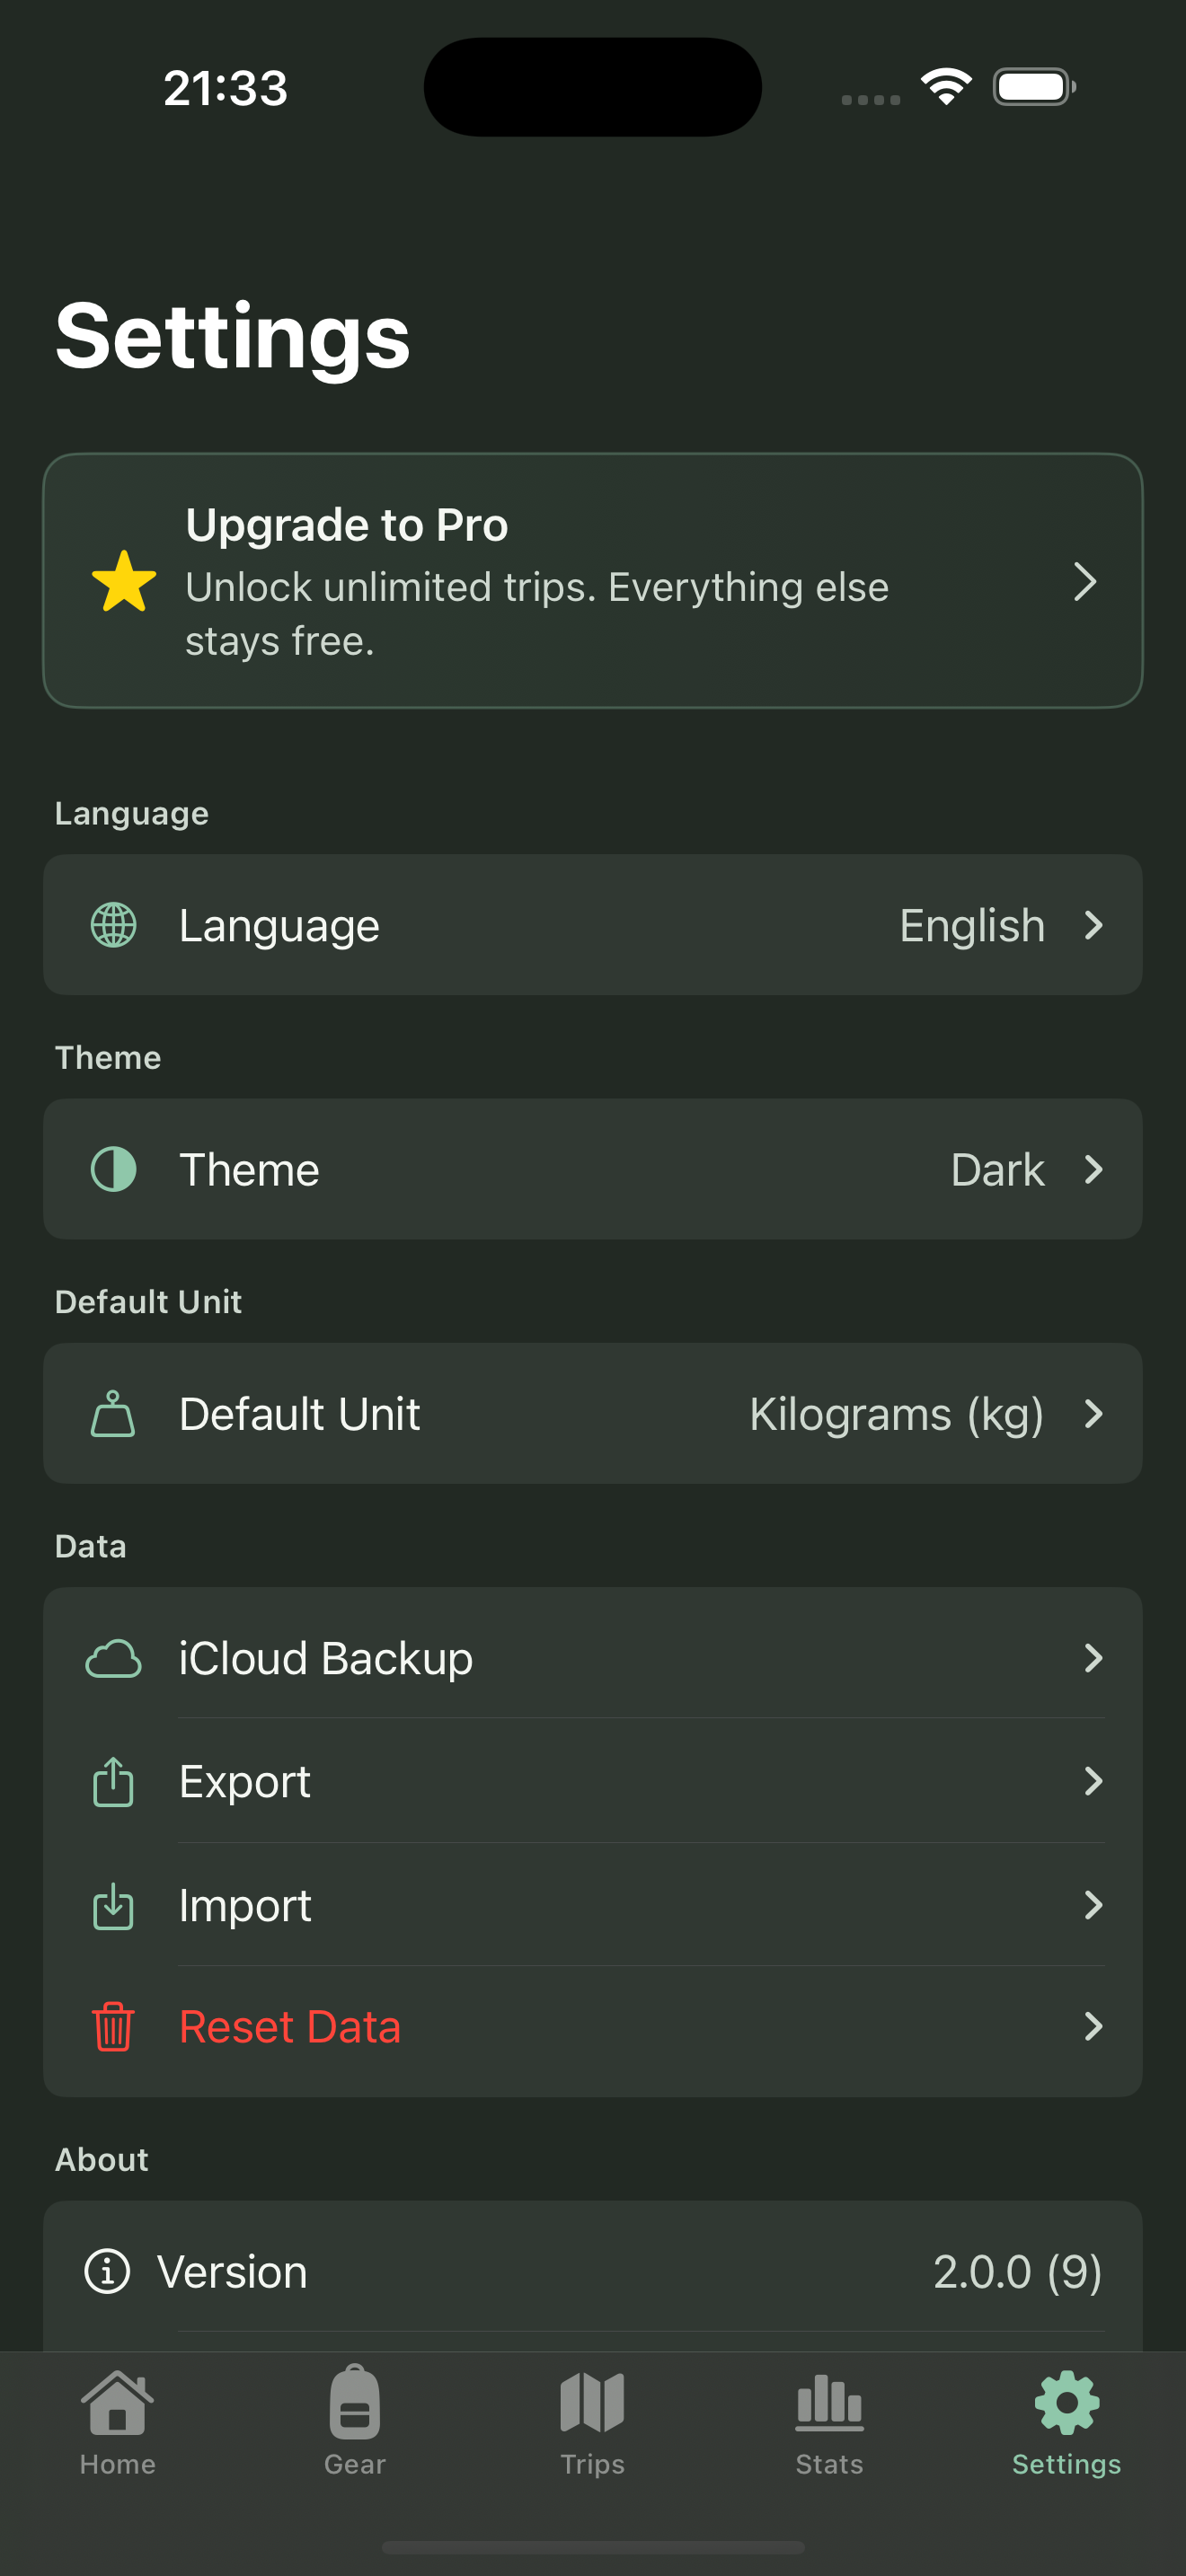
To compare light and dark app appearances, change the theme under “Theme” in Settings, then return to the same trip chart. Names, weights, categories, and quantities should belong to one configuration. A chart from another trip is not evidence of the same data in a different theme.
Step 6 Save a readable analysis image
After checking the charts, return to the same trip and choose “Share configuration” in its three-dot menu to open Share preview. The chart’s sharing menu also offers “Create share card.” In Share preview, choose Pack profile for an overview or Gear list for individual equipment. Select Pie, Bar, or Stacked, then choose the image colors and Pages or Long image. The English examples below use the Electronics gear list.
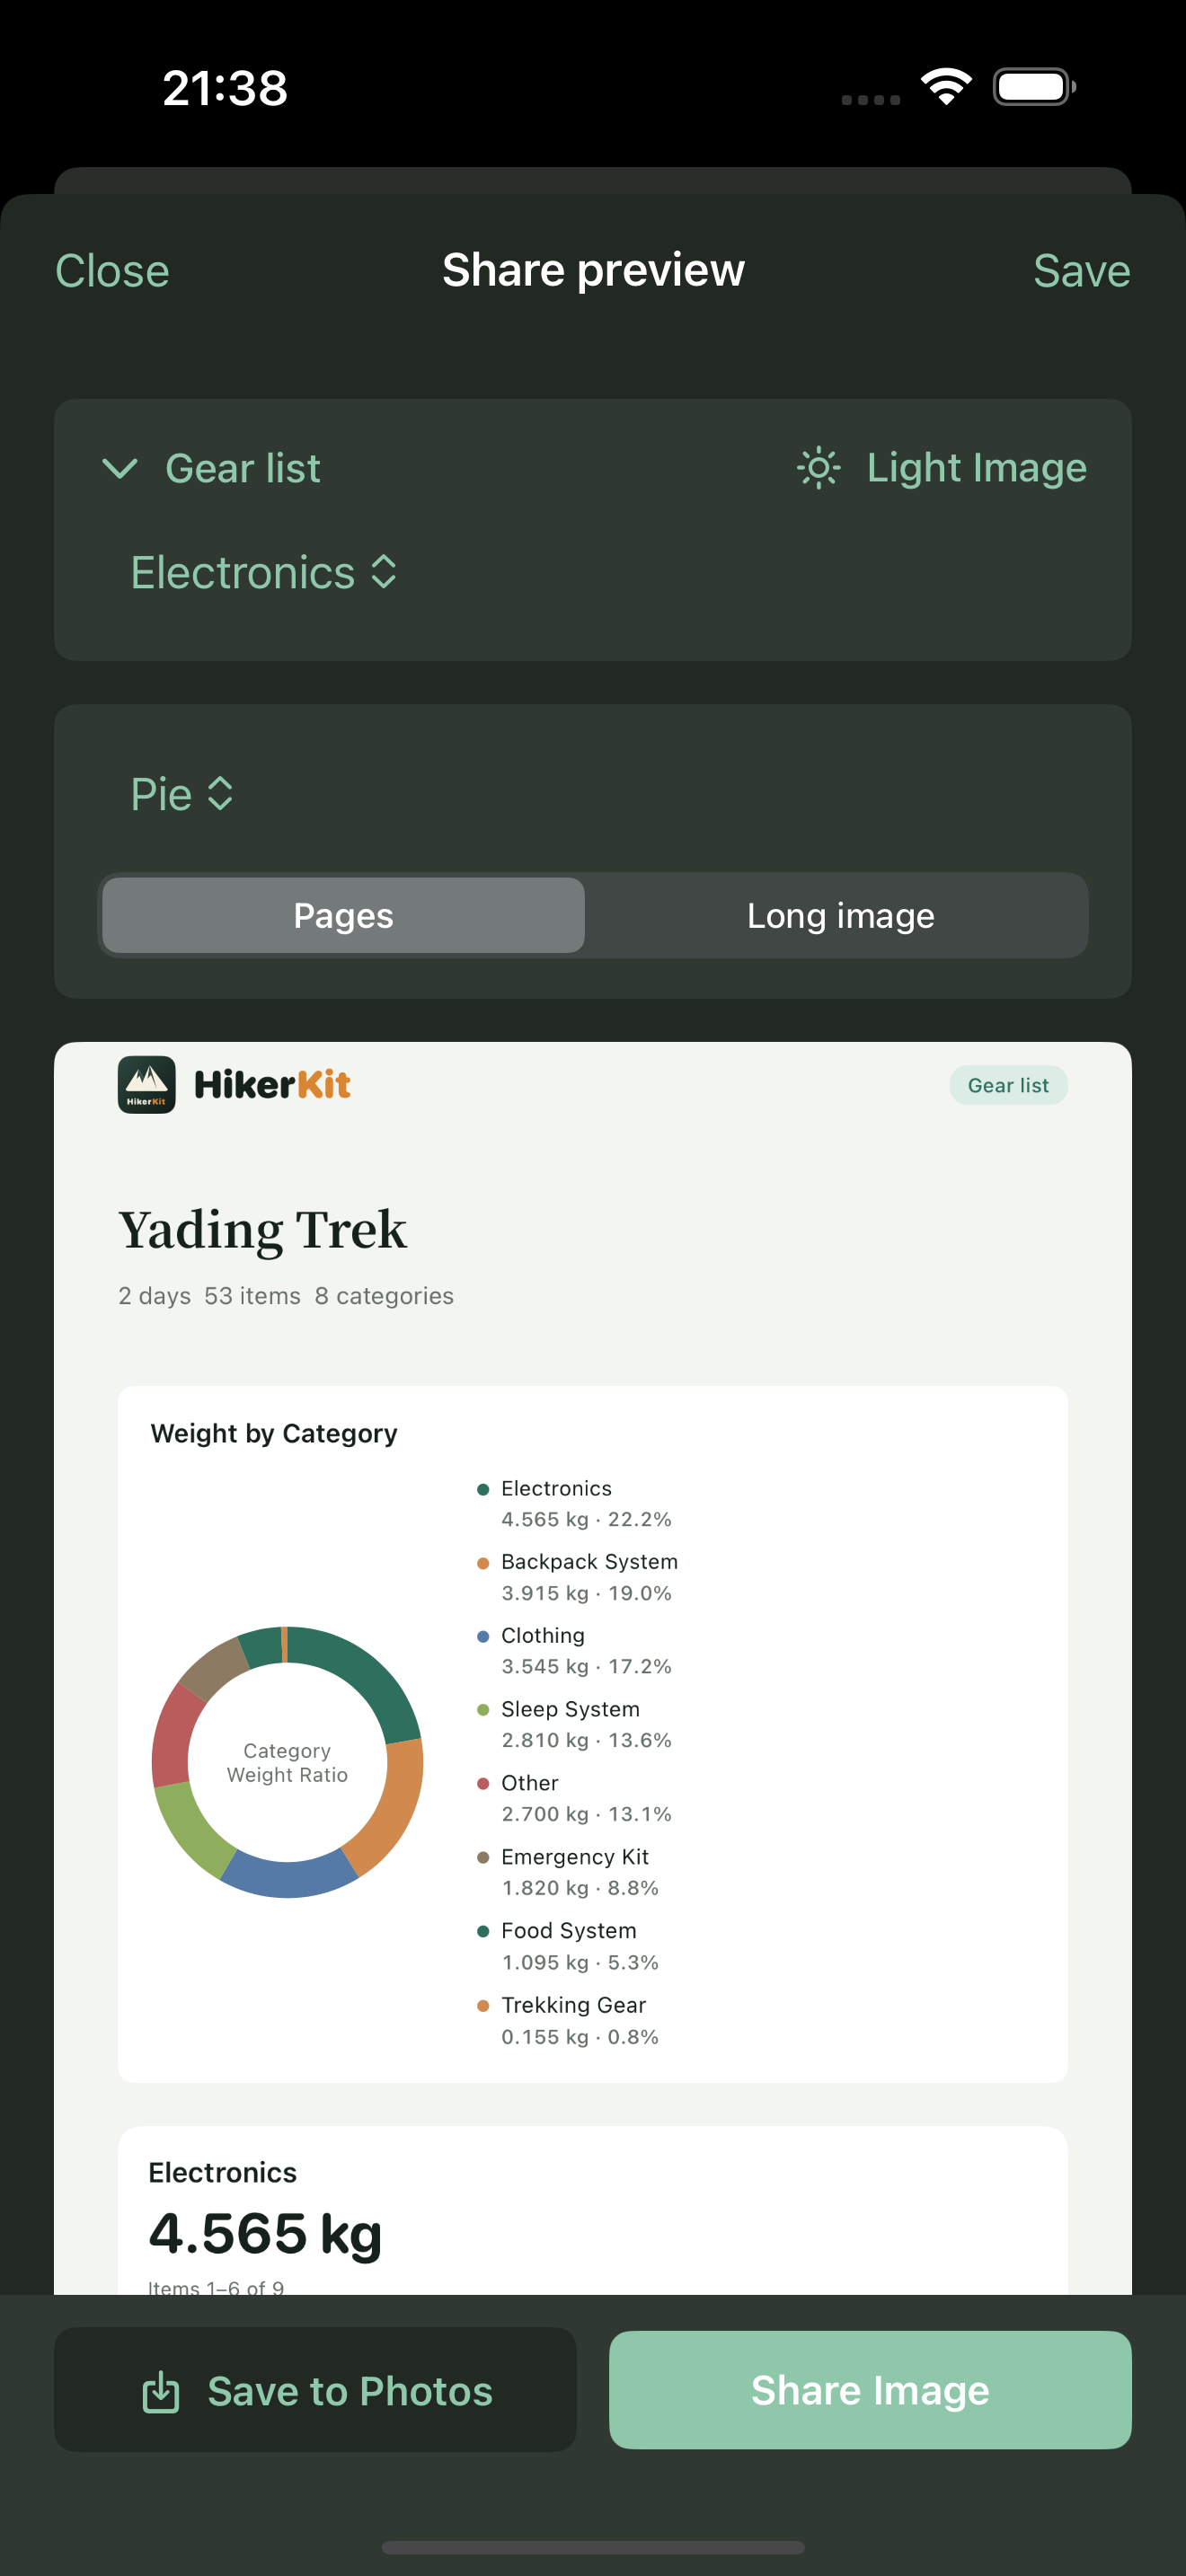 Dark app: light image, Pie, Pages
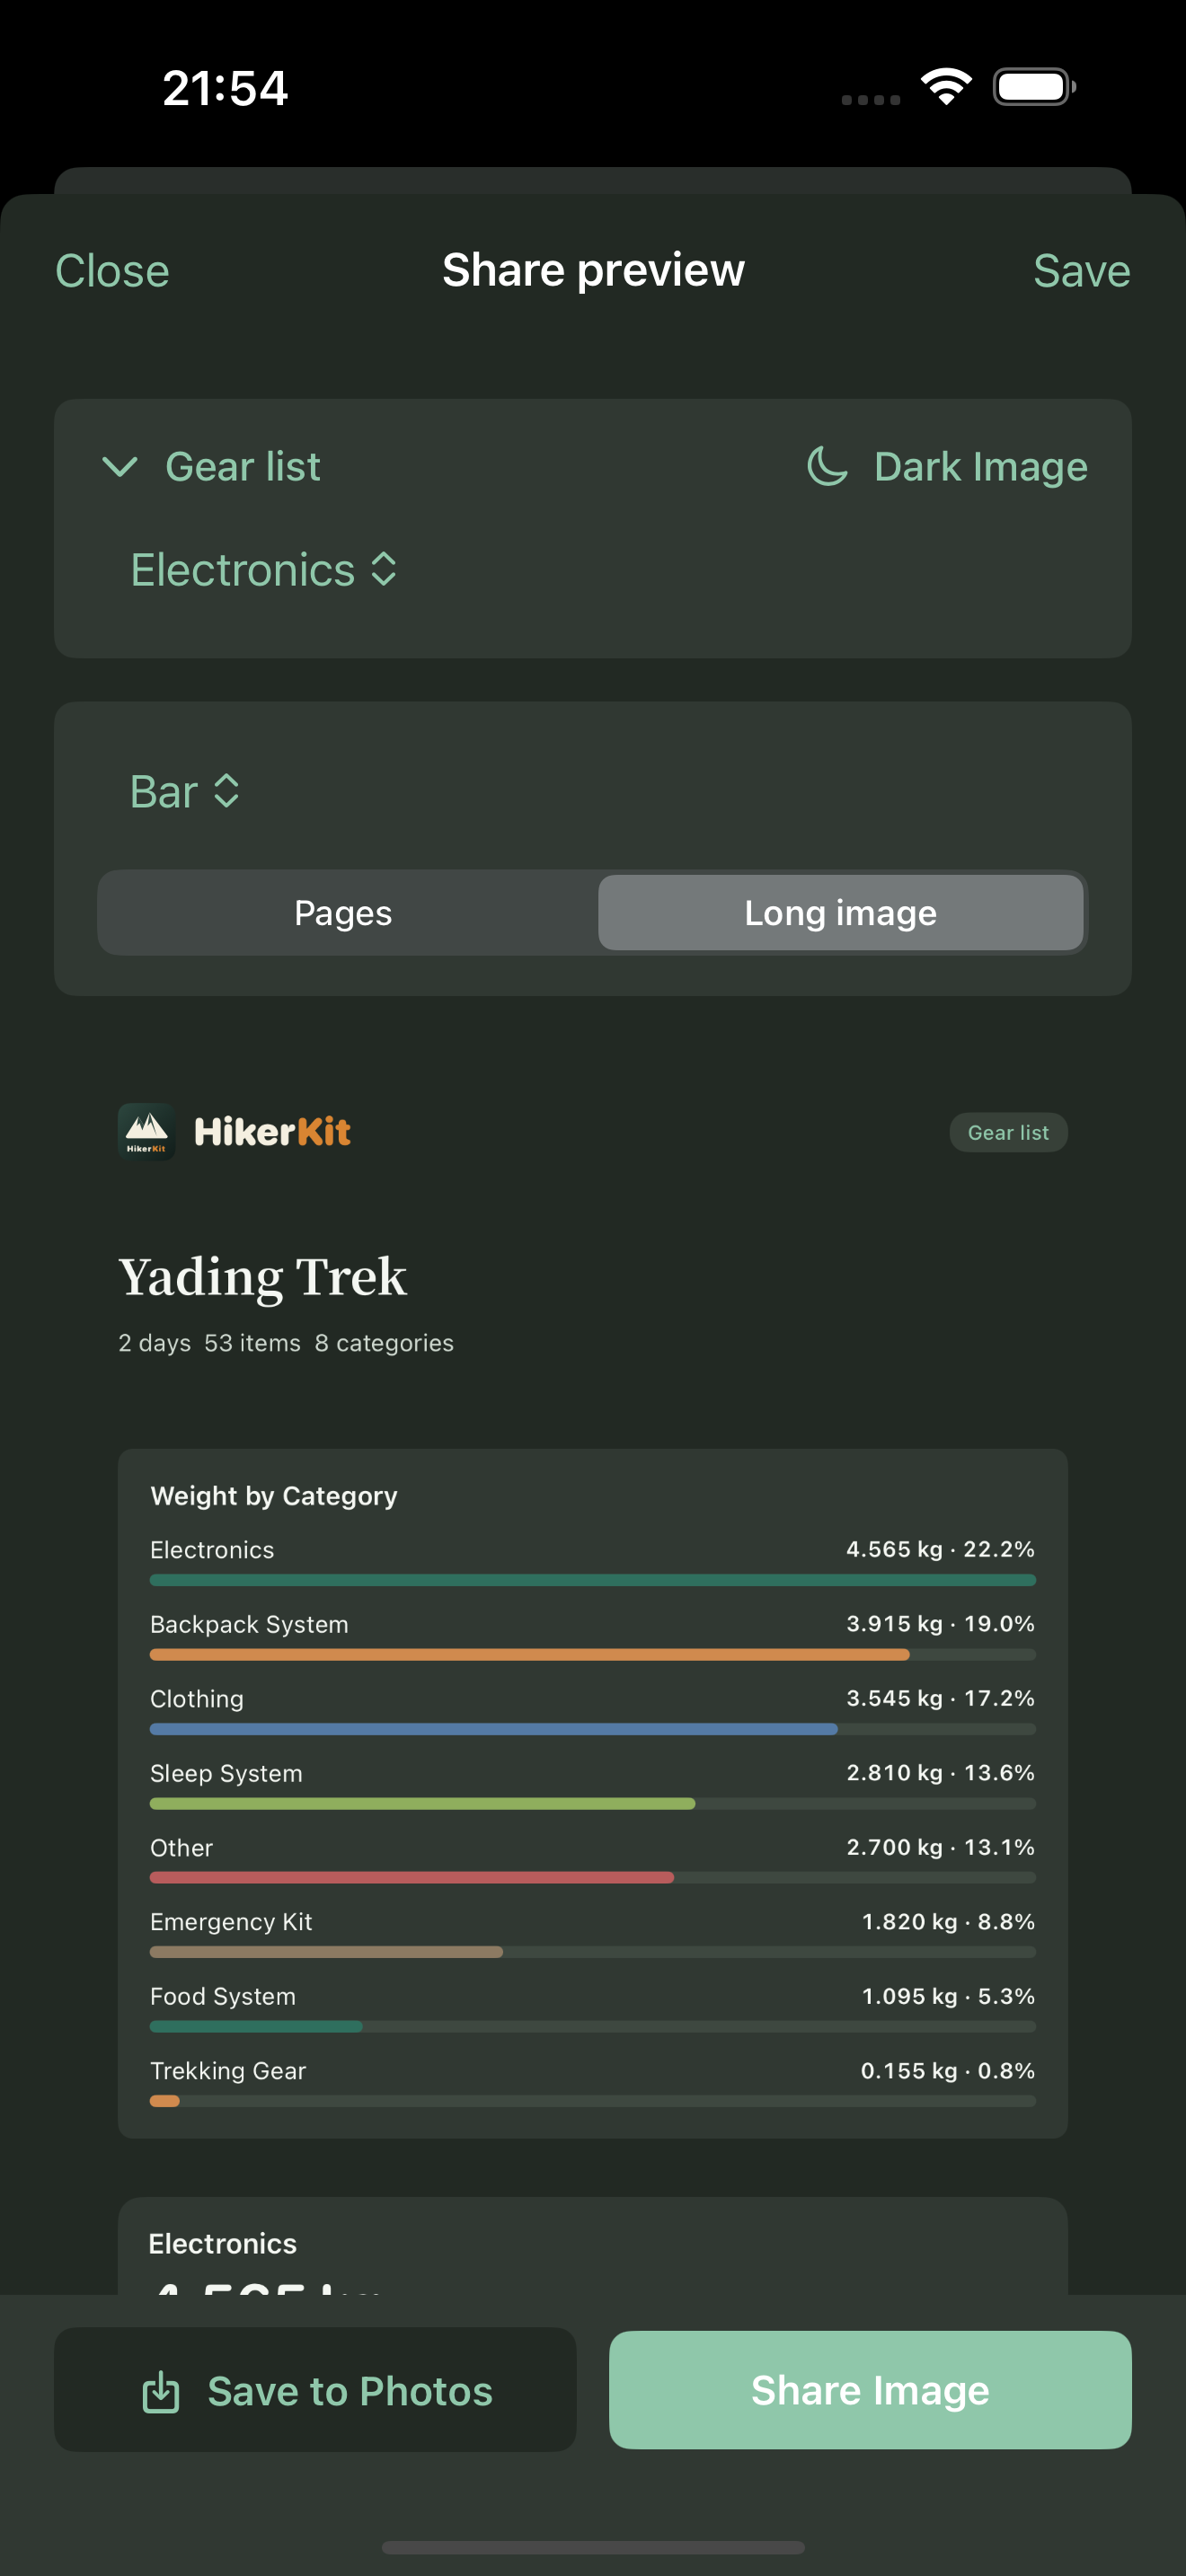 Dark app: dark image, Bar, Long image
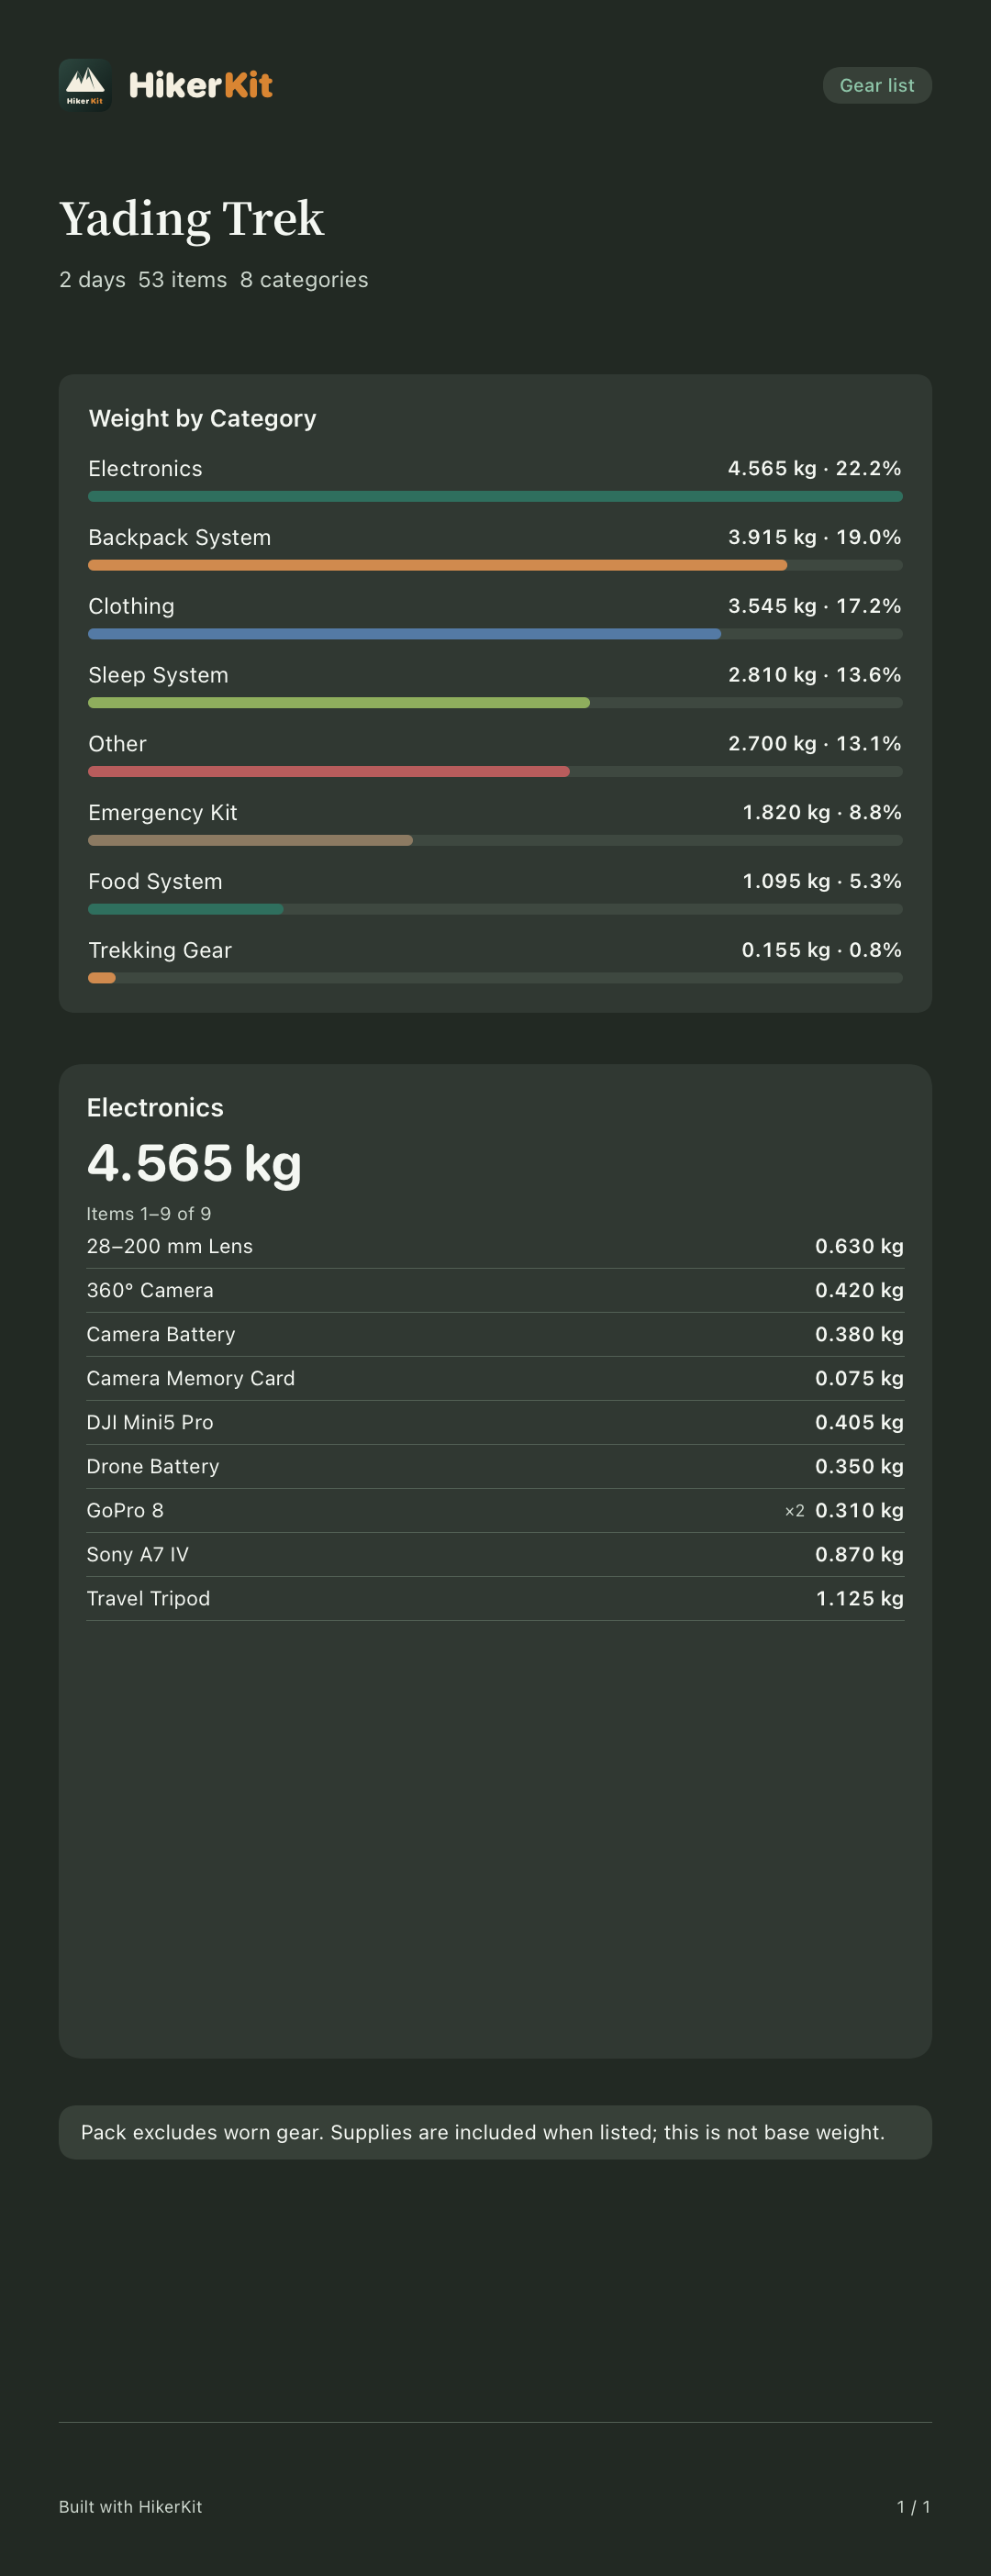 Actual dark Electronics long-image PNG
The app theme and exported image colors are independent. You can export a light image while using the dark app theme. Save at the top keeps the sharing settings; it does not save an image to your photo library. After checking the preview, use Save to Photos or Share Image. If someone needs to check specific equipment, export a gear list too so the percentages have corresponding item details.
Frequently asked questions
Why is weight already shown when some items are unpacked
The total uses selected equipment and carried quantities. Packing status checks preparation progress and does not decide whether an item counts.
Why does my trip total differ from the sharing card’s pack weight
Check the trip, configuration, and unit first, then whether worn gear is included. The sharing card’s pack weight excludes worn items but includes listed supplies.
Will changing the library recalculate a completed trip
Completed trips use their frozen gear snapshots. Later library edits or deletions do not rewrite that historical configuration.
Can the charts recommend a safe load for me
No. They explain the recorded weights. Your circumstances, route, and safety requirements still matter, and the example figures cannot make that decision for you.