
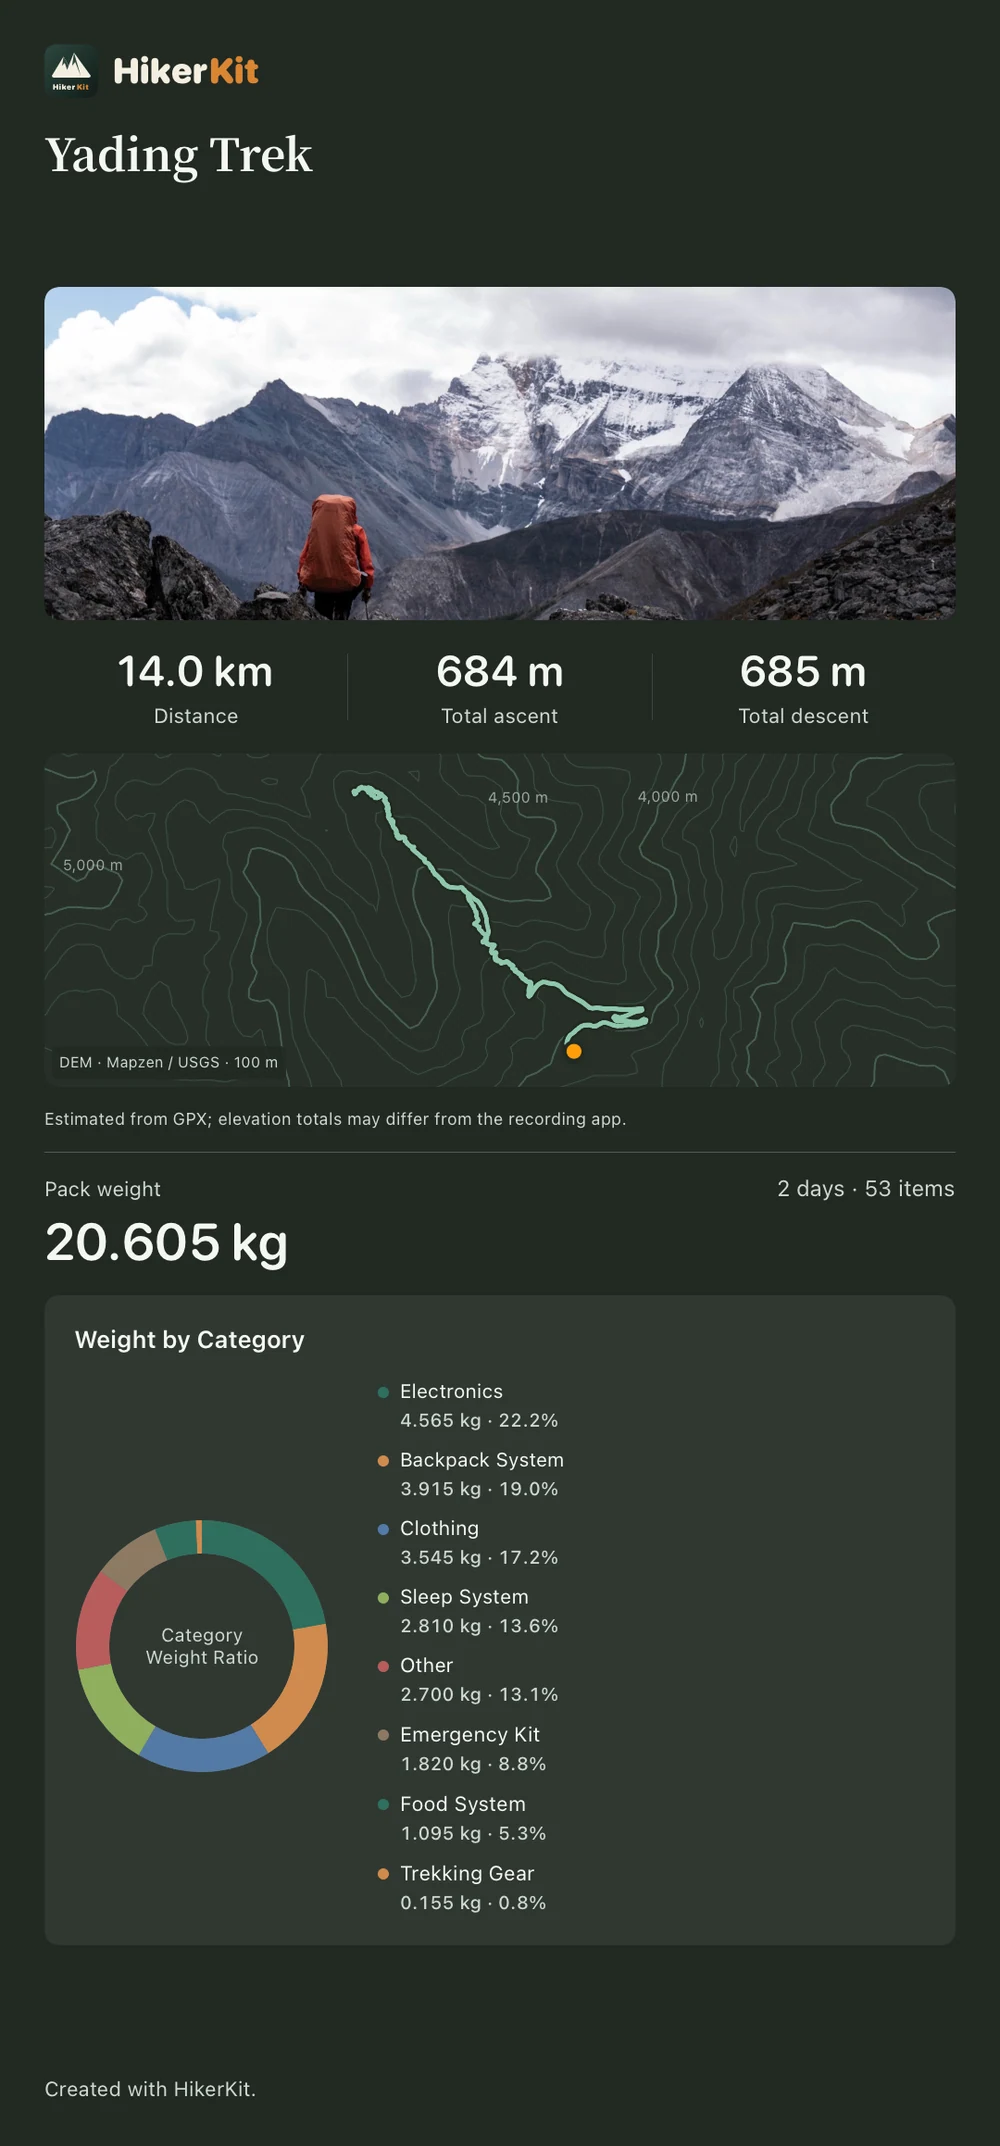
HikerKit 2.0 has been released. This update connects pre-trip equipment choices with the tracks, photos, and historical configuration you keep afterward. A first outing can take you through five practical workflows: checking gear and packing a list, reading weight, importing GPX and making a memory card, finding the trip in Calendar, and preparing sharing images. This guide covers the entries and sequence, with detailed tutorials for each workflow.
The gear library, trip checklists, and basic weight charts are established features. Version 2.0 adds a hiking calendar, photo timeline, GPX, memory cards, and optional iCloud backup, alongside improvements to carried quantities, pounds (lb), gear snapshots, and sharing. Following one real checklist makes these features easier to learn.
This walkthrough uses the English interface and the Yading Trek demonstration. Counts and weights describe the illustrated configuration.
Prepare the outing’s information
Have gear names, categories, measured weights, and accessory details ready, along with the trip name and actual dates. GPX and a cover photo are optional. Start with the equipment you need for this outing. Avoid counting a camera kit and the same battery twice or adopting an illustrated load as your own target.
The library total, selected trip entries, carried pieces, and packing progress each have their own scope. Check which one a number describes before interpreting it.
1 Check the library and pack the trip
- Open Gear to reach the library. Filter by category or search by name, then open an item and check its single-item weight, unit, and library quantity. New users can first add and save the records needed for this outing with the plus button.
- Open the unfinished trip in Trips. Create one with the plus button if needed, checking its name and planned dates.
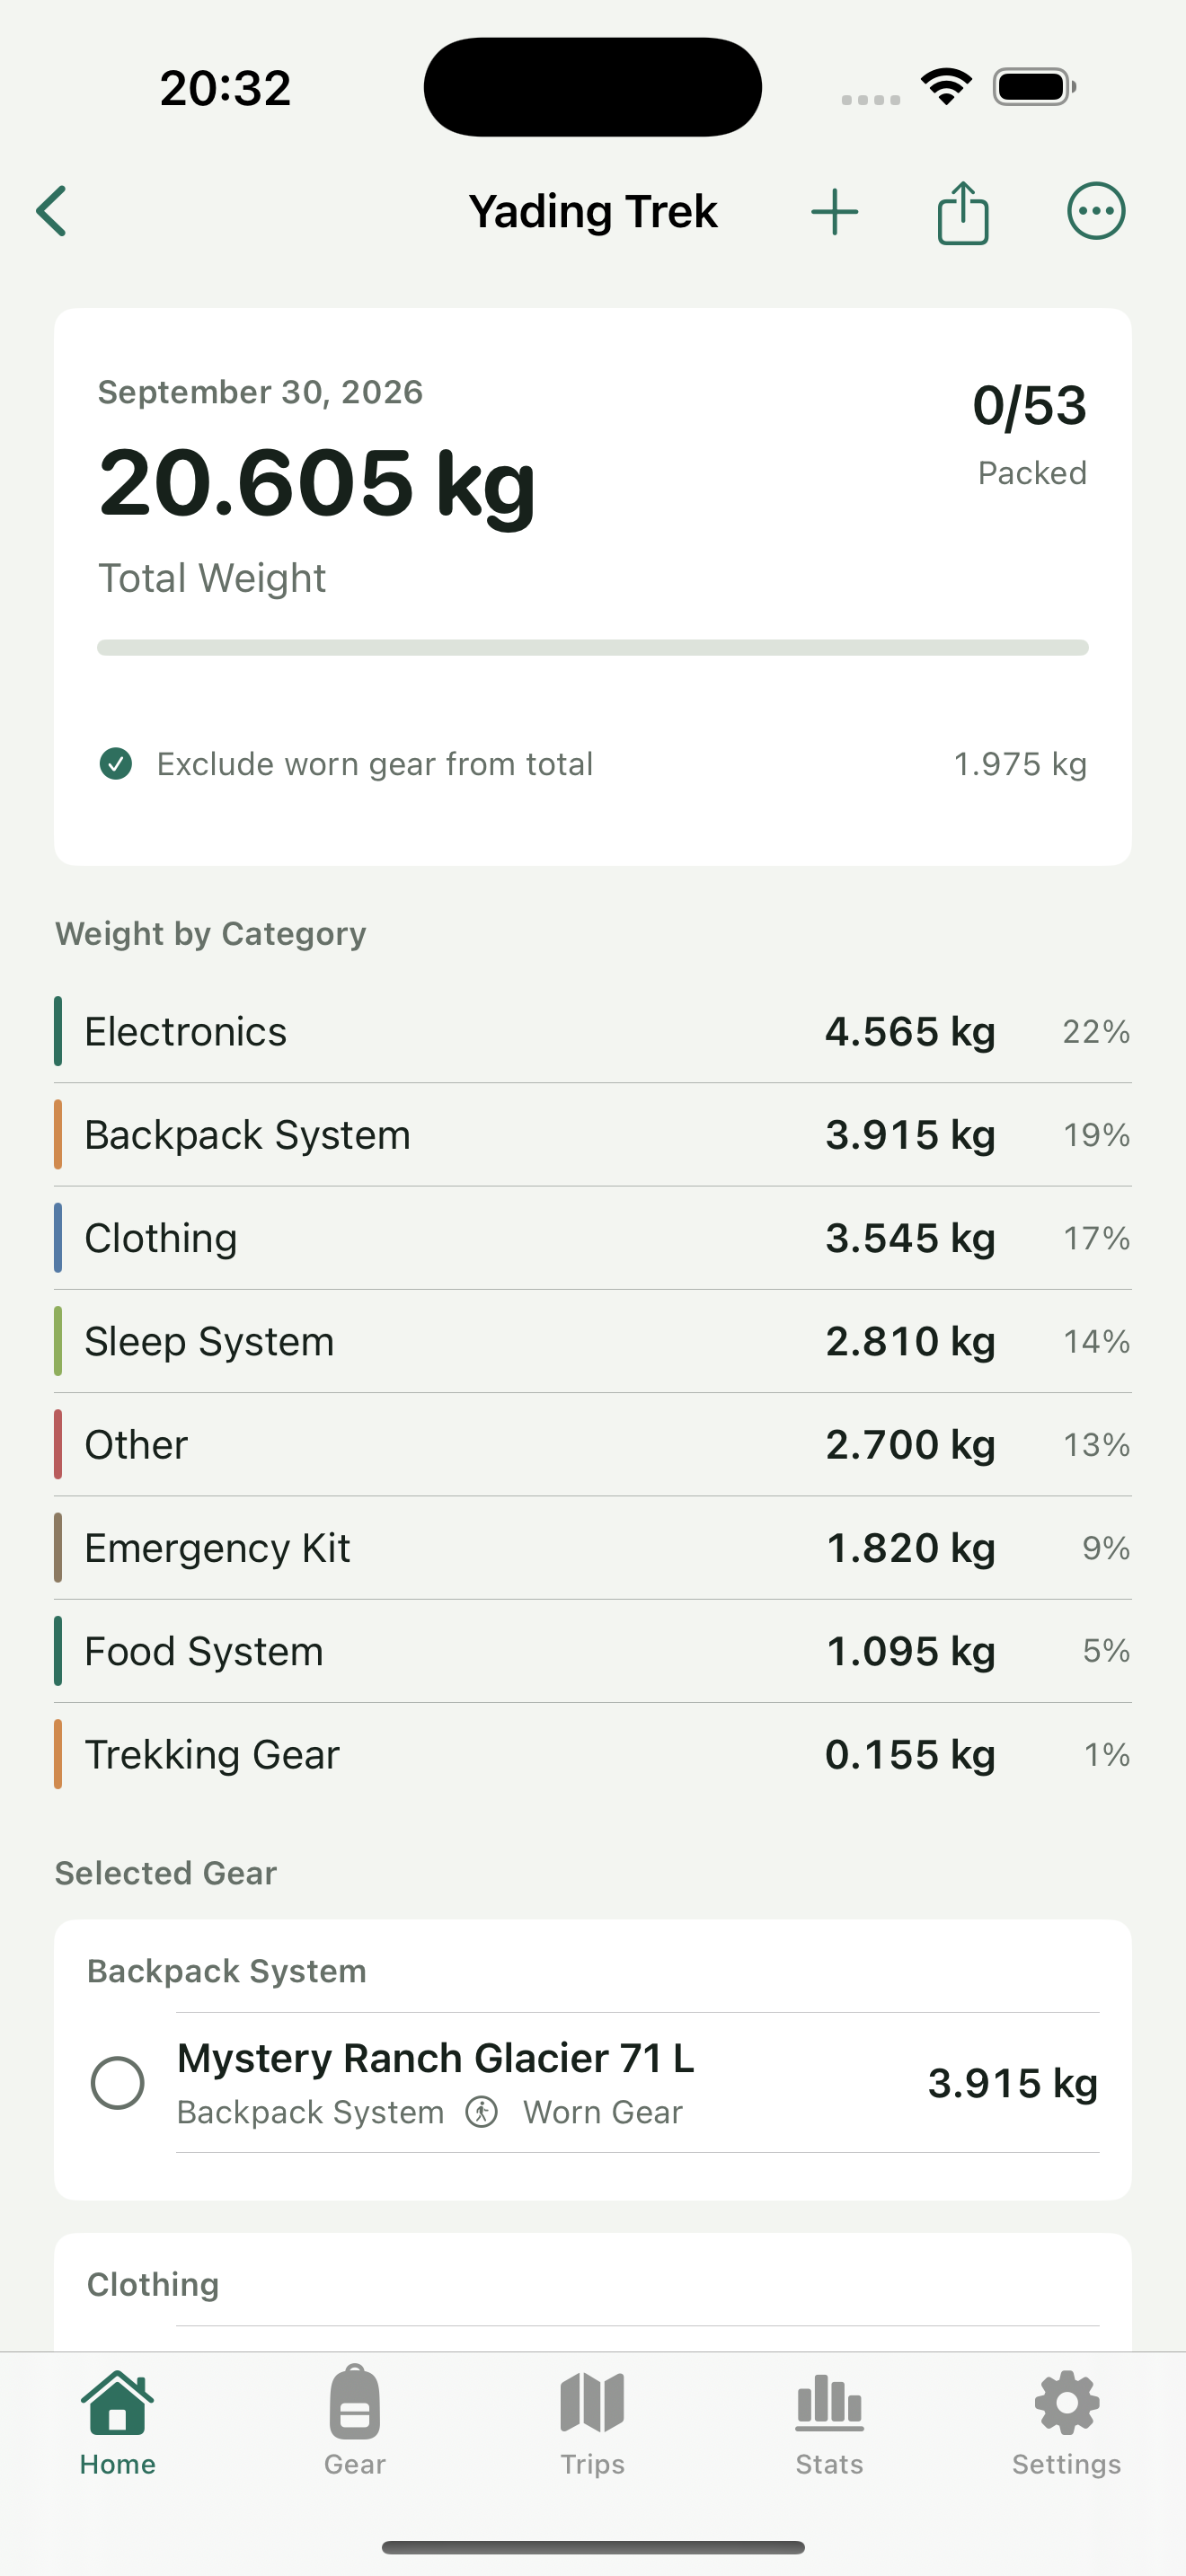
- Use the trip’s plus button to select existing gear and set carried quantities on the selection screen. Tap “Add” at the top and check the result in the list. Here, two GoPro 8 items are selected, giving the trip 53 entries after addition.
- Tap the circles on the left after checking and packing the equipment, then review progress. Check “Exclude worn gear from total” to establish the weight basis for the charts.
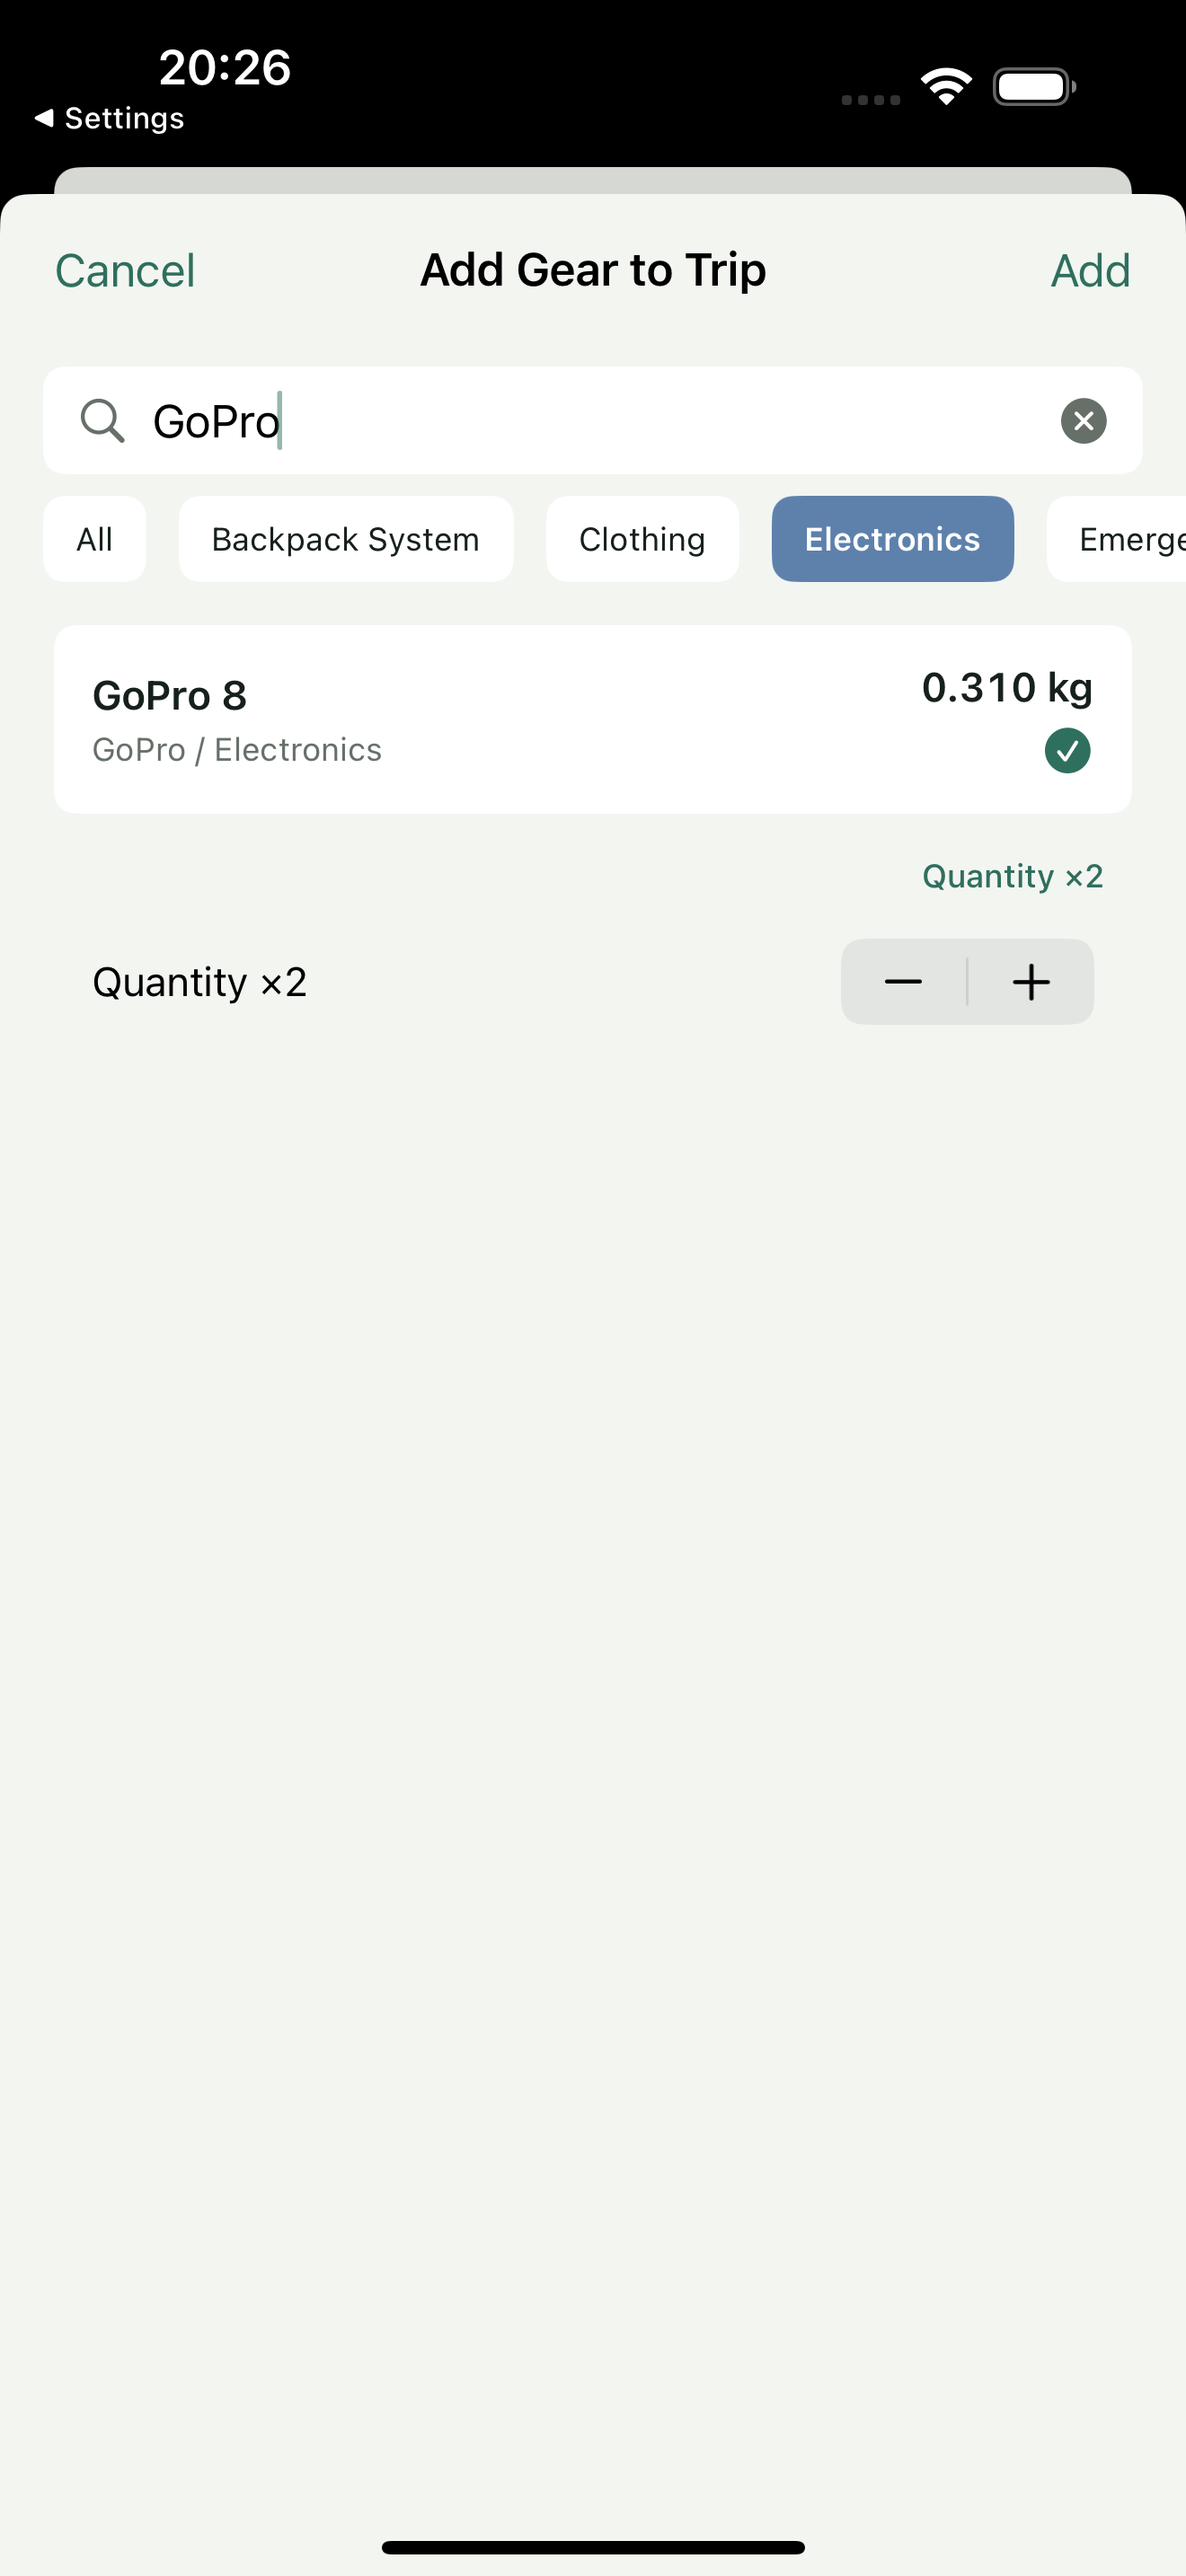
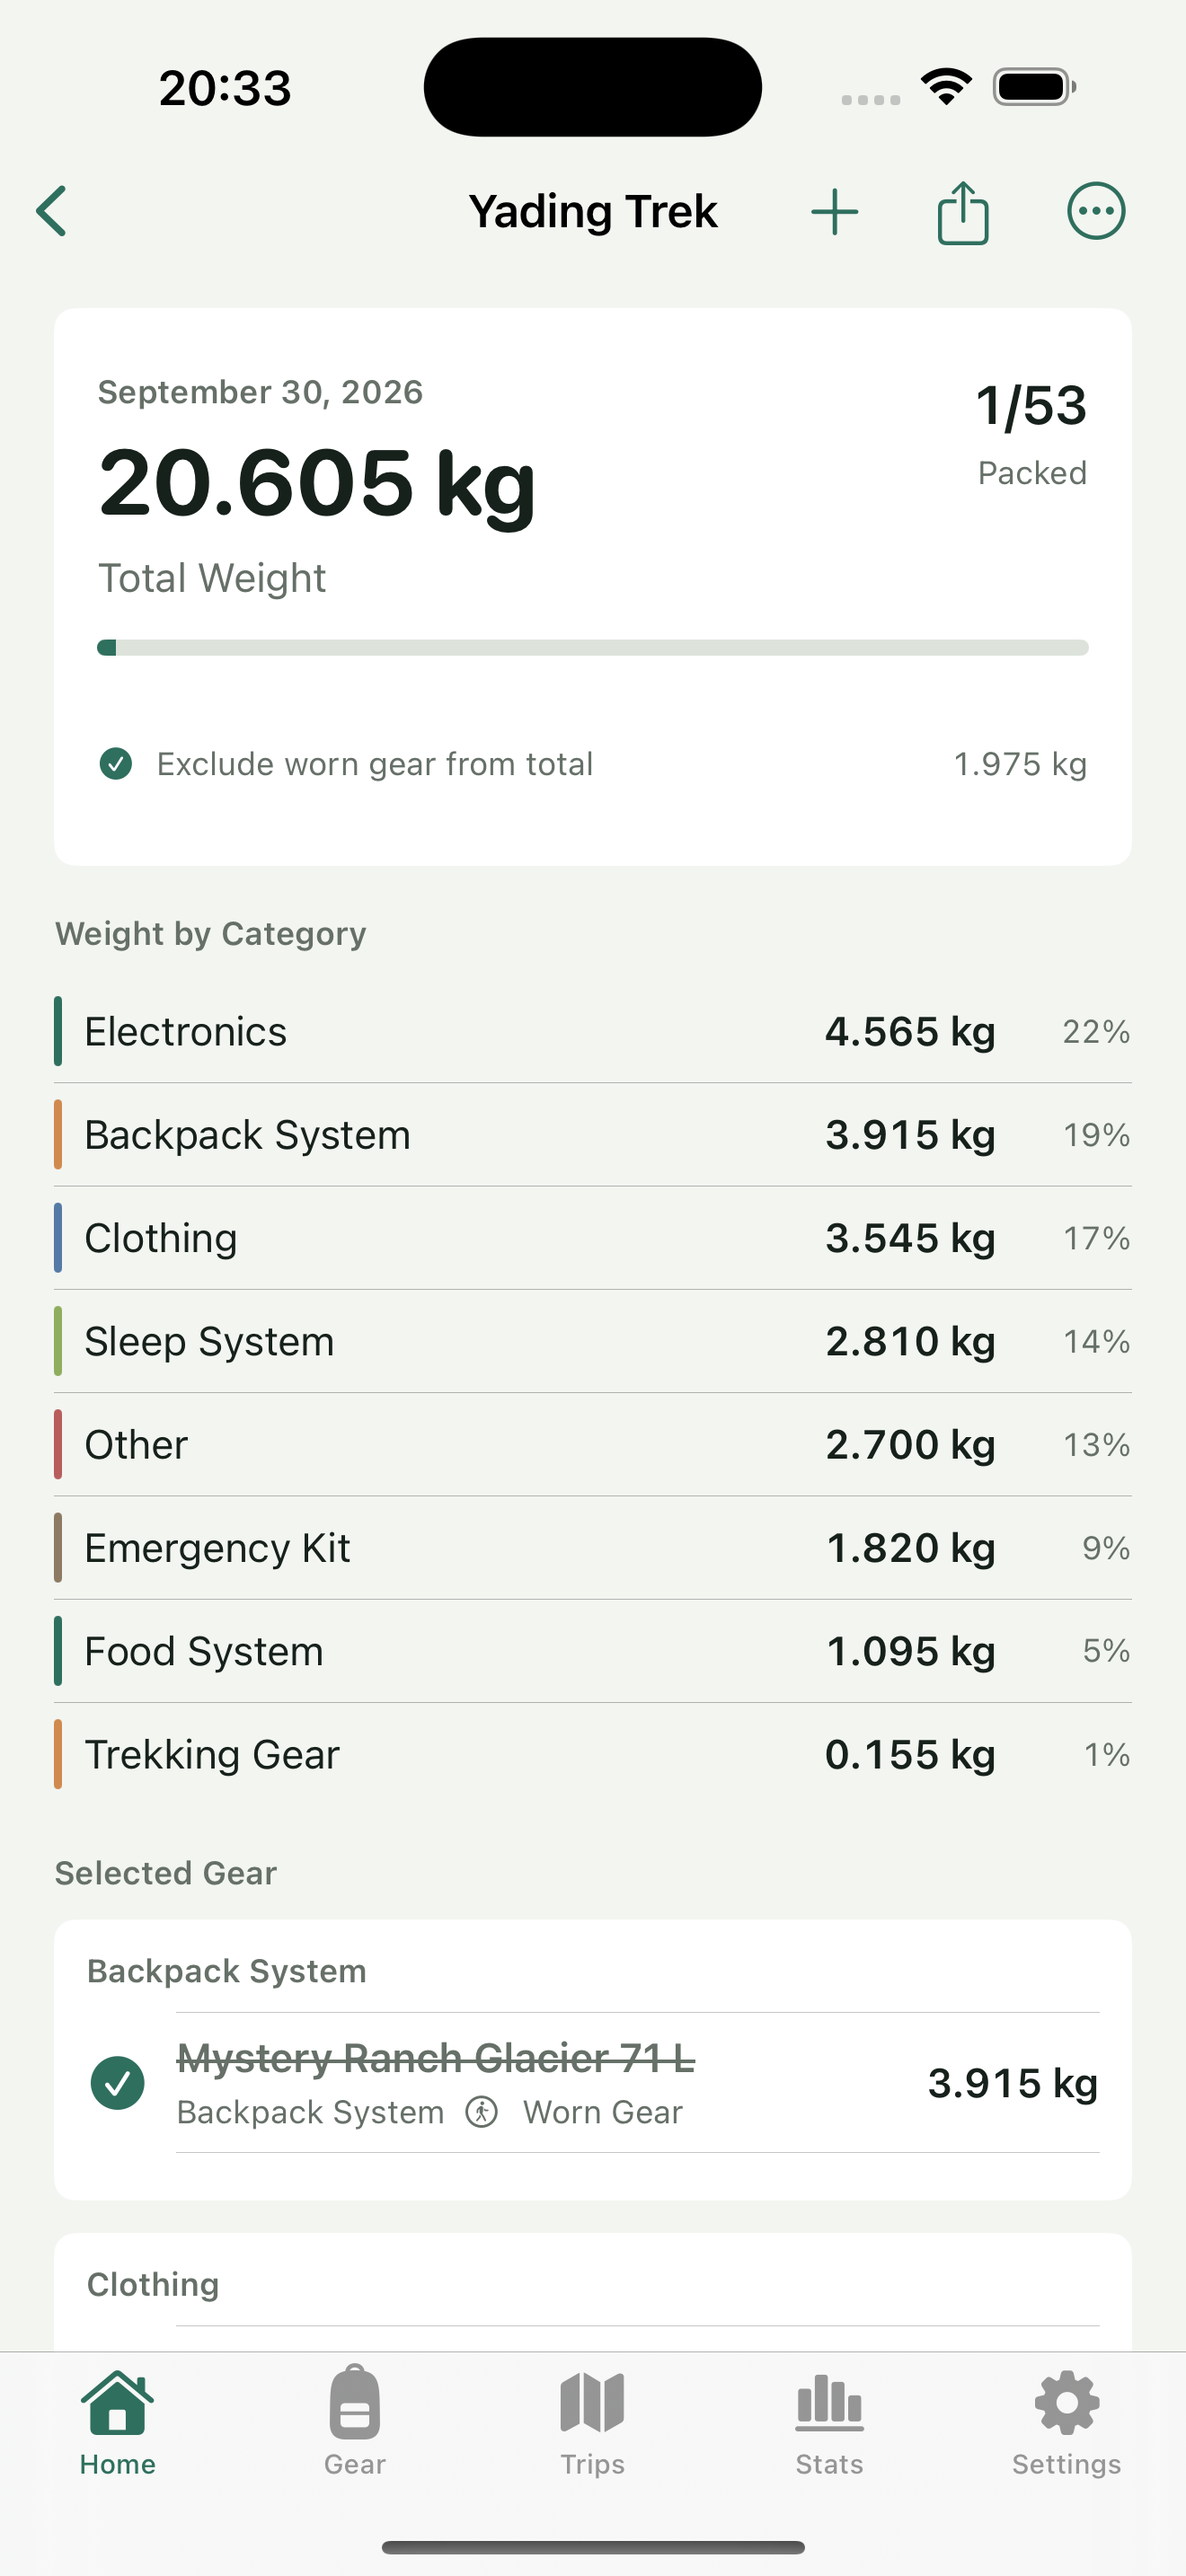
Checkmarks record preparation; selected but unchecked gear still counts. Here, progress changes from 0/53 to 1/53 while the total excluding worn gear remains 20.605 kg. Worn gear is 1.975 kg, and the total including it is 22.580 kg. See Check gear and track packing in HikerKit for the detailed sequence.
2 Read the weight before departure
Choose View Charts from the trip’s three-dot menu. Start with Summary, confirm the trip and weight basis, compare category weights, then expand grouped gear details. Use the bar chart to compare categories, the stacked chart for shares, and Top 10 to find heavier entries, returning to items to check quantities and accessories.
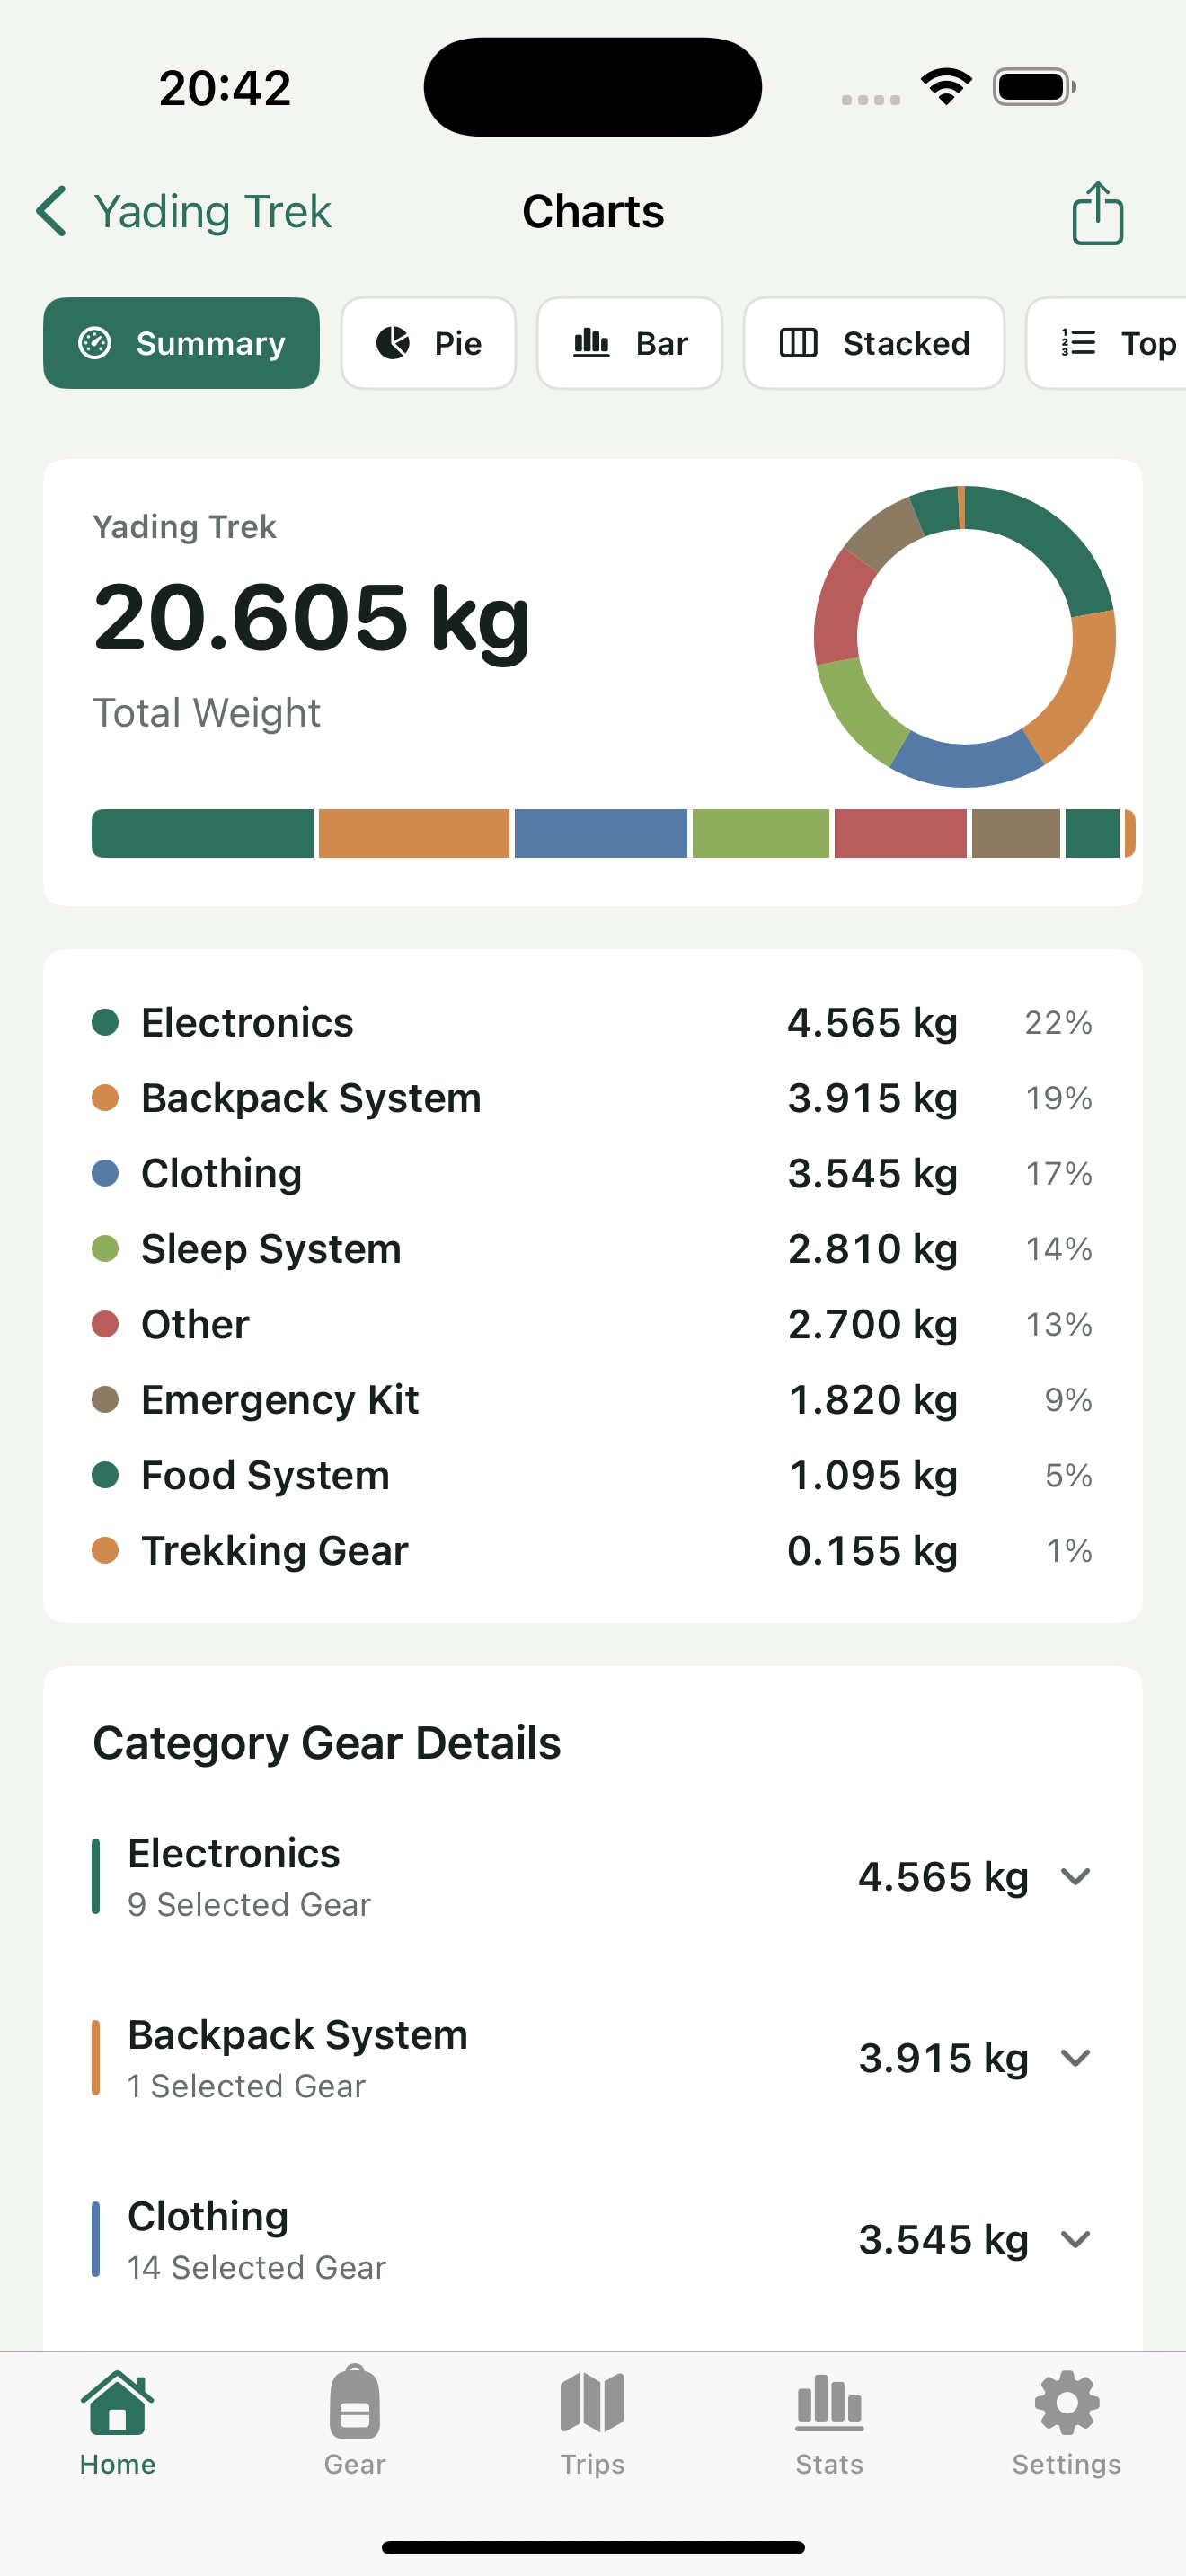
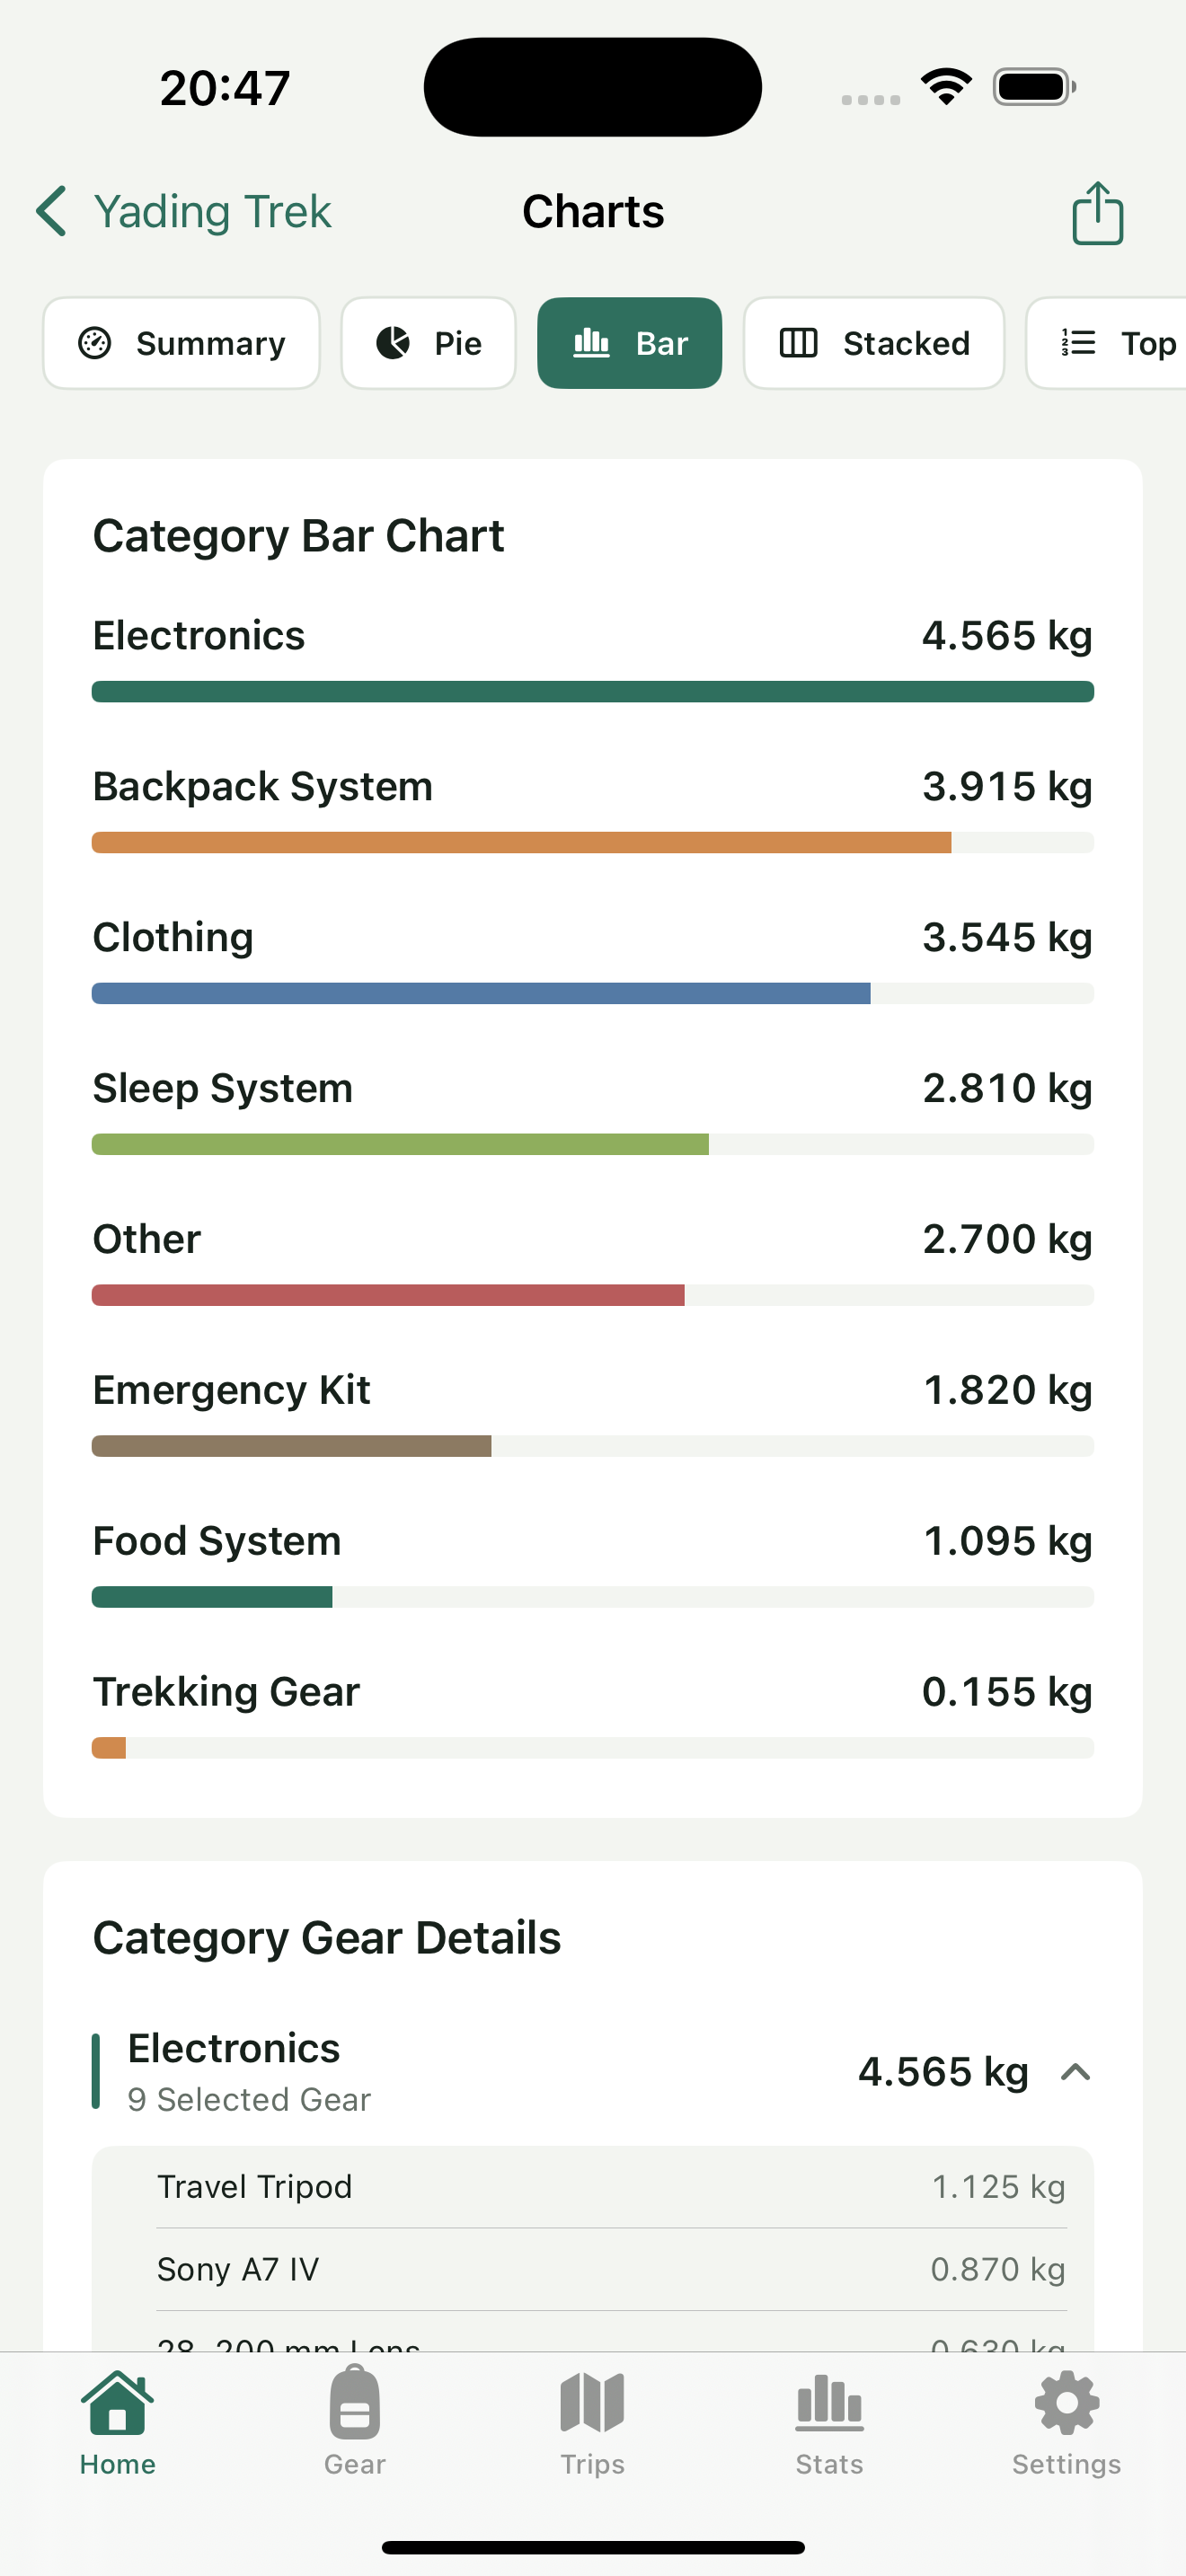
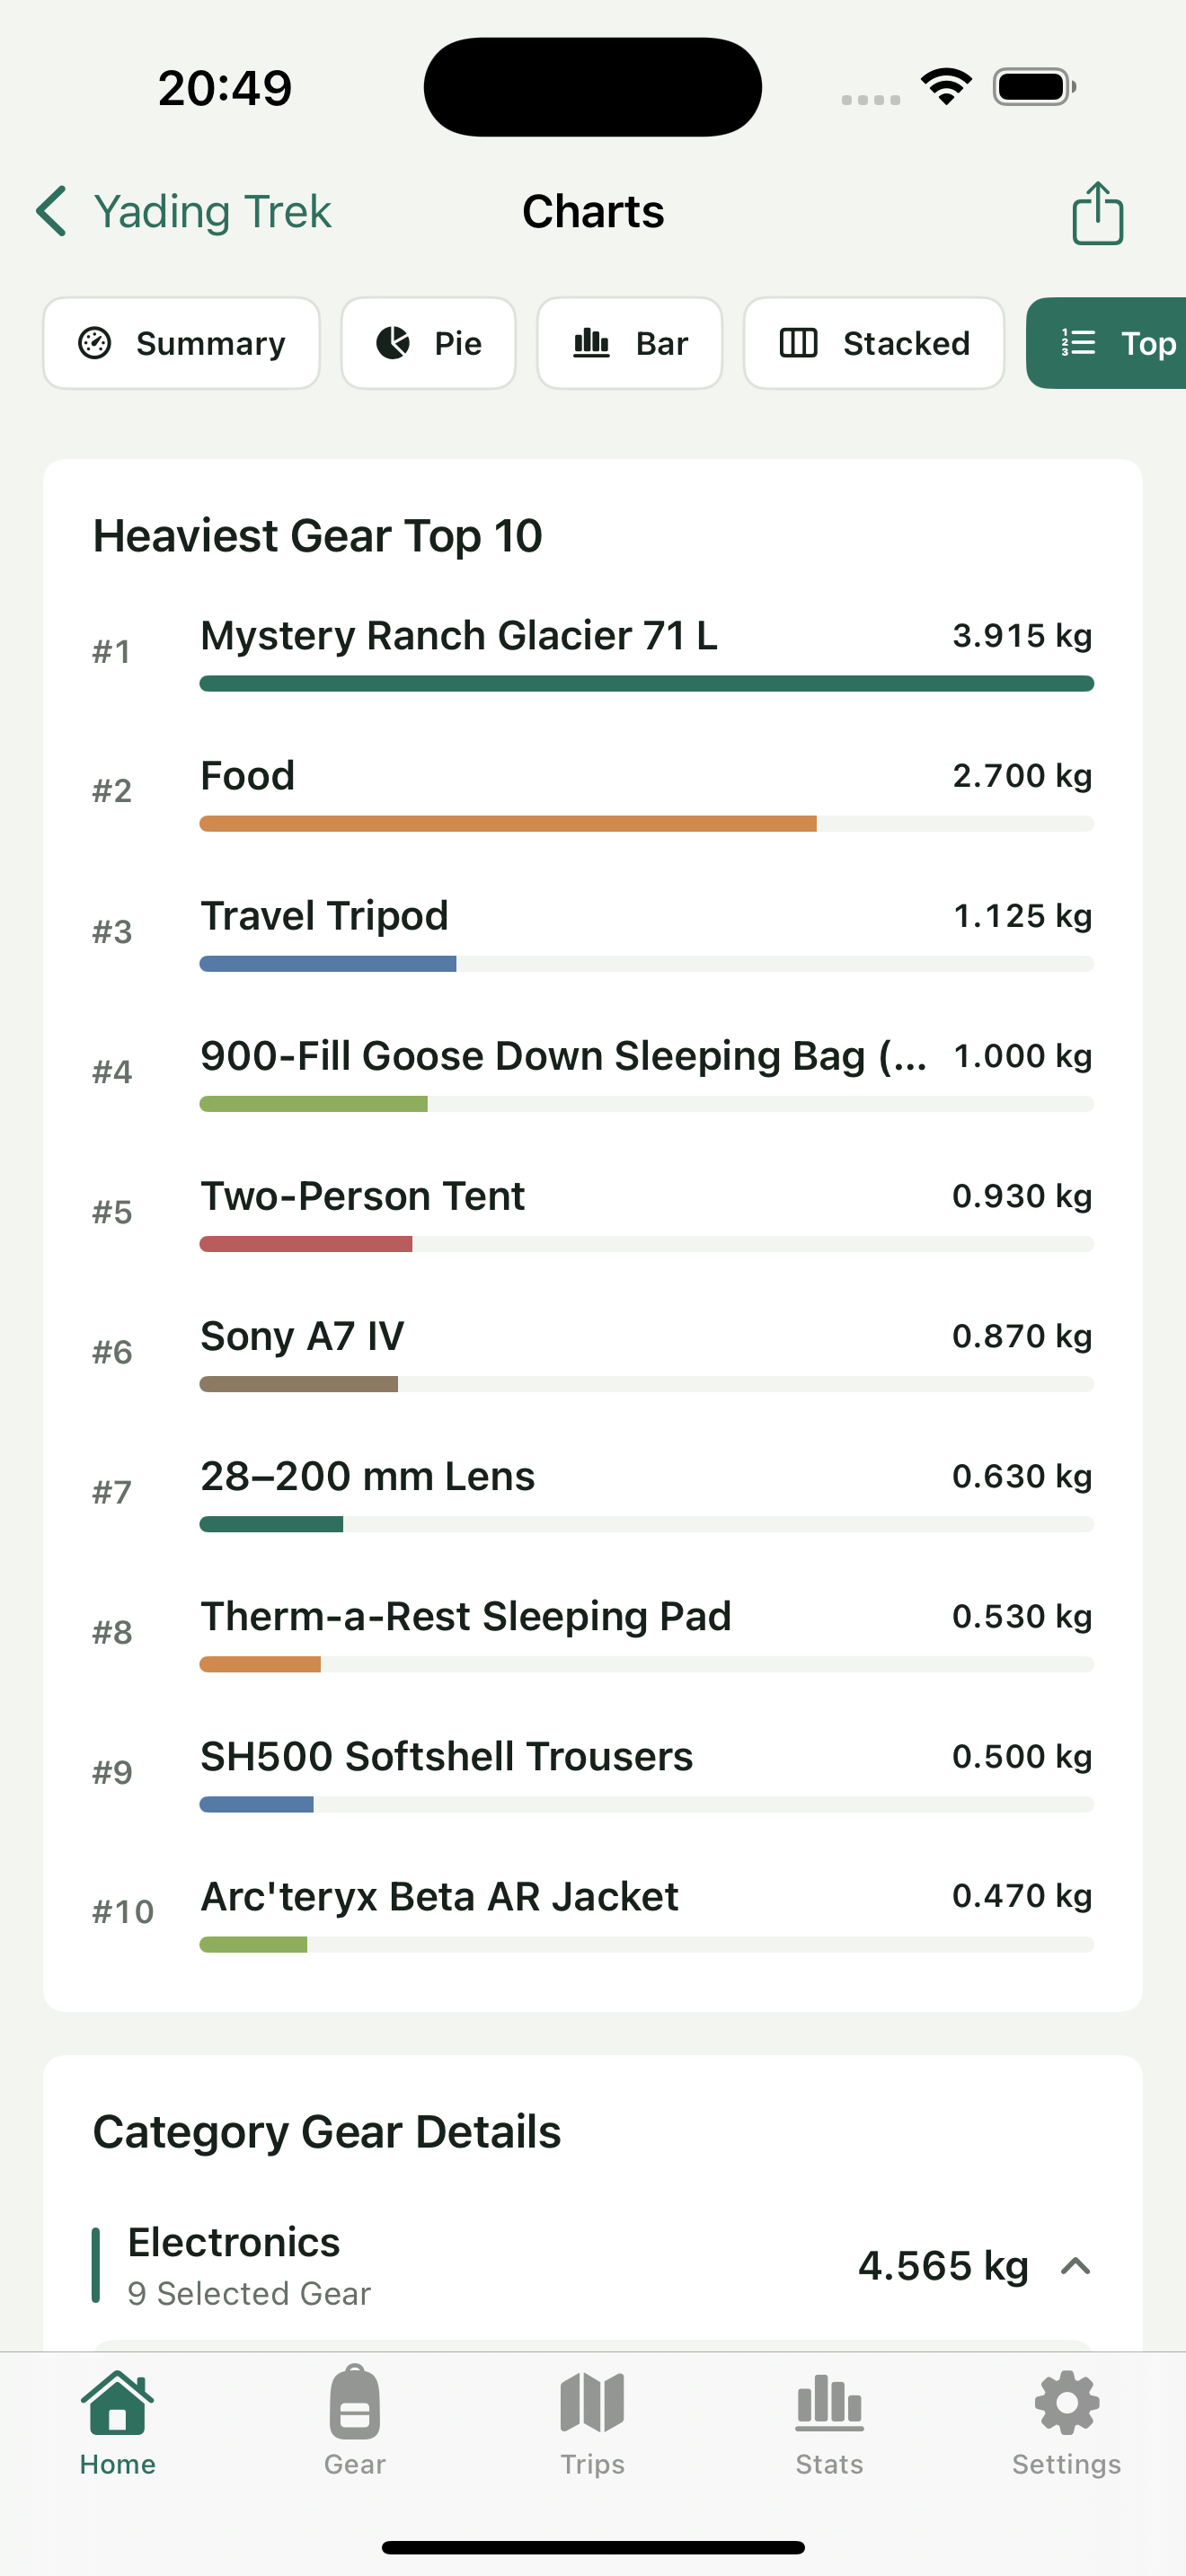
The sharing card’s pack weight excludes worn gear but includes listed supplies, so it is not base weight. Different charts describe the same configuration. Theme and chart changes do not reduce its physical load. See Review pack weight and gear composition in HikerKit for the detailed checks.
3 Import tracks, add a photo, and make a memory card
In the unfinished trip’s three-dot menu, choose “Trip tracks” and then Add GPX files. Select the outing’s recording in the system file picker. Review the file, route, distance, ascent, and descent, save it, and check the result from the trip. One trip can contain one or multiple GPX files; separate GPX segments retain their boundaries without straight lines added between them.
Next, choose “Confirm completed hike” from the trip menu to open the completion form. Check the actual start and end dates, then tap “Choose from Library” in its optional photo section. Choose this outing’s photo, return to the form, review the image, dates, and memory text, and tap “Save” at the top right to complete the trip. This example confirms October 2–3, 2026.
After completion, open Trip memory and select “Share a memory card” from its three-dot menu. Decide whether to show dates, text, and the route, enable “Show route” to show the route, then choose “Contour map,” “Terrain map,” or “Satellite.” Check loading and attribution, choose image colors, retain the settings, and save or share the actual image.
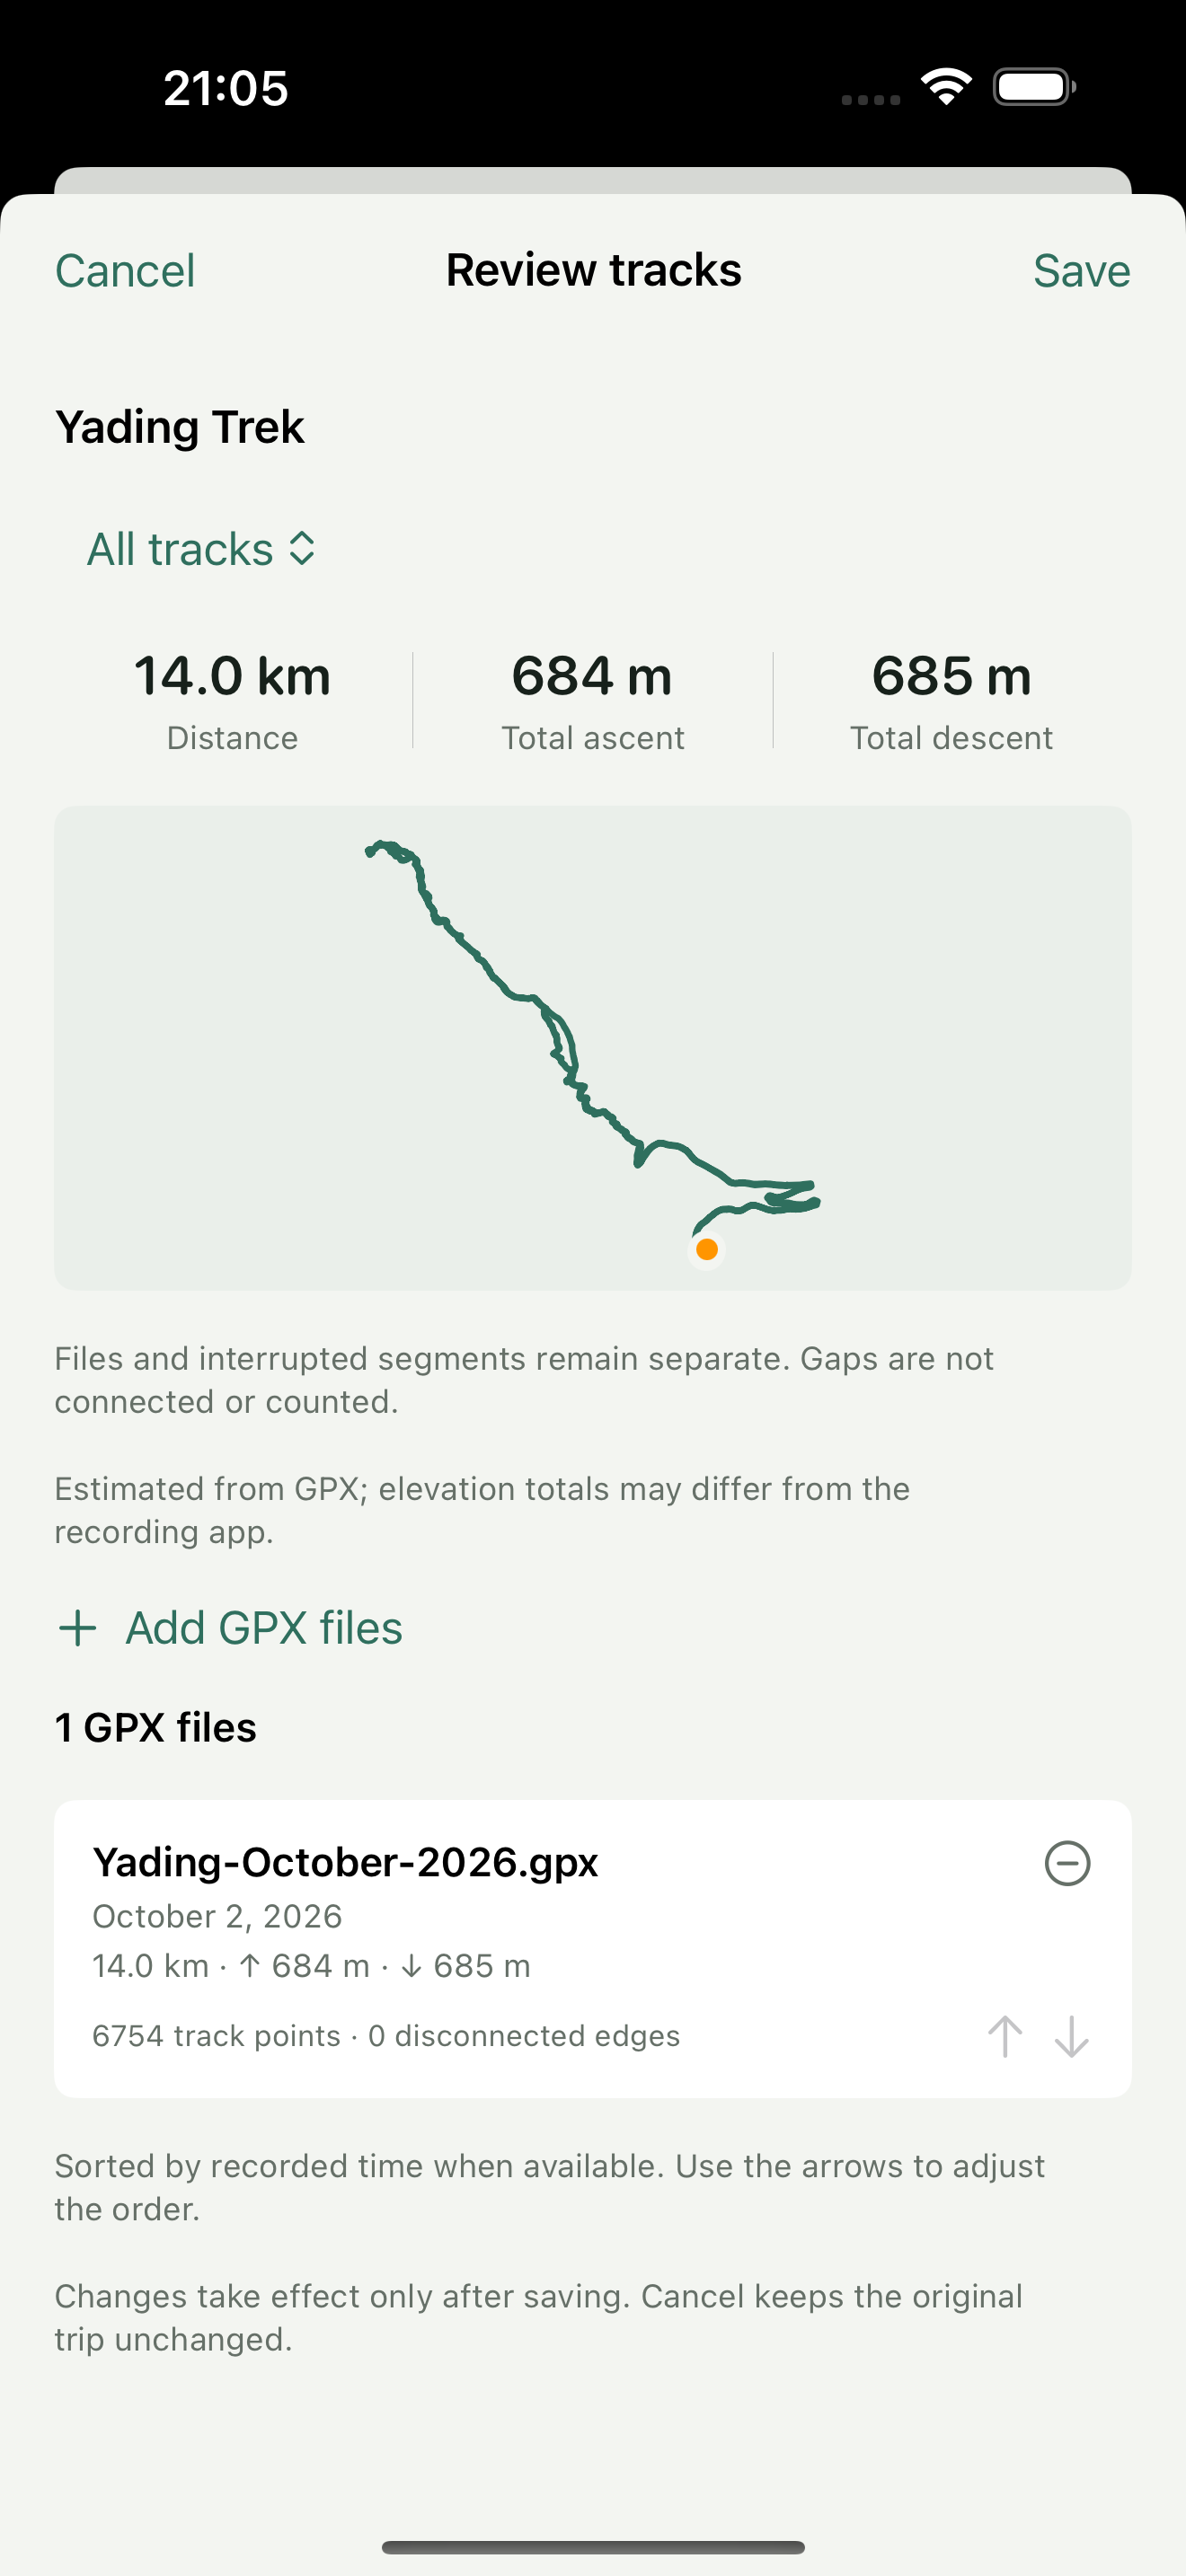 Yading-October-2026.gpx: parsed track
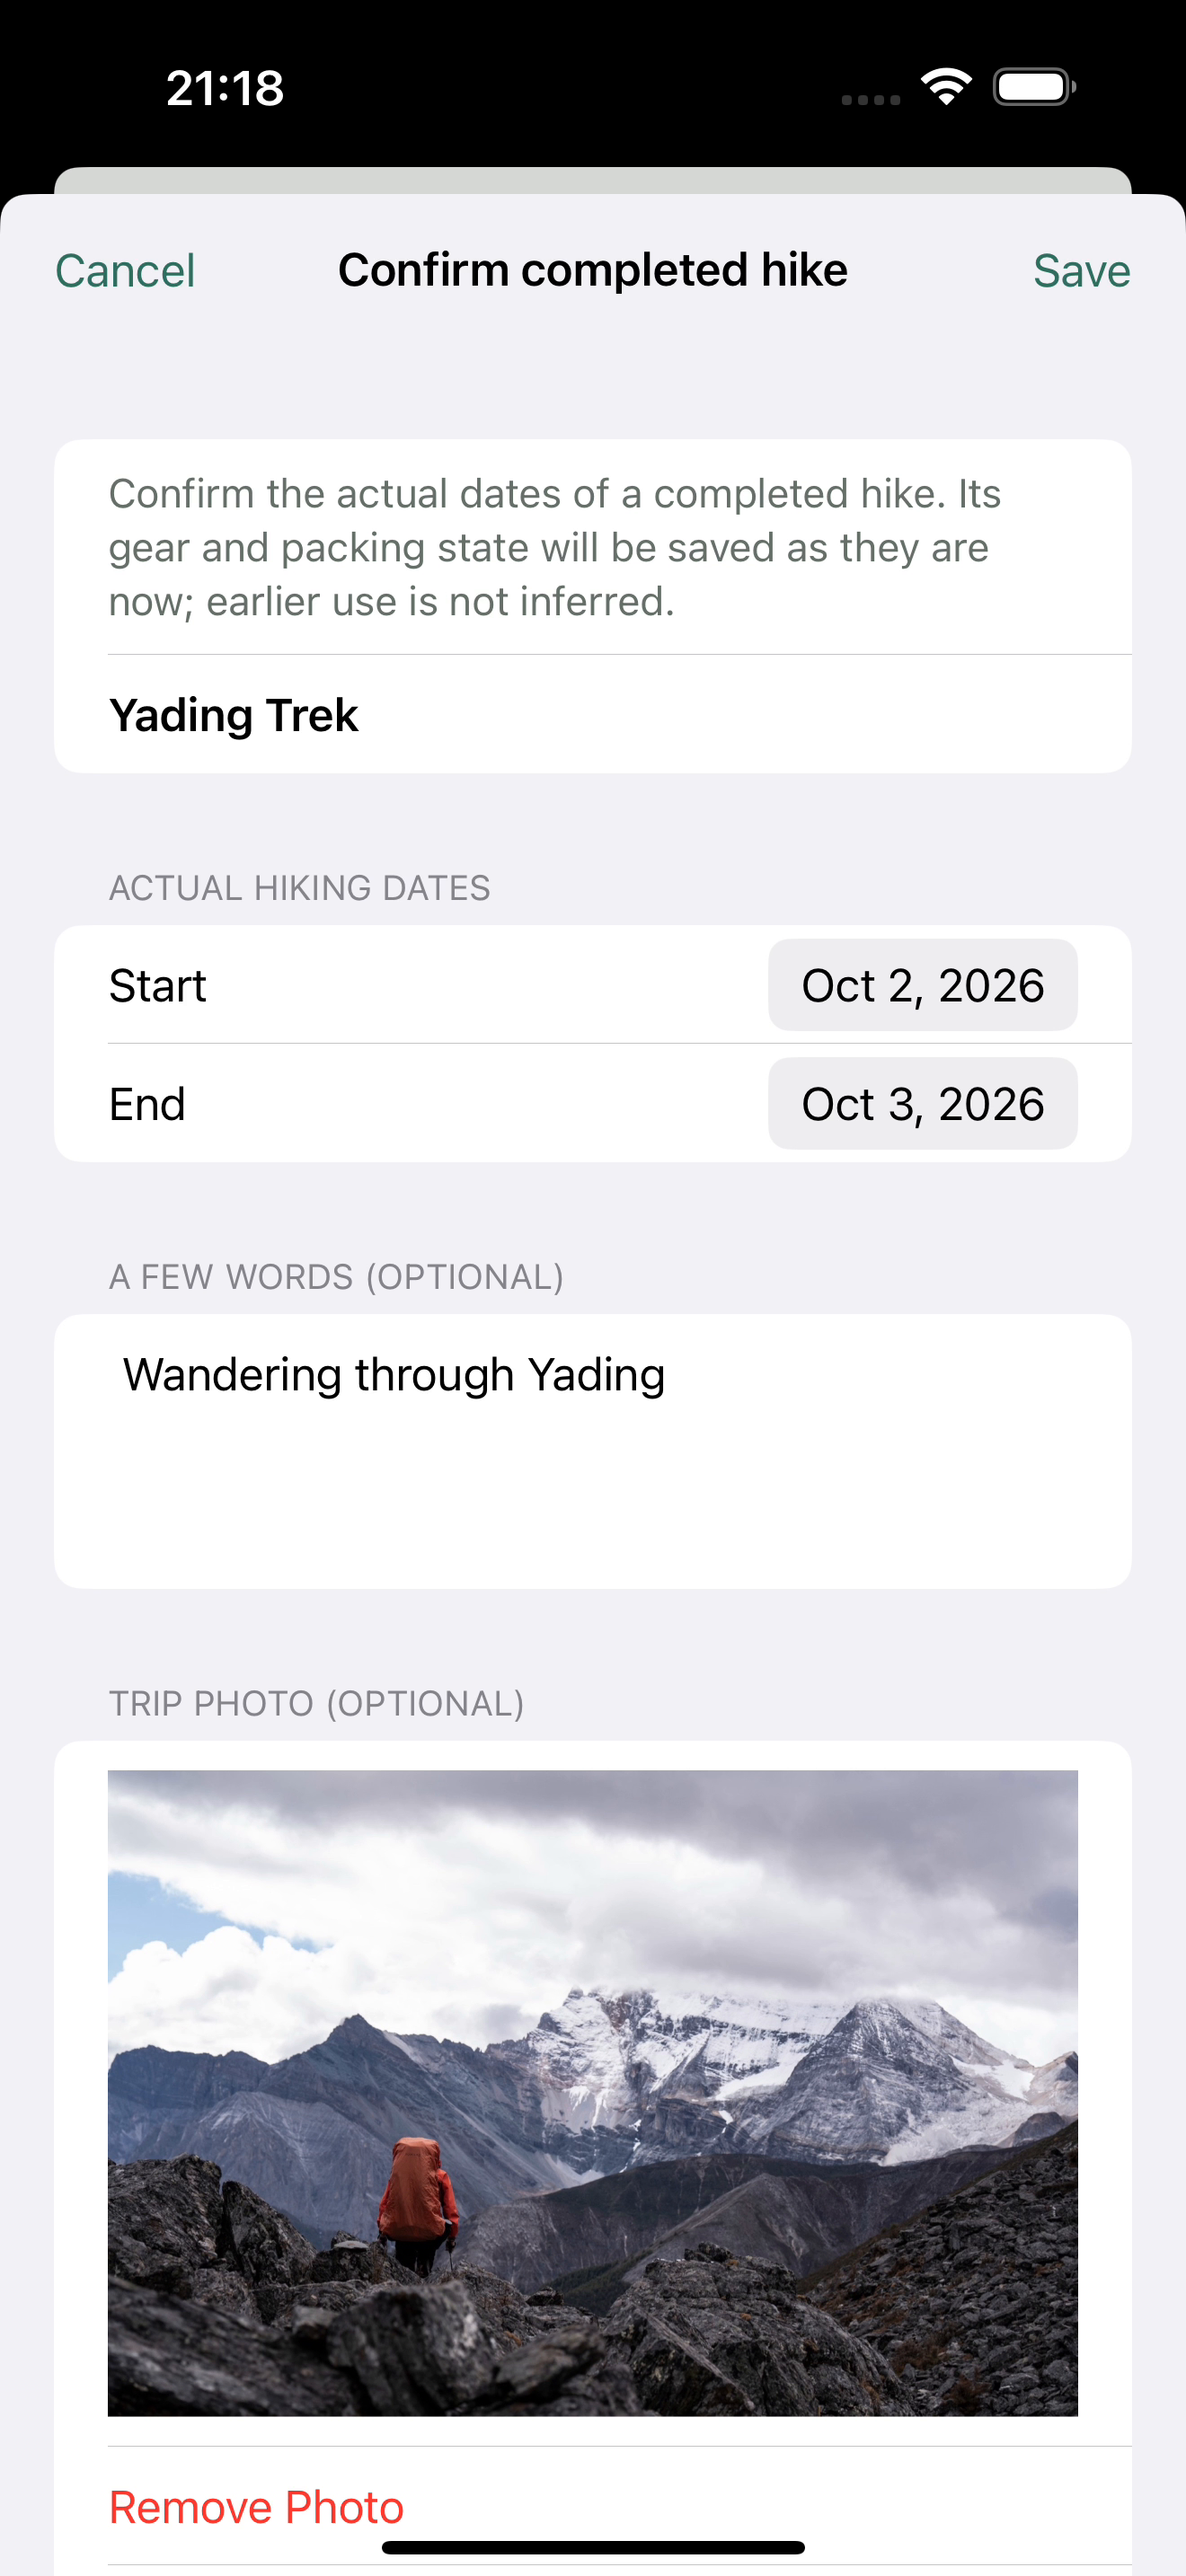 Completion form: October 2–3 and selected photo
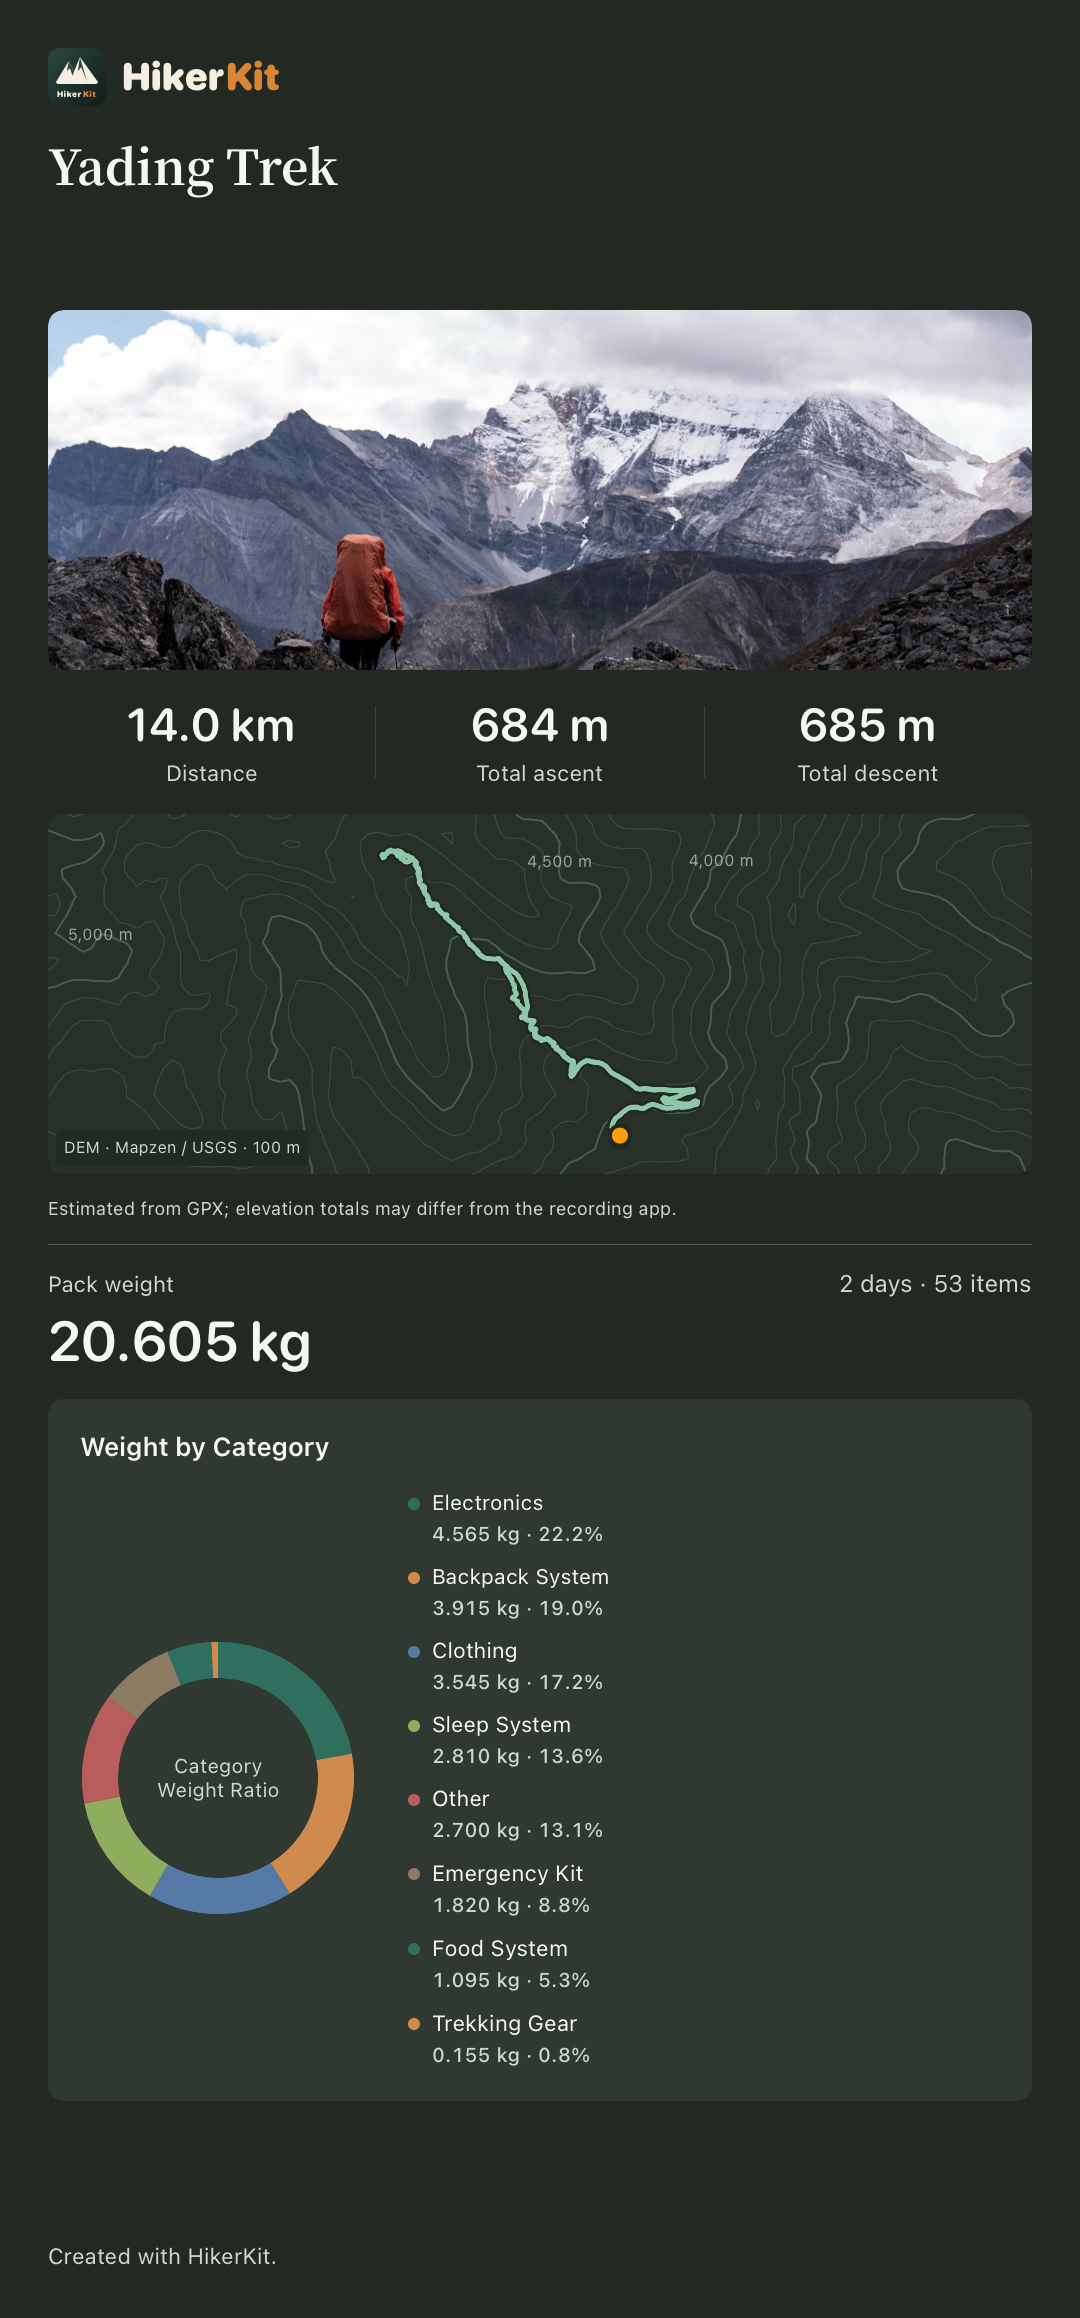 Actual dark contour memory-card PNG
Completion freezes the historical gear. Later library edits do not rewrite it. GPX is for importing and reviewing tracks, not live navigation; an overnight timestamp gap is not continuous moving time. The English examples include actual exported cards with all three map backgrounds and confirmation that the dark contour card was saved to Photos. Export colors are independent of the app theme. See Create a HikerKit trip memory card from GPX and a photo for the complete sequence.
4 Find the outing in Calendar and Timeline
Open Stats and choose Calendar in Hiking memories. Use the month arrows to find the dates, select a marked day, and tap the trip card below it to open the memory. Return to Stats and select Timeline to find completed trips that have cover photos.
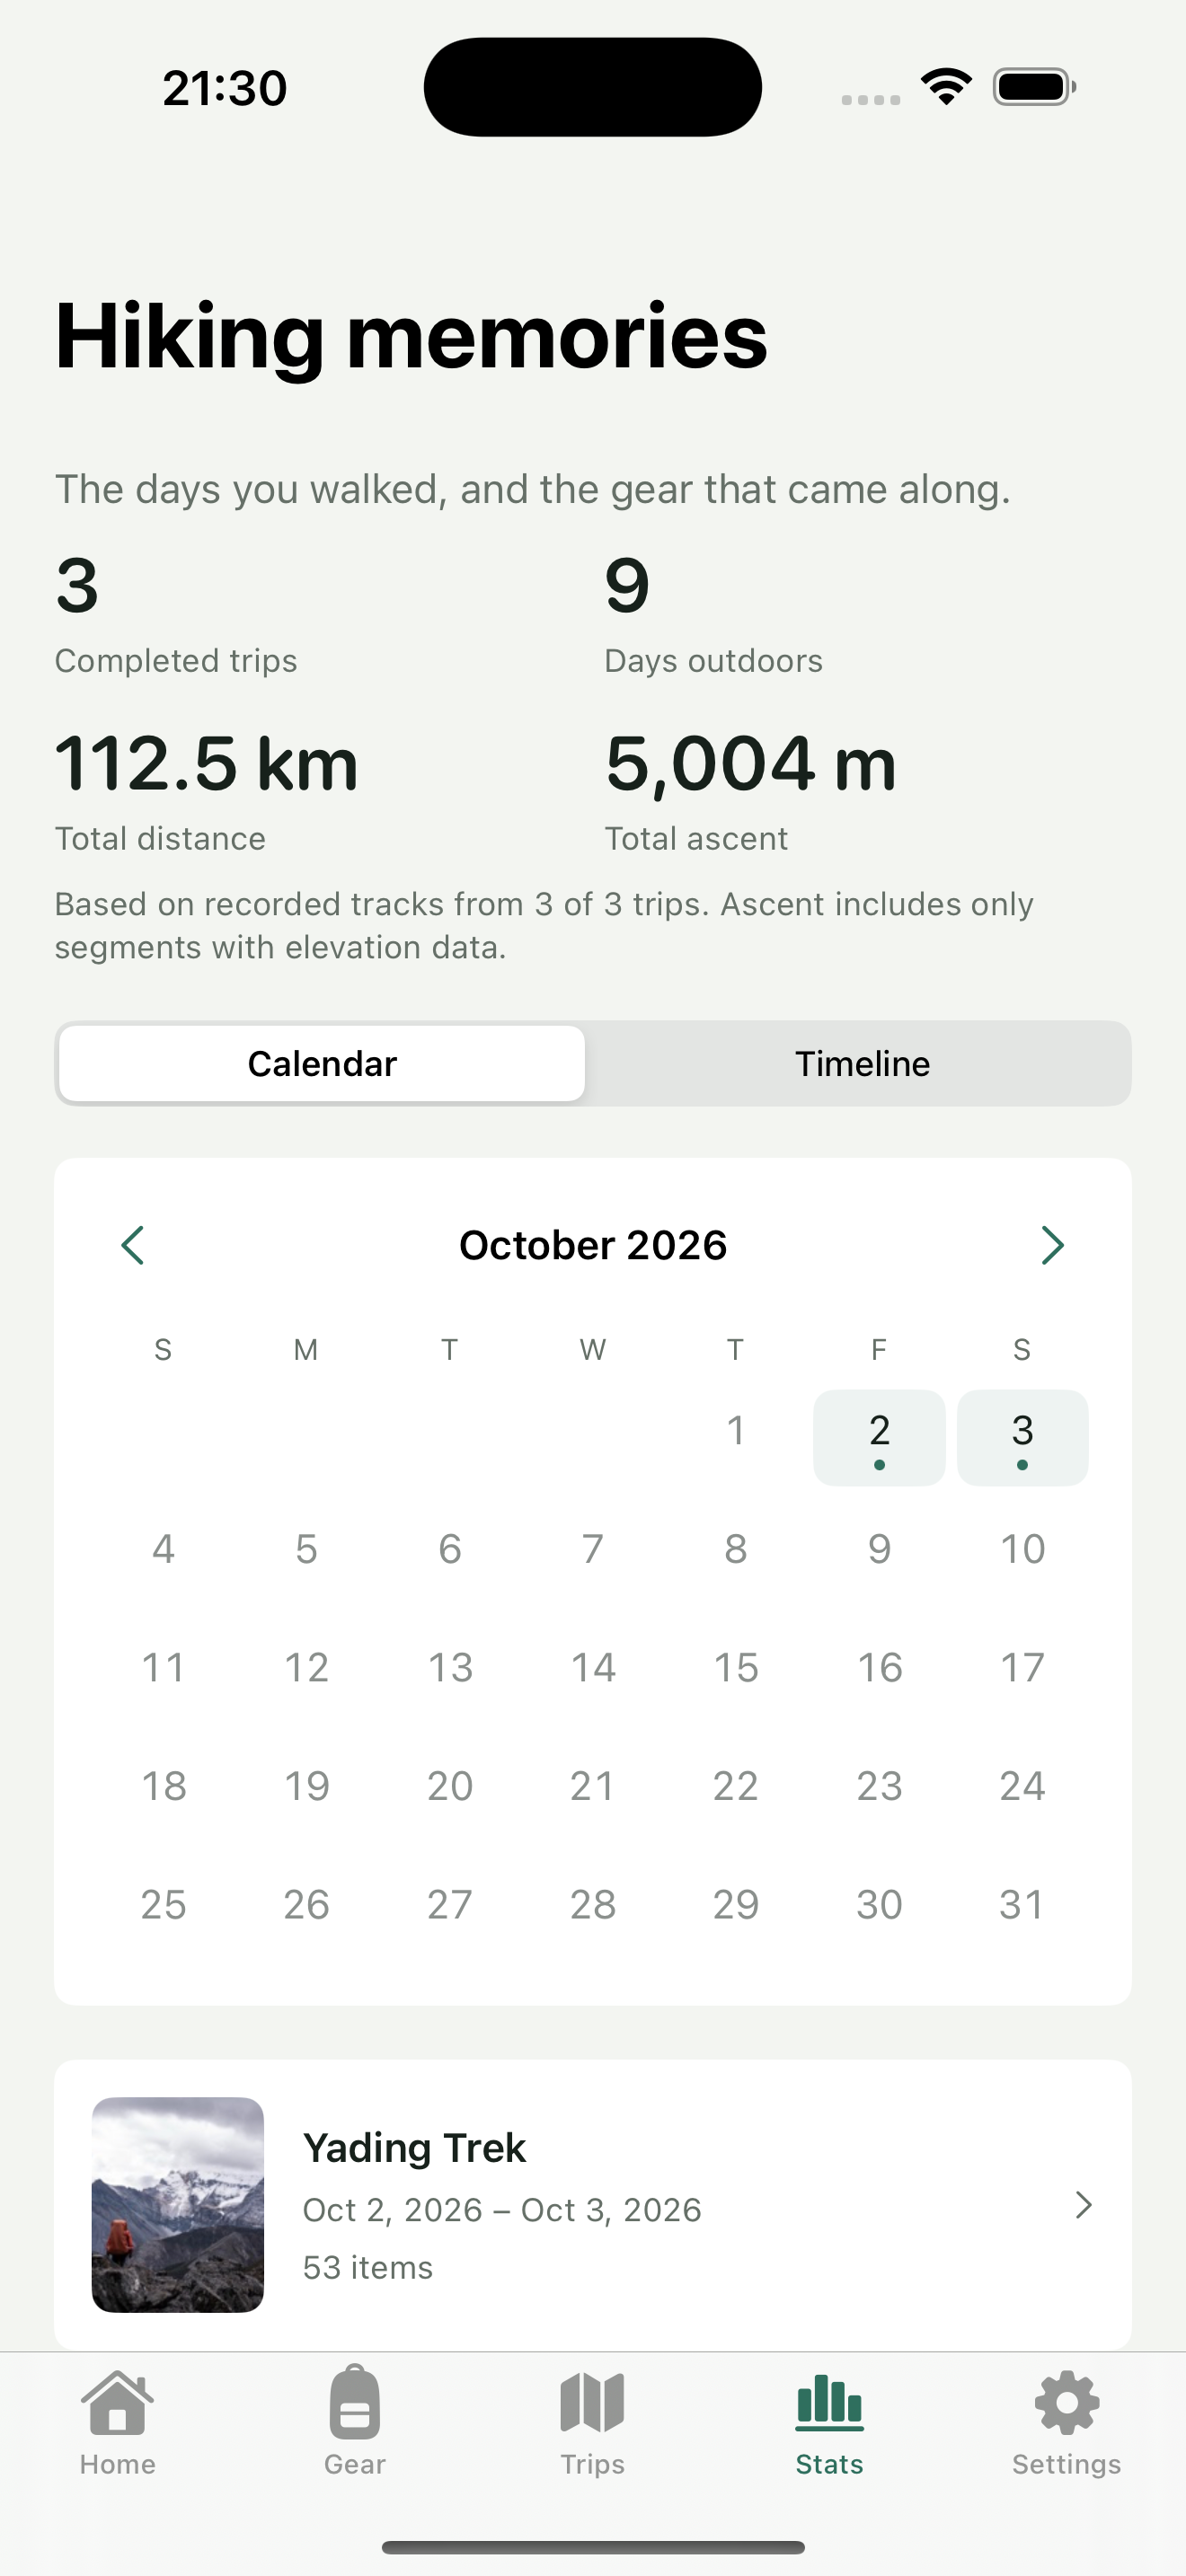
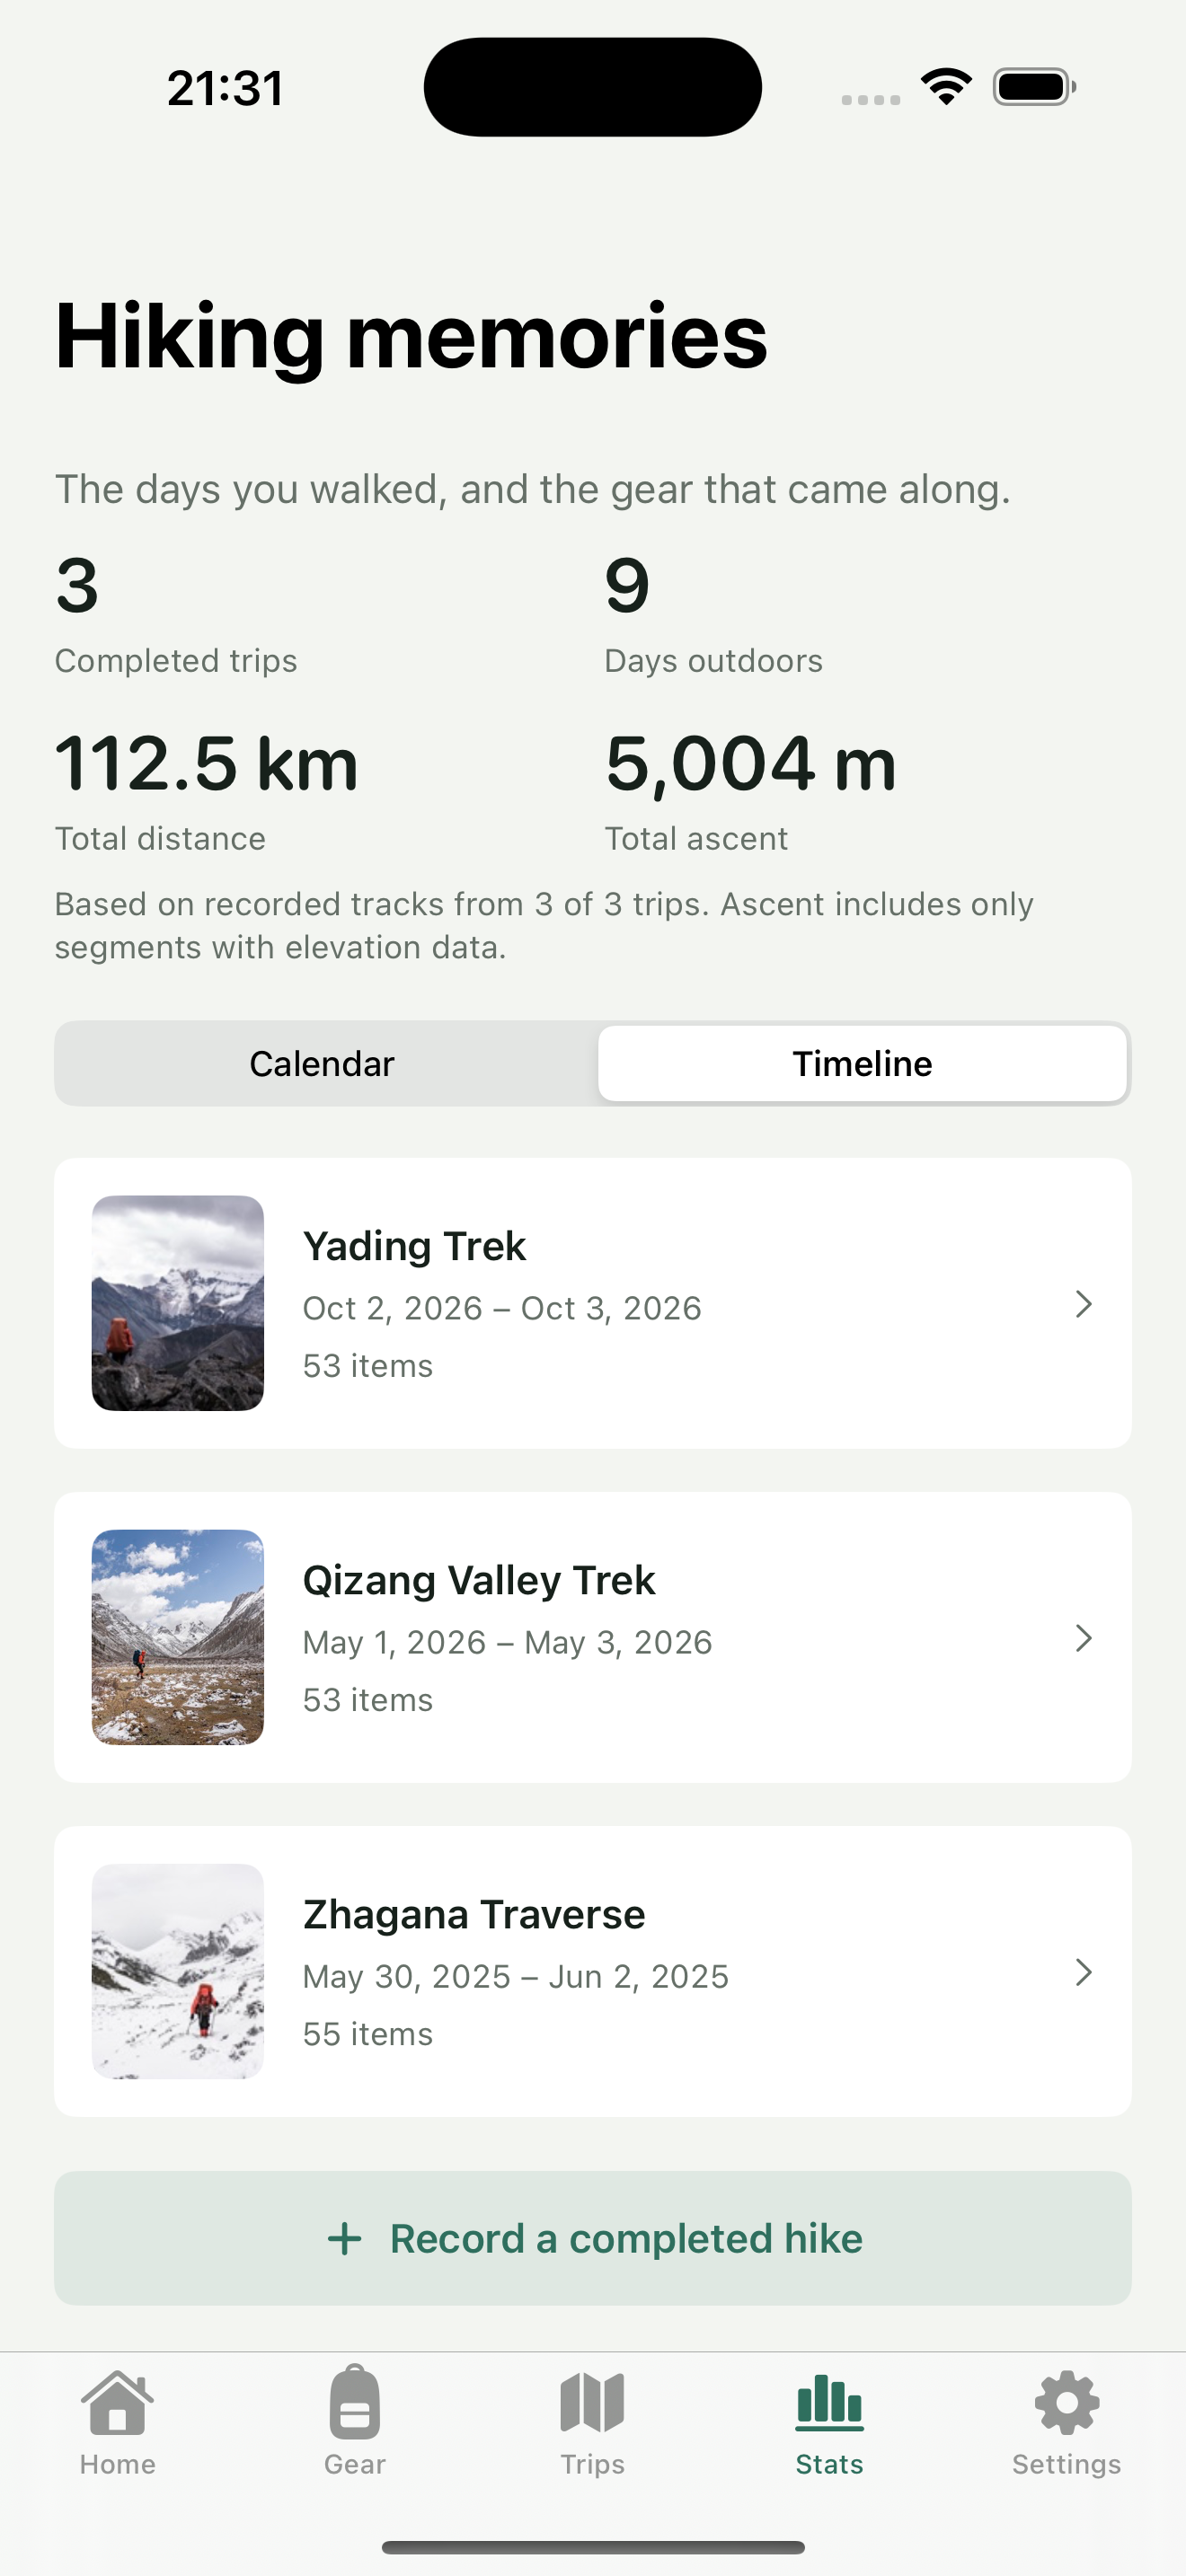
Only manually completed trips count. Hiking days use distinct dates, distance comes from valid GPX, and ascent includes only segments with elevation data. Timeline is not an EXIF sequence of individual photos. See Revisit completed trips in HikerKit’s calendar and timeline for the detailed path.
5 Prepare readable sharing images
Choose “Share configuration” in Trip memory’s three-dot menu. The main chart’s sharing menu also offers “Create share card”. Select Pack profile or Gear list, review category scope and chart style, then choose Pages or Long image and independent light or dark image colors.
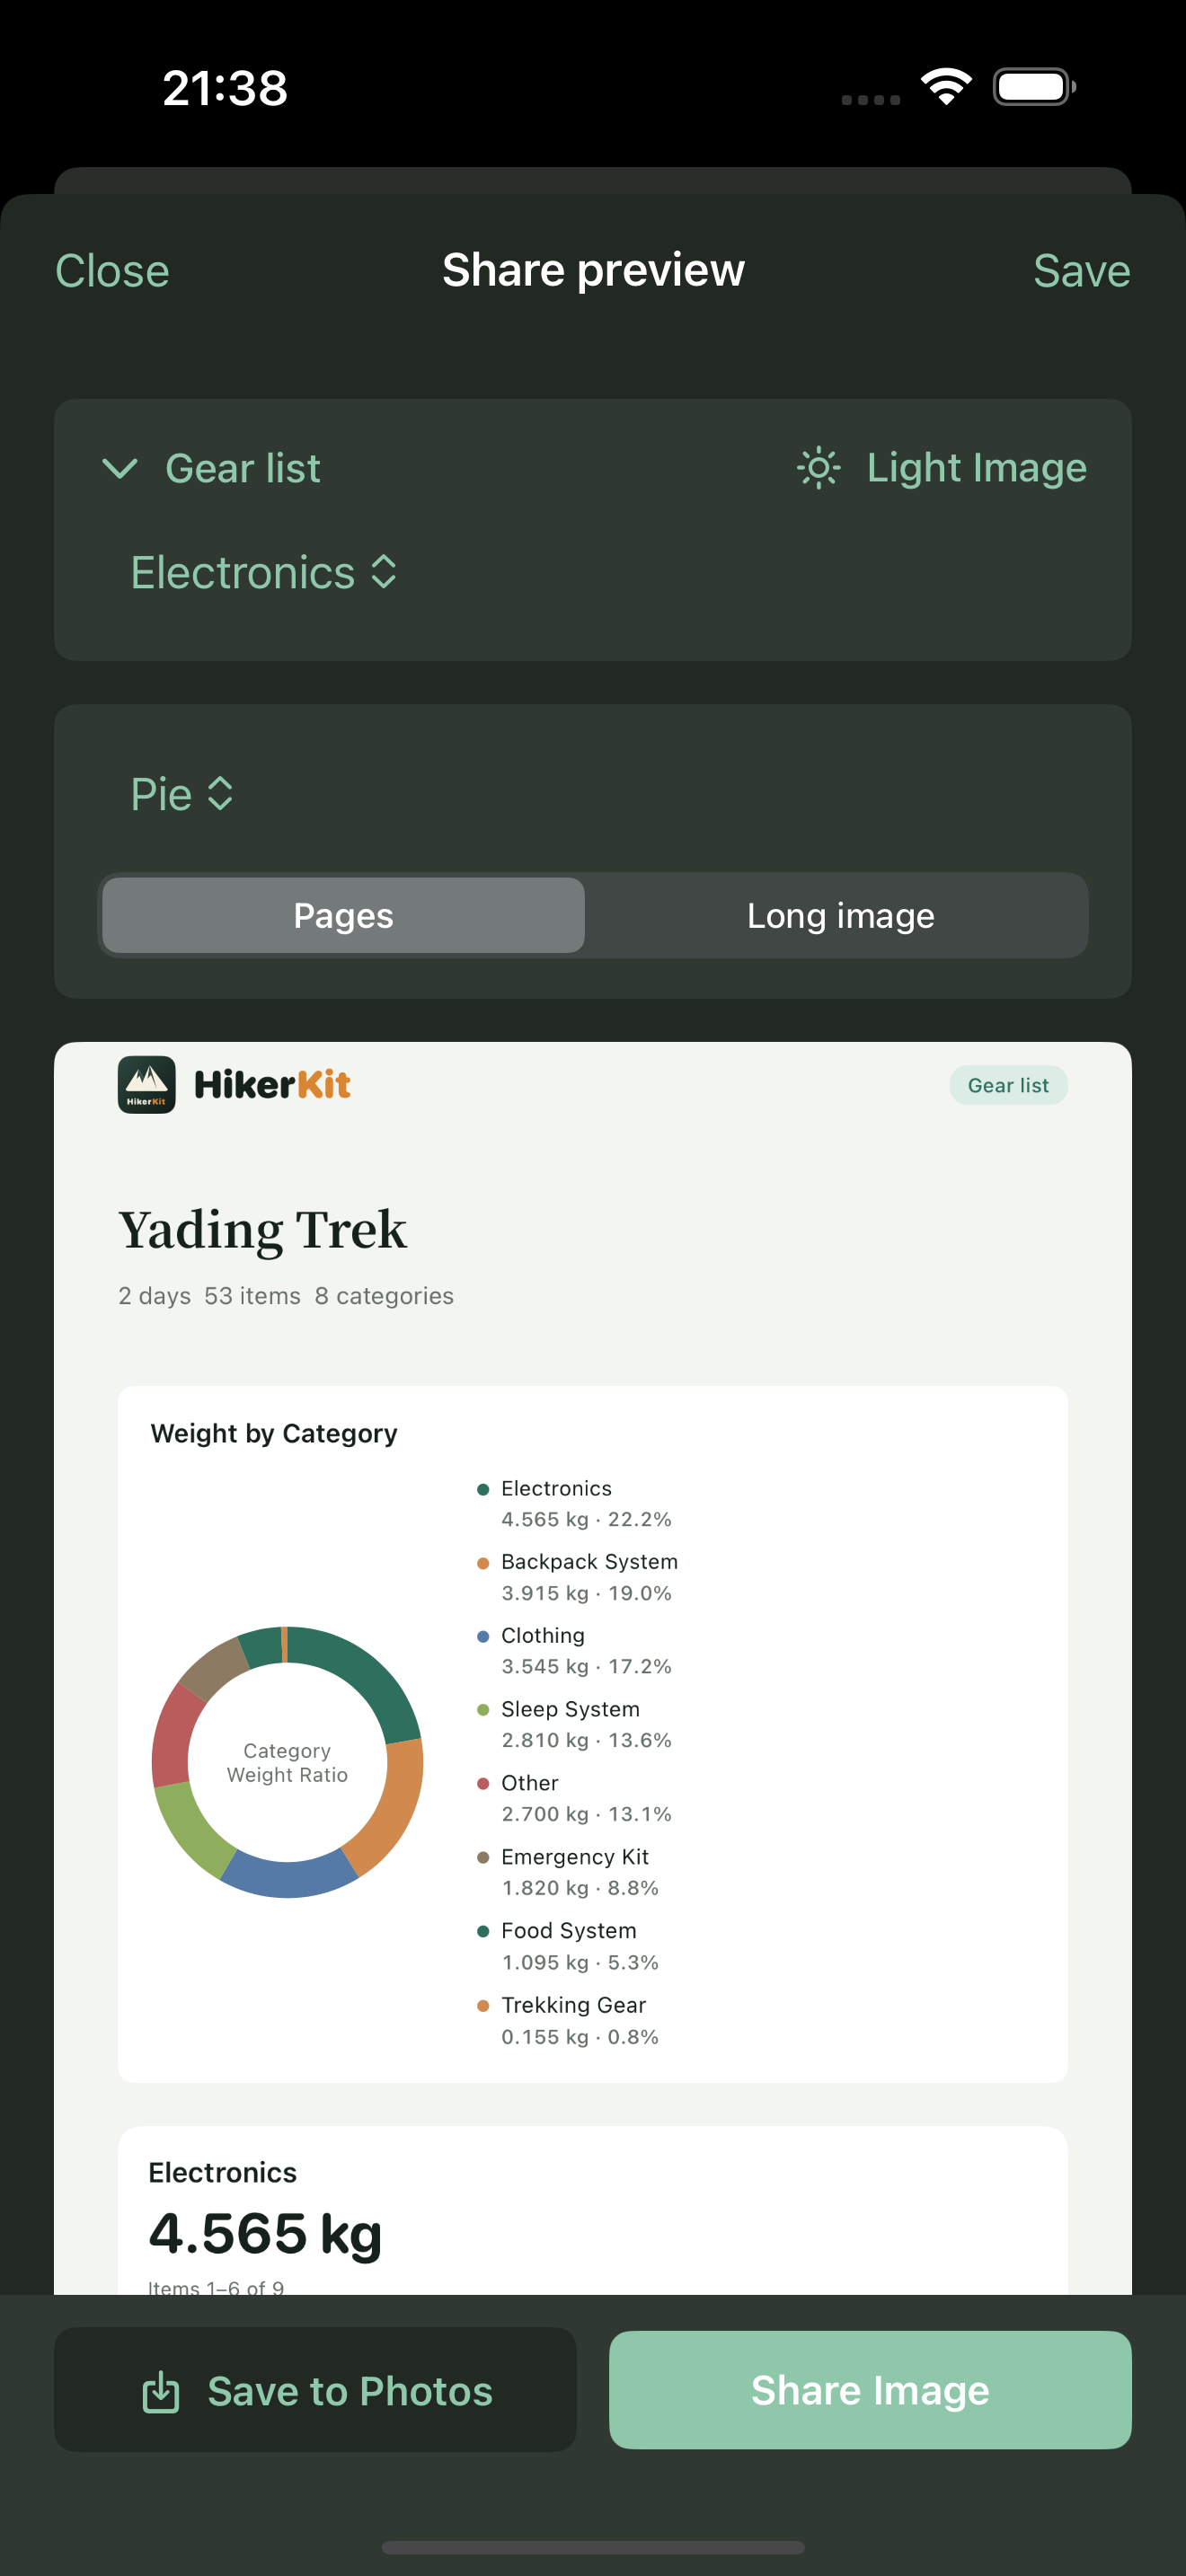
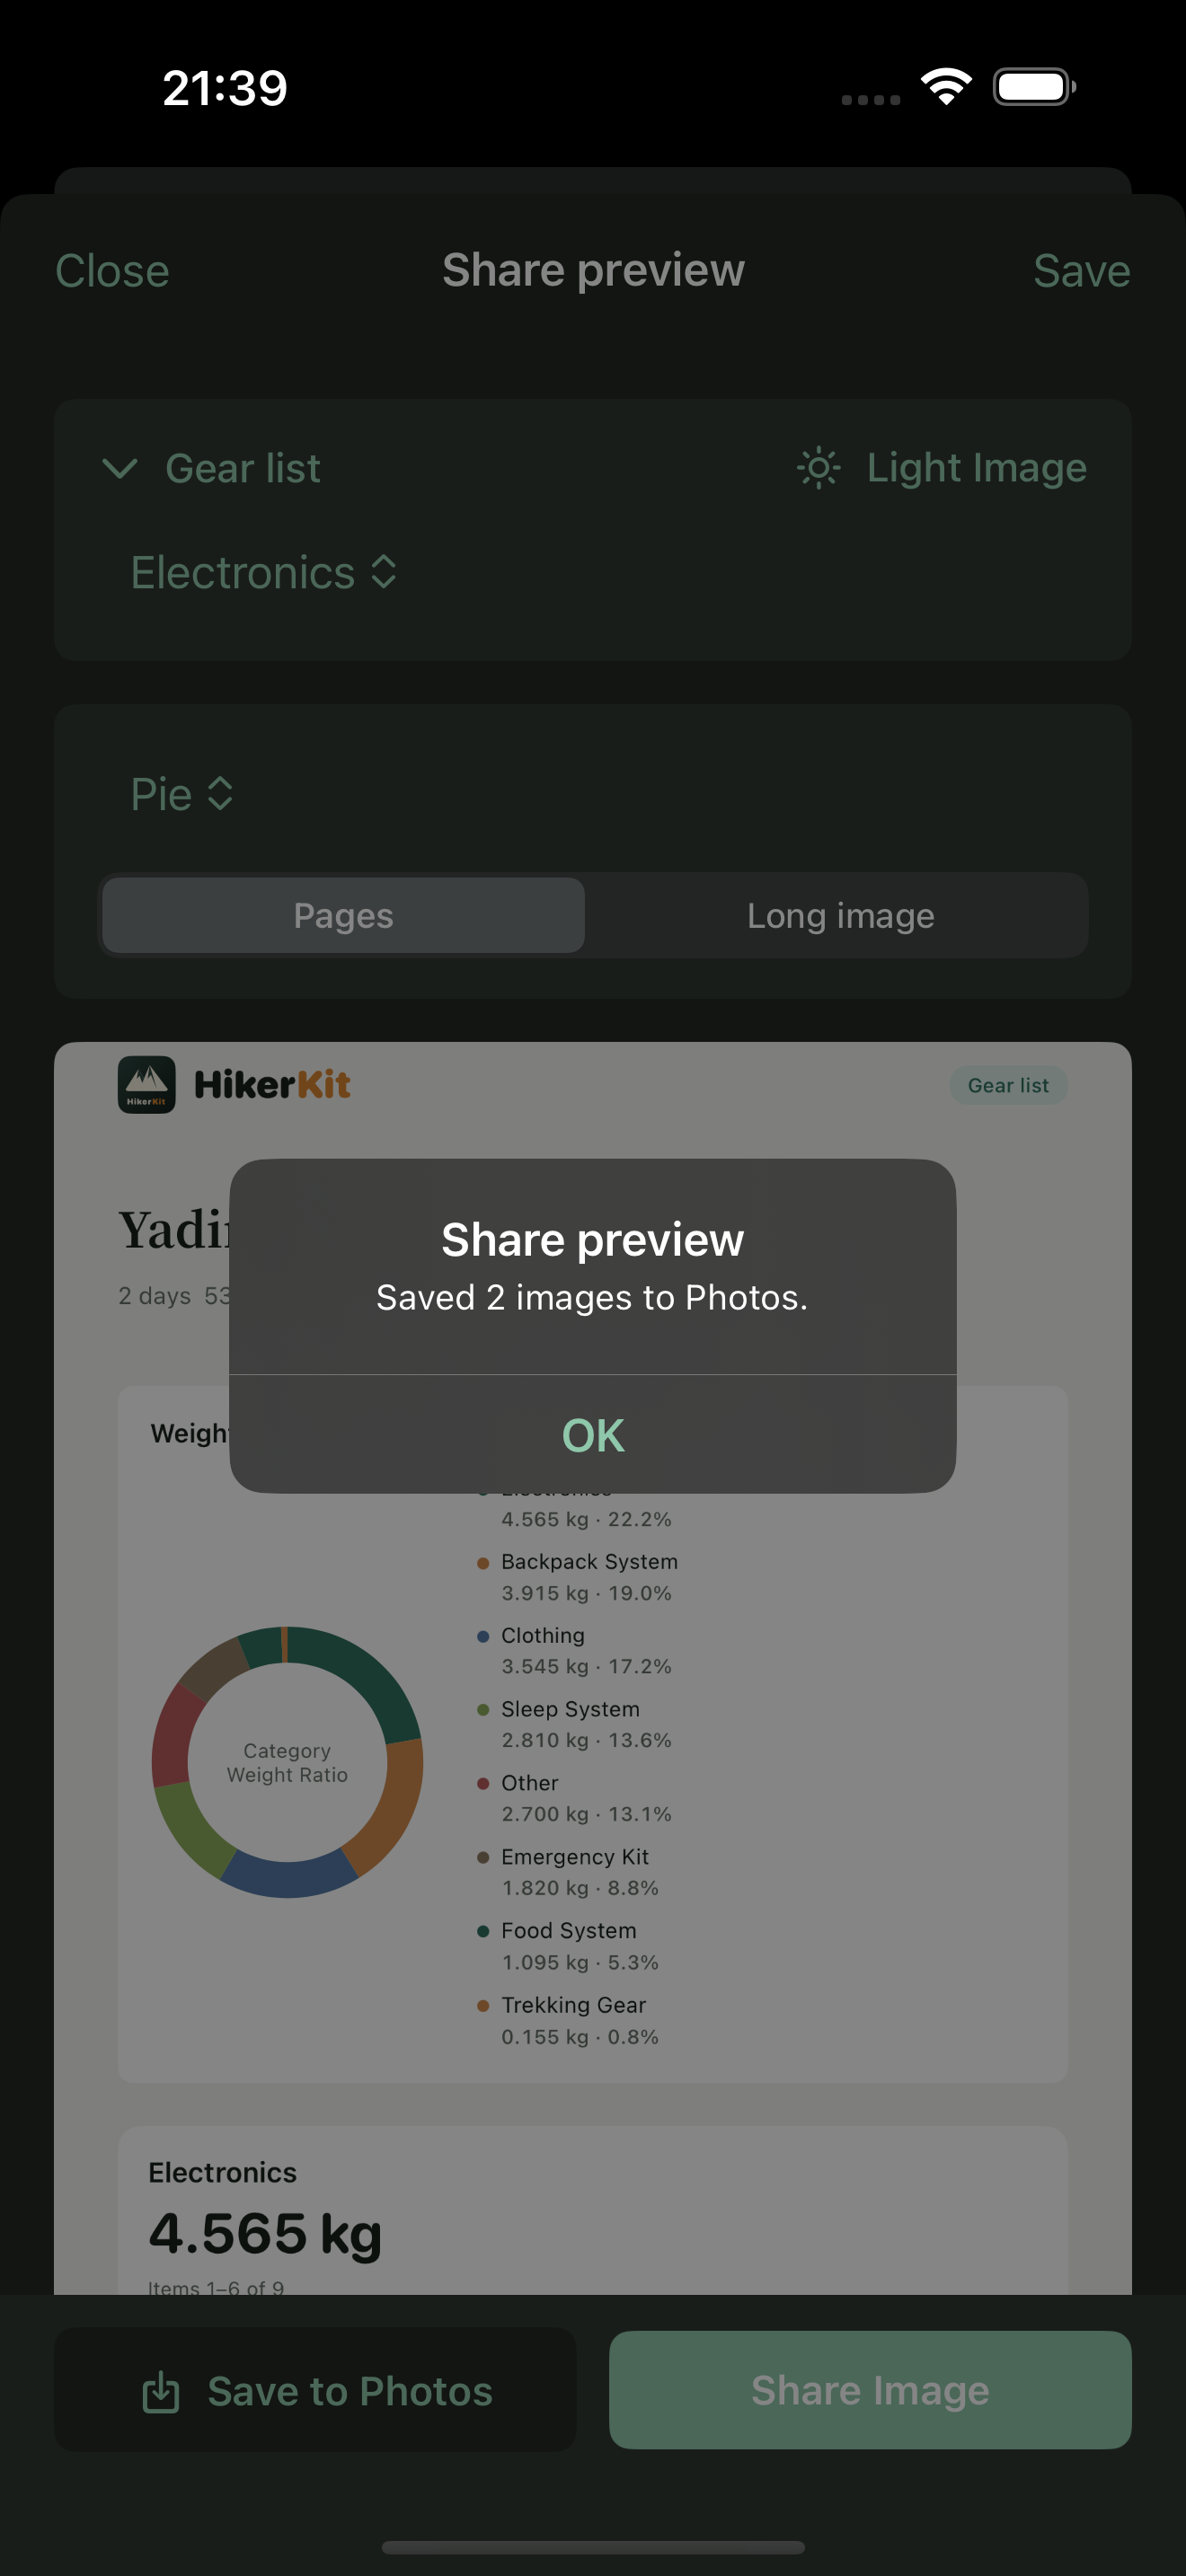
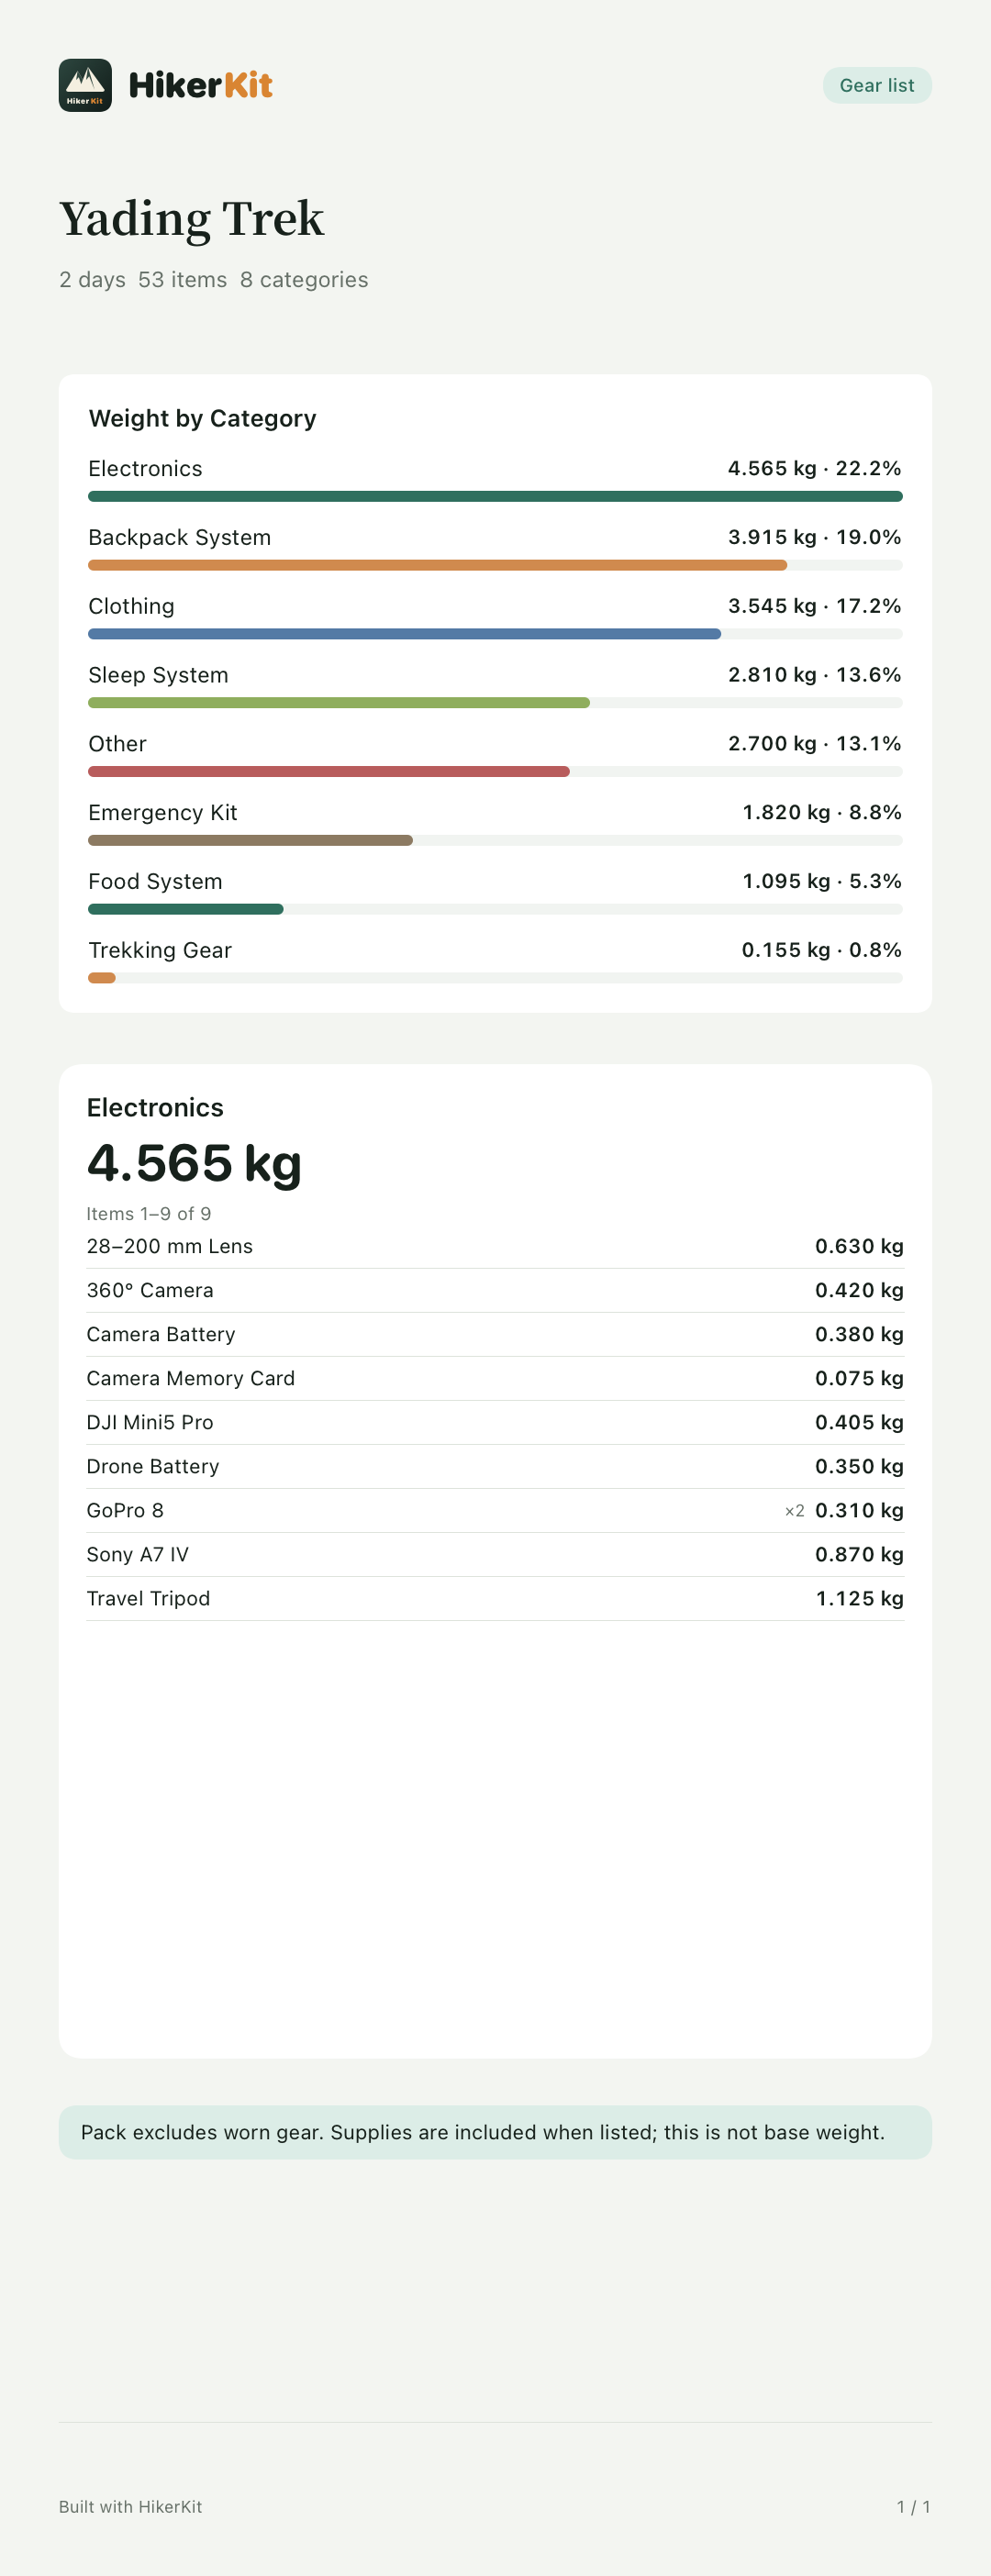
Save at the top retains settings. Save to Photos at the bottom generates images; Share Image opens the sending flow. This list example contains the 9-entry electronics category, not all 53 entries. Check the selected scope, page order, and the bottom of a long image after export. See Share a pack profile and category gear list with HikerKit for every setting and check.
Choose a backup method
Settings has an optional iCloud backup entry under data controls. Open it and choose an immediate backup when needed. Automatic backup is off by default; after you enable it, changed data can be backed up while using the app when at least 24 hours have passed since the last automatic backup. Check the record status rather than treating local saving as proof of completed cloud upload.
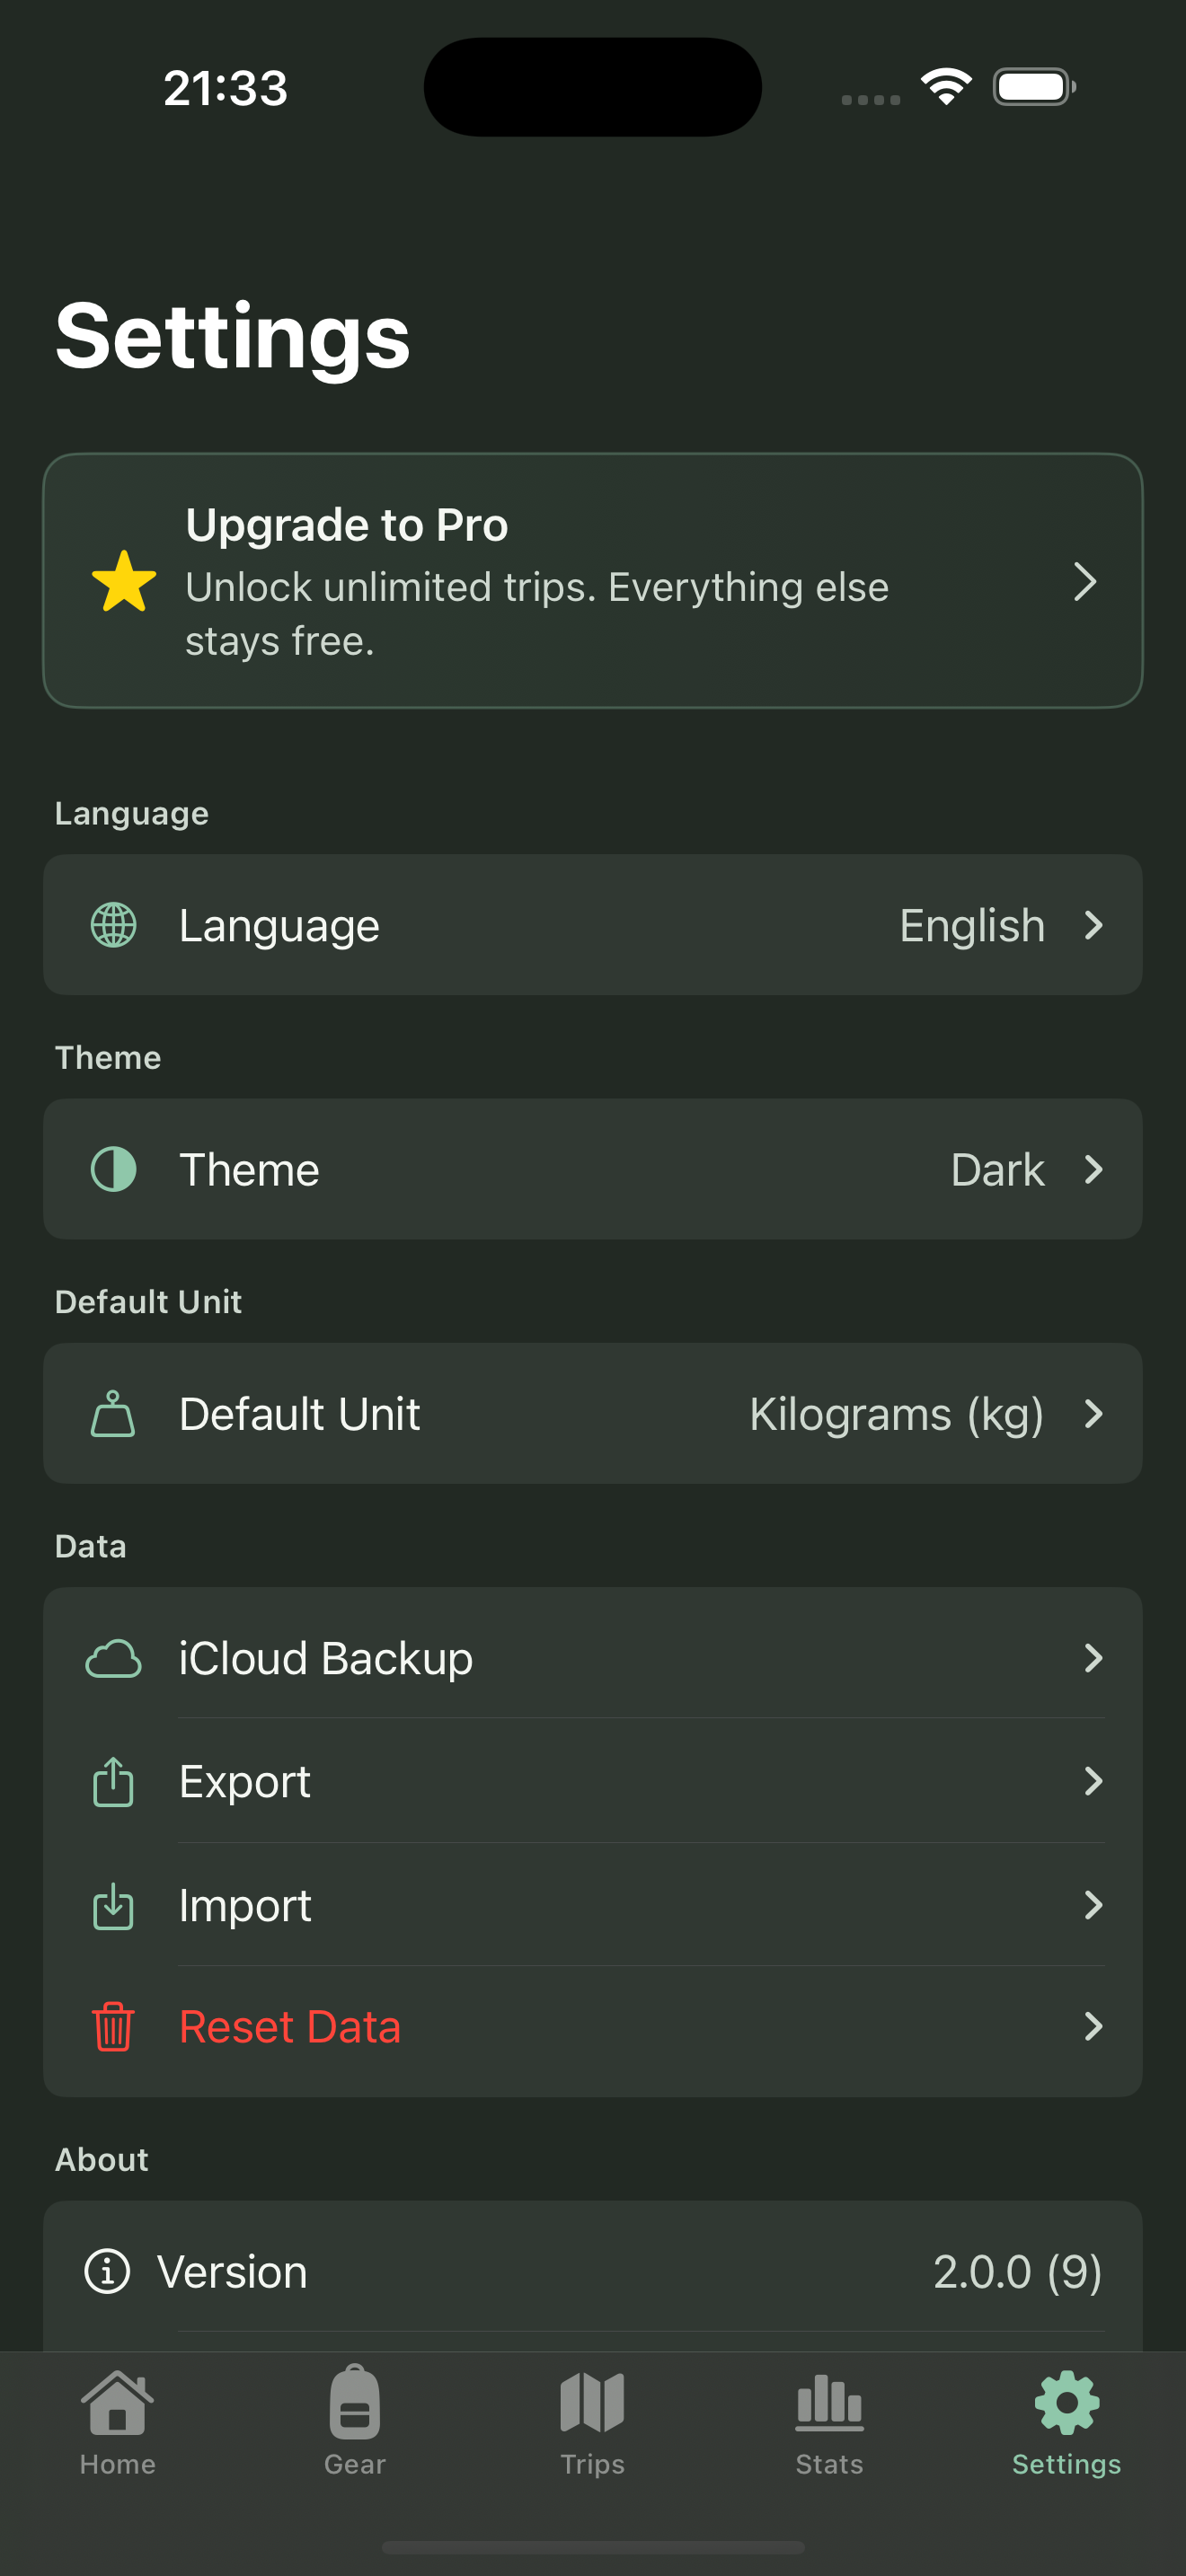
This is not live multi-device database synchronization. Another device needs the relevant Apple account, iCloud Drive access, available network, and storage. Open a backup record, inspect its restore preview, select the restore action, and confirm. A local protection copy is retained before restoration; matching records revert to their backup content while other local records remain. Backup data can include gear and trip photos, memory text, GPX, and routes, so review the scope before enabling it. Manual JSON supports export and import of gear, categories, trips, photos, memories, tracks, and sharing configurations. CSV exports an equipment table without complete trips, photos, or GPX and cannot replace a full restore file.
Frequently asked questions
Which features require Pro
Free users can create up to two trips. Gear, charts, statistics, sharing, backups, import/export, themes, and languages remain available. Pro unlocks unlimited trips only.
Must I import GPX to make a checklist
No. Use the features you need. Photos, memory text, and GPX are optional. Missing track statistics do not mean no walking took place.
What should I check last
Before departure, compare the list and quantities with the equipment. After returning, confirm dates and completion. Before publishing, check photos, routes, precise dates, and notes, then inspect the actual exported file. This sequence leaves both a reusable configuration and a coherent trip memory.